You’ve more than likely come across recipes for finishes that can be applied quickly and easily, offer guaranteed results, and look great. And there’s a good reason for the popularity of these simple techniques. Most woodworkers’ attitude toward finishing is a little less than enthusiastic — the phrase “necessary evil” comes to mind. The catch is that a fast and foolproof finish may lack another important quality — the durability and protection a quality piece of woodworking deserves. The good news is that you don’t have to compromise. After a bit of trial and error, I found an easy way to achieve this additional goal without sacrificing the guaranteed results and no-fuss application. The trick is a threepart, three-step process consisting of linseed oil, shellac, and fast-drying varnish. Each ingredient plays a particular role. A linseed oil “toner” imparts a warm color to the wood, the shellac quickly builds a smooth film, and the varnish adds durability and a high level of protection.

First, A Bit of Oil
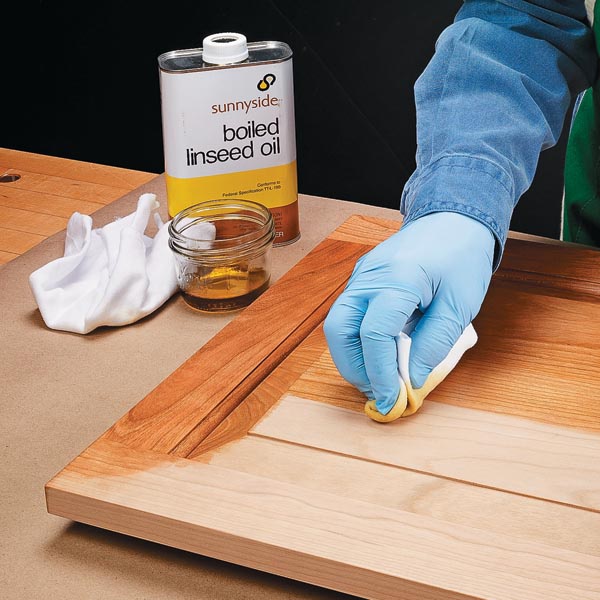
You start by wiping on a very light coat of boiled linseed oil. Apply just enough to darken the wood and then wipe off any excess. When applied sparingly, the linseed oil will simply cure under the following coats of shellac and varnish. I like the way it brings out a beautiful, warm color in most woods. The change is immediate and pretty dramatic.
Then, Apply Some Shellac
After allowing the linseed oil to dry for 30 minutes or so, next comes multiple coats of thinned shellac. The advantage to shellac is that it dries within minutes, allowing you to wipe on the coats in quick succession. Often, by the time you’ve completed one coat, you can start the next. Keep adding coats and you’ll begin to notice a glossy build. I don’t bother to sand between coats. You can wipe on about three coats and then give the shellac a chance to cure (about one hour) before applying several more. After this second round, take another break to let the shellac cure. An hour later you can sand lightly with 320-grit or finer sandpaper in preparation for the varnish topcoats.

Finally, the Varnish
Varnish can be formulated with different solvents to speed the drying time. This feature is further enhanced by thinning the varnish to “wiping” consistency. Depending on the brand you use, the recoat time can be reduced to as little as two hours. Just pour the varnish into a jar and add an equal volume of mineral spirits. Use a soft pad to wipe on a light wet coat. You can stop here, or for more protection, you can add a second coat once the varnish has dried sufficiently. Just sand lightly and then repeat the process.