This article is adapted from Matt Kenney's latest book, The Art of Kumiko (Blue Hills Press). Used by permission.
Most of the kumiko I make is intended to be hung on the wall as decorative art, but I do sometimes incorporate it into the boxes and furniture I make. When I first began to do this, I would make the box, for example, then make and fit the kumiko to it. But that’s the wrong way to do it, because often you are left planing the kumiko frame down to fit the opening you have. That’s undesirable for a few reasons. First, it weakens the frame.
Second, you end up with the outer frame pieces thinner than the interior ones and the infill pieces. The panel begins to look unbalanced. Finally, it’s just plain tedious and difficult to plane the outer frame parts of a kumiko panel. So, I now make the panel first, then build the box around it. This isn’t as difficult as it sounds.
MARK, DON’T MEASURE I actually learned this from making frames for decorative panels, but I should have known it from years of making furniture. Measuring introduces far more errors than marking does. So, when I am making a box or piece of furniture with kumiko in it, I make the kumiko panel, cut off the horns, then use the panel itself to determine the length of things like box sides, door rails, etc.
Exactly how you do this depends on the joinery involved. For example, to use kumiko in the lid of a mitered box, I miter one end of the side, lay the kumiko down, align it with the top of the miter, then mark the other end. To determine the length of a door rail, I’d cut a tenon at one end, align the kumiko with the tenon’s shoulder then mark the opposite end. Hmm…I think I see a pattern here. Cut the joint at one end, mark the other.
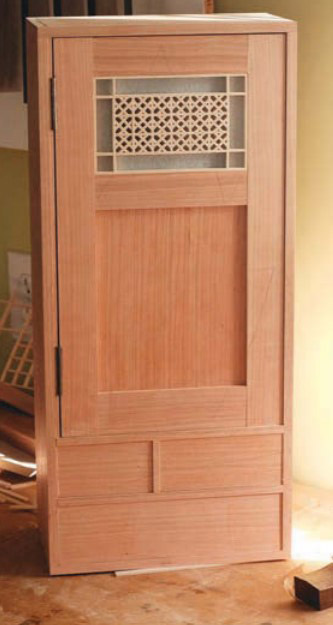
BUILD AROUND THE PANEL This follows from marking rather than measuring. The best example of this from my own work is box 51 of the 52 boxes I made during the course of 52 weeks. There is kumiko in the plinth of the tea cabinet.
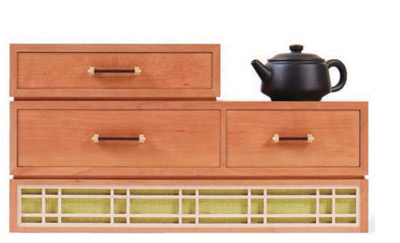
The first time I made box 51, I made the plinth first then made the kumiko to fit. That was frustrating and difficult. Every time I’ve made box 51 since, I’ve made the kumiko first then the plinth. Now it goes together without a hitch.
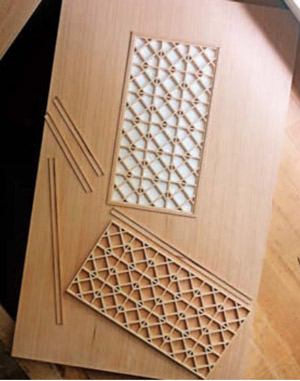
You can do the same for doors by sizing the rail length directly from the kumiko panel, then using the panel to help locate mortises for the rail tenons. Or, just use stub tenons on the lower rail and simply slide it up to the bottom of the panel.
MAKE THE OUTER FRAME THICKER For large pieces of furniture with large panels, it’s a good idea to make the four outer frame pieces thicker than the rest of the pieces in the panel. This makes the panel stronger, but also provides some visual weight, so that you don’t jump from the wide parts of a door frame to the thin parts of the kumiko.
Think of the outer frame as a transition, in other words. An alternative is to make the frame pieces all the same thickness, but surround the kumiko frame with a intermediary and thicker “frame” to make the transition.
DON’T GO BIG Here’s a bit of advice that might be more personal preference than solid design principle. I think that as the size of the furniture grows, the size of the kumiko should not. Certainly, you can make larger panels, but keep the size of the infill patterns relatively small. A bunch of small hemp leaf patterns repeated in a large panel looks better than a large panel with just a few patterns, at least to my eye.
Also, don’t go too thick with the parts. Even in full-size furniture, kumiko that is 1 ⁄8" thick will look great. If you do go thicker, don’t take it beyond 1 ⁄4" Personally, I’d keep it at 3 ⁄16" thick at the most. Still, I’m sure that someone out there will make a stunning piece with really thick kumiko and really big patterns.
This article is adapted from his latest book, The Art of Kumiko (Blue Hills Press). Used by permission.