


Two Easy Ways to Trim Hardwood Edging Flush
Hardwood edging is a great way to conceal the exposed layers of plywood and give shelves, cabinets, and furniture panels a more finished appearance. It also helps protect the edges from everyday wear and tear.
When applying solid-wood edging, I like to make the strips slightly wider than the plywood thickness. This ensures complete coverage, even if the edging shifts a little during glueup.
The challenge comes afterward: removing the excess edging so it's perfectly flush with the plywood surface without cutting into the thin face veneer.
Fortunately, there are two simple ways to tackle the job. The method I choose depends on how much edging needs to be trimmed.
Method 1: Trim Hardwood Edging with a Block Plane
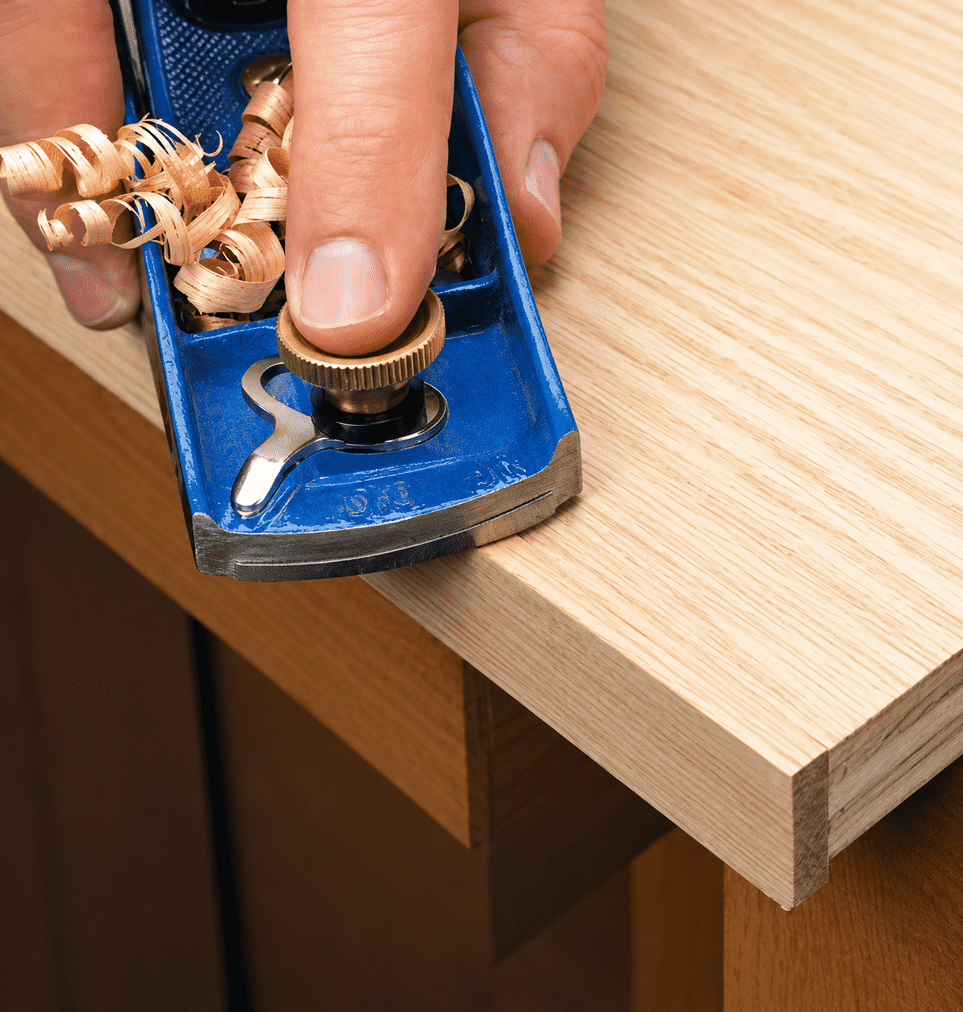
For a couple of shelves or panels with relatively thin edging, a sharp block plane is often the quickest solution.
The key is to set the plane for a very light cut. Taking thin shavings gives you more control and reduces the chance of tearout.
Start by checking the grain direction of the hardwood edging. Plane with the grain whenever possible to leave a smooth surface.
As you work, keep the heel of the plane resting on the plywood surface. This provides a reference that helps you gradually bring the edging down to the same level as the panel.
Work carefully, checking your progress after each pass. With a sharp blade and a light cut, it usually takes only a few strokes to bring the edging flush.
Woodsmith Tip: Protect the Plywood Veneer. The face veneer on plywood is thin, so avoid taking aggressive cuts as you approach the surface. Keep the plane under control and stop as soon as the edging is flush. A sharp blade and light passes are the best insurance against accidentally cutting into the plywood.
Method 2: Flush-Trim Edging at the Router Table
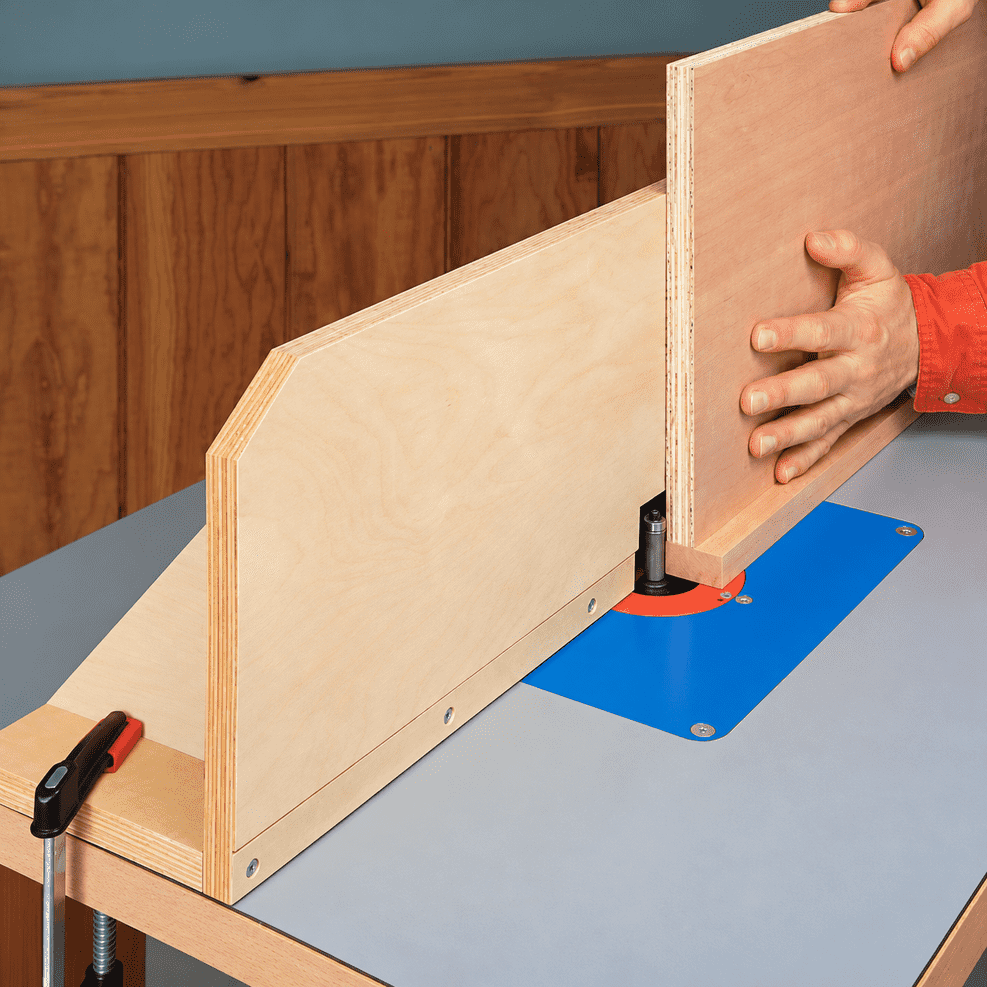
When there's a lot of edging to trim, or the edging is fairly thick, I prefer using a flush-trim bit at the router table.
The router makes quick work of the excess material, and a simple shop-made fence helps keep the workpiece stable throughout the cut.
Build a Tall Router Table Fence
The fence is made from a few pieces of 3/4" plywood.
A tall plywood face is screwed to a plywood base, while triangular braces keep the face square to the router table.
Openings in both the fence face and base provide clearance for the router bit.
One important detail is the rabbet along the bottom edge of the fence. This creates clearance for the edging that extends beyond the plywood surface.
Without the rabbet, the excess edging could prevent the plywood panel from resting flat against the fence.
Set Up the Flush-Trim Bit
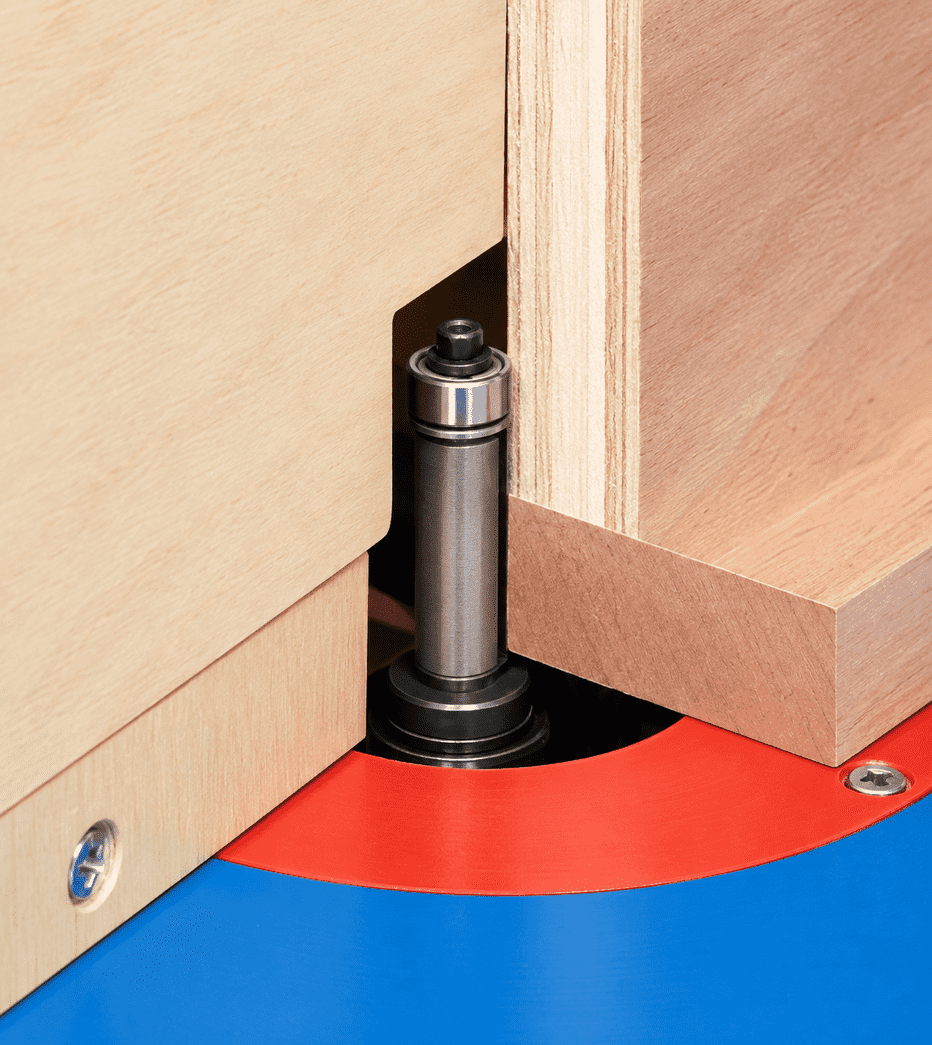
Position the fence so its face aligns with the bearing of the flush-trim bit.
A straightedge makes this easy. Hold it against the fence face and adjust the fence until the straightedge lines up with the bearing.
Then clamp the fence securely to the router table.
The fence supports the plywood panel as you feed it past the bit, while the bearing establishes the trimming position.
Before routing your project parts, make a test cut on a piece of scrap plywood with hardwood edging. This helps verify the setup and ensures the bit won't cut into the plywood veneer.
Keep the workpiece firmly against the fence and feed it steadily past the bit, following the proper feed direction. Use suitable workpiece supports and keep your hands clear of the cutter.
For particularly thick edging, remove most of the excess before making the final flush-trimming pass.
Which Edging-Trimming Method Should You Use?
Both methods can produce a clean, nearly invisible transition between the hardwood edging and plywood surface.
The block plane is ideal when you want to make a few careful adjustments without setting up a machine. The router table is especially useful when you're working on a larger cabinet project with numerous shelves and panels.
Whichever method you choose, the goal is the same: remove the excess hardwood without disturbing the plywood veneer.
A little patience during the final trimming step makes a big difference in the appearance of the finished project.
More Tips & Techniques for Better Woodworking
Sometimes the simplest shop techniques produce the biggest improvements. Explore our collection of woodworking tips and techniques from Woodsmith readers and editors, covering everything from joinery and routing to sharpening, finishing, and clever shop-made solutions.
EXPLORE TIPS & TECHNIQUES → Small Shop Tricks That Make a Big Difference
How to Use a Block Plane: 5 Essential Woodworking Techniques
A block plane is good for more than trimming hardwood edging. From chamfering edges and trimming end grain to fine-tuning joints and fitting project parts, this handy tool earns its place on the workbench. Learn five essential block plane techniques that will help you work more accurately and get better results on your next project.
MASTER THESE 5 BLOCK PLANE TECHNIQUES → Get More Precision from One of the Most Versatile Hand Tools in Your Shop


