


Every workshop needs a good pair of sawhorses. But if you're searching for how to build sawhorses, you'll find that many designs are intended to be inexpensive jobsite supports — a few pieces of 2x4 lumber joined with screws or nails.
There's nothing wrong with that approach, but we wanted something different.
These heavy-duty trestle sawhorses are built from solid construction-grade lumber using traditional woodworking joinery. They're sturdy enough for serious shop work, attractive enough that you won't mind leaving them out, and versatile enough to become the foundation for a large assembly or finishing table.
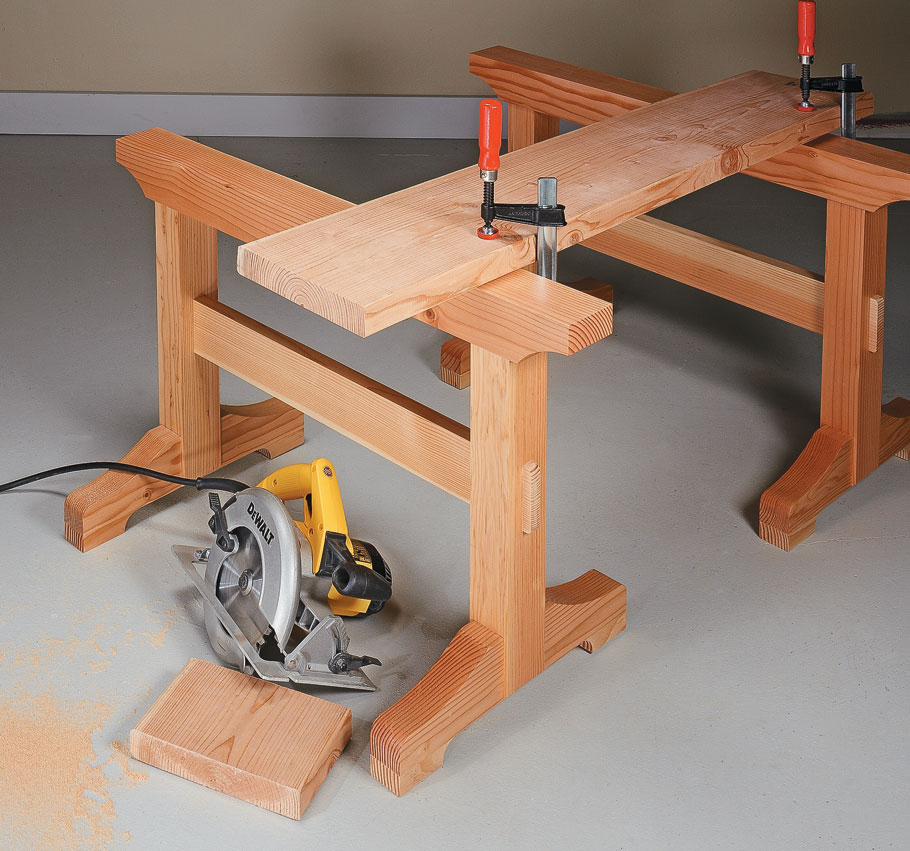
Best of all, building a pair is a manageable woodworking project that gives you a chance to practice several useful joinery and shaping techniques.
GET THE STEP-BY-STEP TRESTLE SAWHORSE PLANS FROM WOODSMITHPLANS.COM.
Why Build Trestle-Style Sawhorses?
A basic sawhorse has one job: support a workpiece. These take that idea quite a bit further.
Instead of lightweight legs attached to a top with screws, this design uses hefty uprights, wide bases, a stretcher, and traditional joints to create a rigid trestle-style sawhorse.
That added strength comes in handy when you're breaking down sheet goods, assembling furniture, finishing a large project, or simply need a dependable auxiliary work surface.
The wide bases also provide a stable footprint. Small pads at the ends create individual feet, which help the sawhorse sit solidly even when your shop floor isn't perfectly flat.
And despite their substantial appearance, there aren't a huge number of parts to make. That's one reason these are such a satisfying shop project.
Building the Solid-Wood Bases
I like to start with the bases because they establish the foundation for each sawhorse.
The connection between each base and upright uses an interlocking bridle joint. This gives you considerably more mechanical connection than simply driving screws through one part into another.
The joint starts by cutting notches in the top and two faces of the base. Since the notch is wider than a typical dado blade, a stop block attached to a long auxiliary fence on the miter gauge makes it easier to establish the shoulders accurately.
Make one pass, flip the workpiece end-for-end, and make the second. This automatically centers the notch. Then remove the remaining waste between the shoulders.
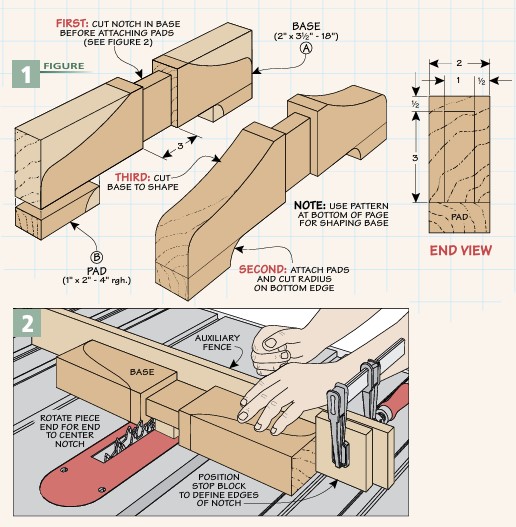
This is one of the things I particularly like about this sawhorse design. The joinery isn't complicated for the sake of being fancy. It creates a strong connection while giving you a chance to practice a traditional woodworking joint on a forgiving shop project.
Shaping the Trestle Bases
There's no reason heavy-duty shop furniture needs to look clunky.
After cutting the joinery, thin pads are glued to the ends of each base. These form the feet and help stabilize the finished sawhorse on an uneven floor.
The base can then be cut to its final curved profile.
A band saw makes quick work of removing most of the waste. Don't worry about cutting perfectly to the layout line. Leave a little material behind, then smooth the curves and remove the band saw marks with a sanding drum in the drill press.
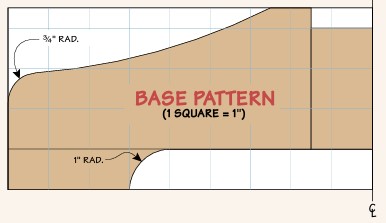
The result is a sawhorse that still has the mass needed for a sturdy work support but looks more like a piece of traditional shop furniture.
Traditional Joinery Makes These Sawhorses Strong
The advantage of building sawhorses like these is that the project gives you a low-risk opportunity to practice traditional woodworking joinery.
A sawhorse doesn't have to meet the visual standards of a dining table or cabinet, but the same fundamentals apply: accurate layout, straight cuts, square shoulders, and a good-fitting joint.
That makes this a particularly good project for practicing tenons.
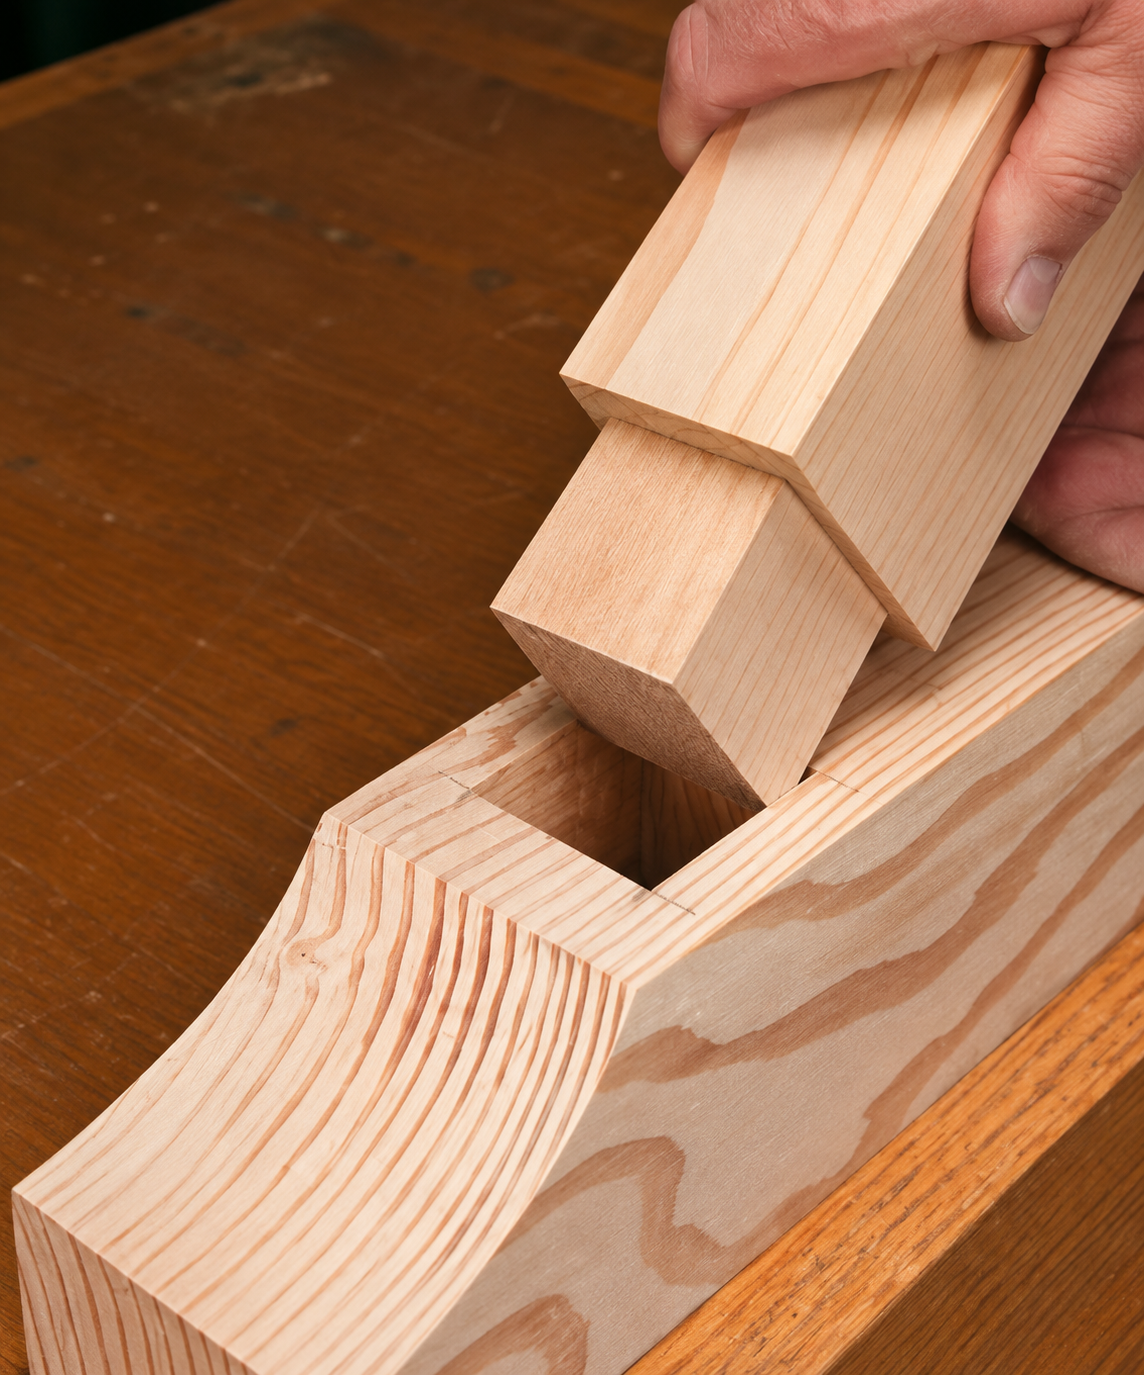
How to Hand-Cut a Tenon
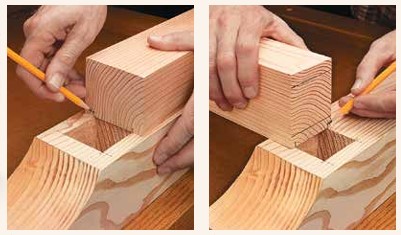
Start with the mortise already completed so you have a reference for laying out the mating tenon.
Mark the thickness and width of the tenon on the end of the workpiece. It's better to leave the tenon slightly oversized rather than risk cutting it too small. You can always fine-tune the fit afterward.
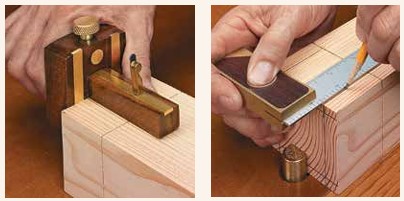
Next, establish the shoulder line. A cutting gauge is especially useful here because the scored line provides a precise starting point for the saw and helps create a clean shoulder on the finished joint.
Then make the saw cuts carefully, staying aware of your layout lines on both faces of the workpiece.
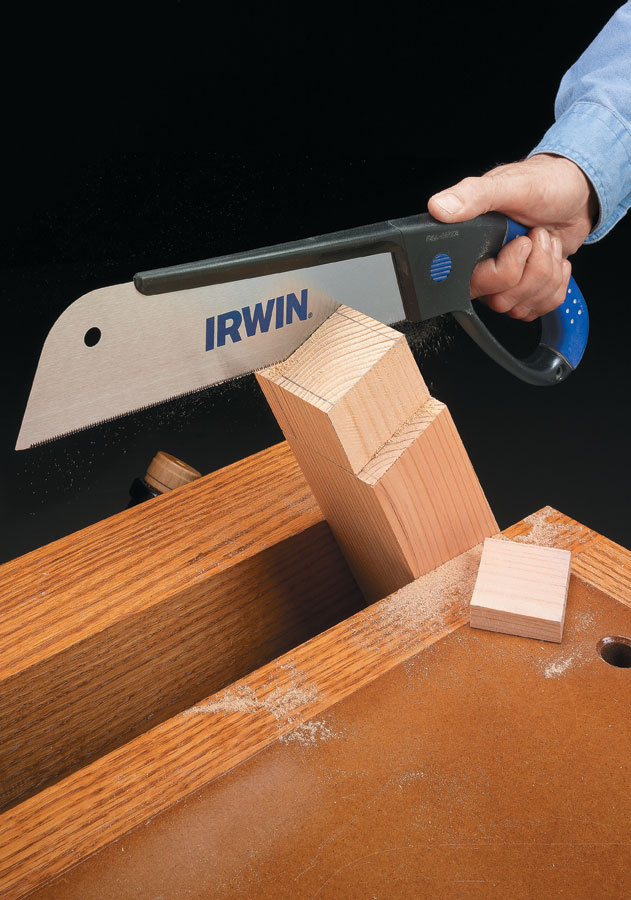
This is excellent practice for anyone interested in improving their hand-tool skills. Once you're comfortable cutting a tenon for a shop project like this, the same basic technique carries over to tables, chairs, workbenches, and other furniture.
The downloadable Trestle Sawhorse plans include an additional article devoted to hand-cut tenons.
GET THE STEP-BY-STEP TRESTLE SAWHORSE PLANS FROM WOODSMITHPLANS.COM.
Turn Two Sawhorses Into an Assembly Table
One of my favorite features of this design is that the sawhorses can do more than simply support lumber.
The plans include three removable cross beams that fit across the tops of the two sawhorses. A notch near each end of the beam fits over the sawhorse to keep it positioned.
Lay a sheet of plywood across the beams and you suddenly have a large temporary woodworking assembly table.
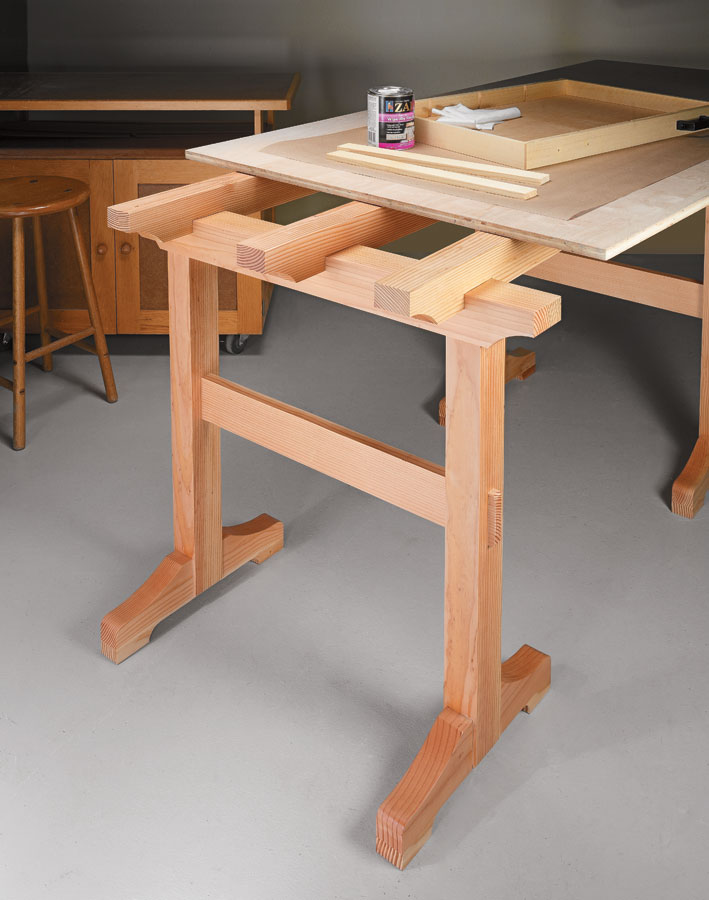
That extra work surface is useful for assembling cabinets and furniture, laying out larger projects, sanding, or finishing.
When you're finished, lift off the plywood, remove the beams, and you're back to two relatively compact sawhorses.
For a smaller workshop, that's a big advantage. You can have a large work surface when you need one without permanently sacrificing the floor space required for another workbench.
Construction Lumber Makes Sense for Shop Sawhorses
You don't need premium furniture lumber to build useful shop furniture.
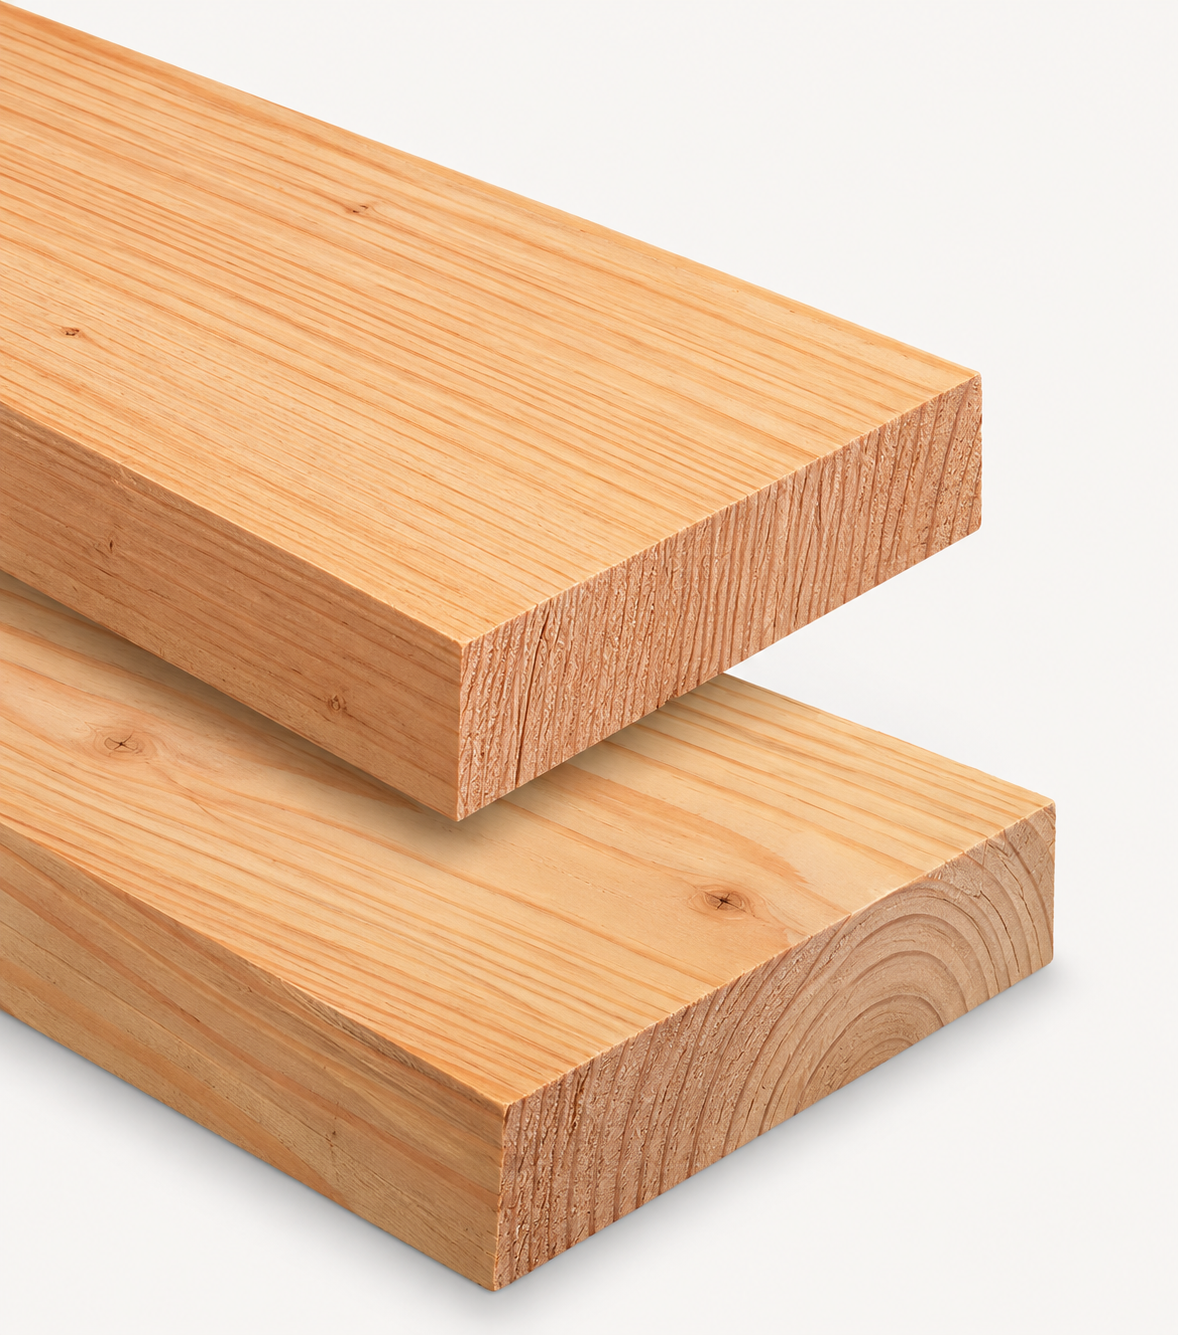
Good-quality construction lumber keeps the material cost reasonable while still providing the substantial stock needed for this design. Take some time at the lumberyard to select straight pieces with as little twist and bow as possible.
Letting the lumber acclimate to your shop before milling is also worthwhile, particularly if the boards have a higher moisture content when you bring them home.
From there, treat the lumber just as you would material for any other woodworking project: establish straight, square reference surfaces and make your mating parts consistent.
The goal isn't to turn construction lumber into expensive furniture stock. It's to give yourself predictable material so the joinery fits and the finished sawhorses sit flat.
More Than Just a Pair of DIY Sawhorses
There are certainly faster ways to build a sawhorse. A few 2x4s and a box of screws can produce a perfectly serviceable pair in an afternoon; that's also the approach taken by several popular current how-to guides.
These trestle sawhorses are intended for something different.
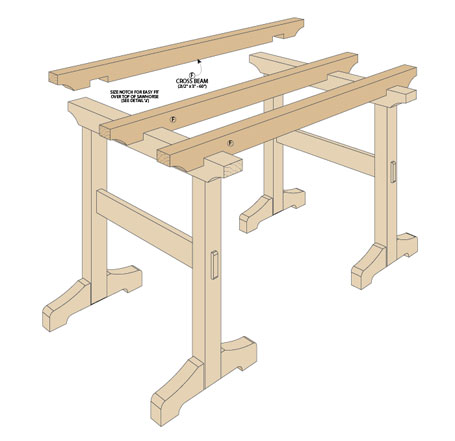
They're a permanent addition to the woodworking shop rather than temporary jobsite equipment. The solid lumber, wide stance, and traditional joinery create dependable work supports, while the removable cross beams allow the pair to serve as the base for a full-size work surface.
And building them gives you an excuse to practice woodworking skills you'll use on much more demanding projects.
That's a pretty good return from a pair of sawhorses.
BUILD YOUR OWN: Get the complete step-by-step Trestle Sawhorse woodworking plans, including detailed drawings, photos, illustrations, and bonus instruction on cutting tenons by hand.
GET THE STEP-BY-STEP TRESTLE SAWHORSE PLANS FROM WOODSMITHPLANS.COM.


