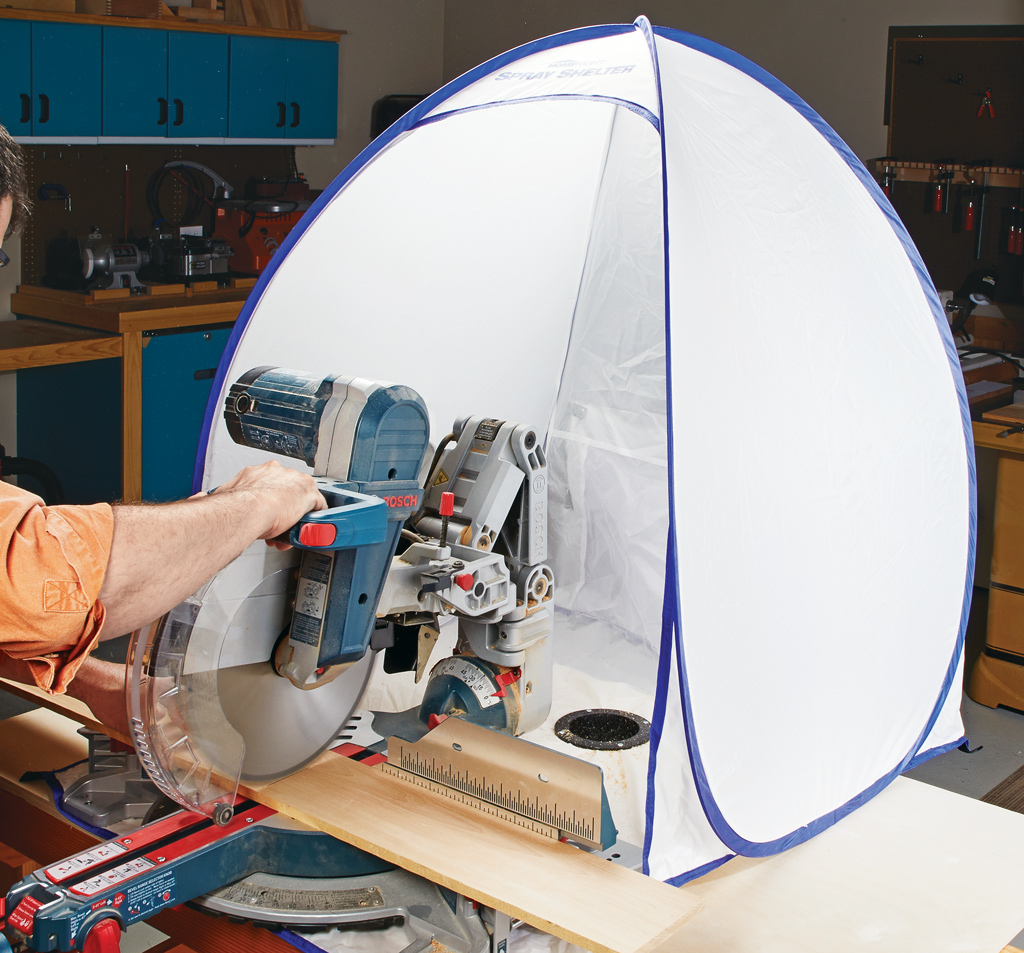
A sliding compound miter saw is much more than a tool for chopping long boards into shorter pieces. Set up and used correctly, it can make accurate crosscuts, miters, bevels, and compound cuts while handling workpieces that would be difficult to crosscut on a table saw.
What separates a sliding miter saw from a conventional miter saw is right in the name: The motor and blade assembly travels along a sliding mechanism. Instead of simply lowering the blade through the workpiece, you can move it across a wider board.
That increased cutting capacity is a big advantage. But getting clean, accurate results requires understanding how the saw moves, how to support and secure the workpiece, and how to make each type of cut.
What Is a Sliding Compound Miter Saw?
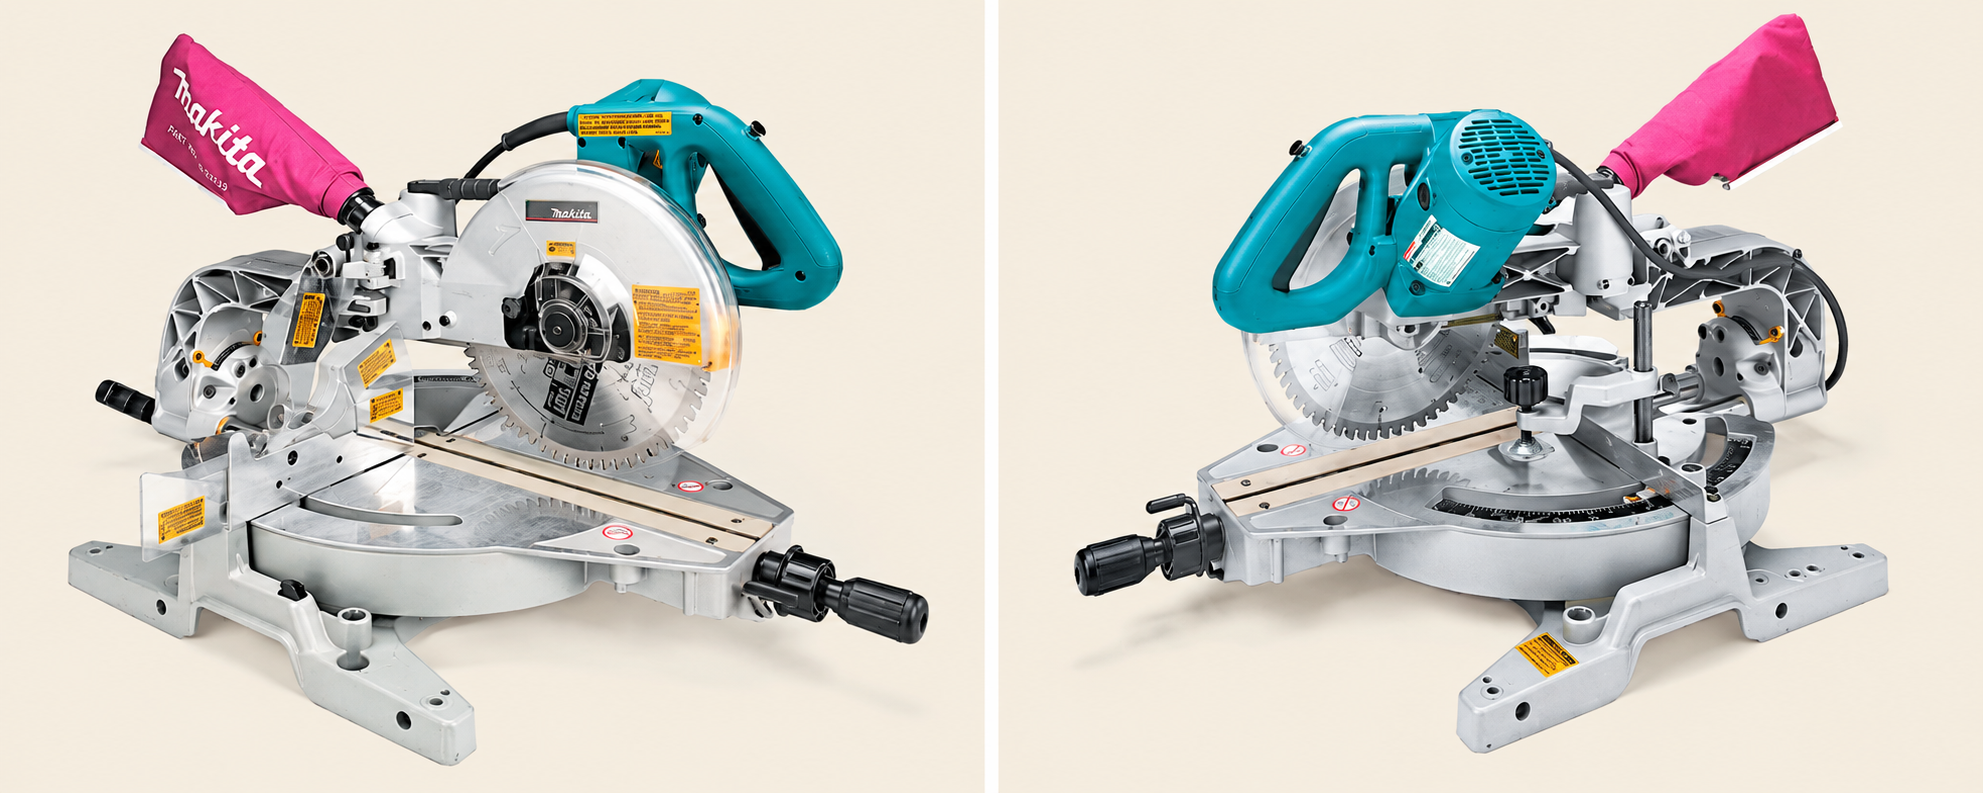
A sliding compound miter saw combines three basic movements.
The miter adjustment rotates the saw to make angled cuts across the face of a workpiece. The bevel adjustment tilts the blade for angled cuts through the thickness of the workpiece.
And the sliding mechanism moves the blade and motor across the workpiece, significantly increasing crosscut capacity compared with a conventional non-sliding saw.
Put those adjustments together and you have a compact tool capable of making everything from basic 90° crosscuts to compound miters.
Understanding Miter, Bevel & Sliding Adjustments
Before making precision cuts, get familiar with the controls on your particular saw.

Miter Adjustment
Rotating the saw changes the miter angle.
Most saws provide positive detents at commonly used angles. These let you quickly return to frequently used settings when making square crosscuts and common miters.
Don't assume the factory detents are perfectly calibrated, however. If you're building something where the fit really matters, verify the setup before cutting your project parts.
Bevel Adjustment
Tilting the blade creates a bevel cut.
Depending on the saw, the head may bevel in one or both directions. Combining a bevel setting with a miter setting creates a compound miter.
This is particularly useful for trim and molding work.
Sliding Mechanism
The sliding action is what gives the saw its increased crosscut capacity.
For narrower workpieces, you may be able to make a conventional chopping cut. For wider stock, the sliding mechanism allows the blade to travel across the workpiece.
How to Make a Sliding Crosscut
One of the first techniques to learn is the basic sliding crosscut.
The original Woodsmith method follows this sequence: 1. With the saw head raised, pull the carriage toward you and position it over the workpiece. 2. Start the saw. 3. Lower the blade into cutting position. 4. Push the saw through the workpiece. 5. Complete the cut. 6. Release the trigger and keep the saw head down until the blade stops rotating.
The important point is that the powered cutting stroke moves away from you through the workpiece, rather than pulling the spinning blade toward you.
Important: Sliding miter saw designs vary. Follow the cutting procedure specified in the owner's manual for your particular saw rather than assuming every model operates identically.
Choose the Right Miter Saw Blade
Blade choice can have a significant effect on cut quality and how the saw behaves.

The blade shown in the original article is a 60-tooth, thin-kerf blade with a negative 5° hook angle. Its alternating-top-bevel tooth geometry is designed to produce a smooth cut, while the negative hook angle makes the blade less aggressive as it engages the workpiece.
When replacing a blade, choose one specifically approved for your saw and appropriate for the material and type of cut you're making.
Start with a Solid Miter Saw Setup
Accuracy starts before you make a cut.
A sliding miter saw should be mounted on a solid, stable surface, with enough support for the material you're cutting.
A dedicated miter saw station is ideal in a woodworking shop. It provides a stable platform while auxiliary tables support longer workpieces.
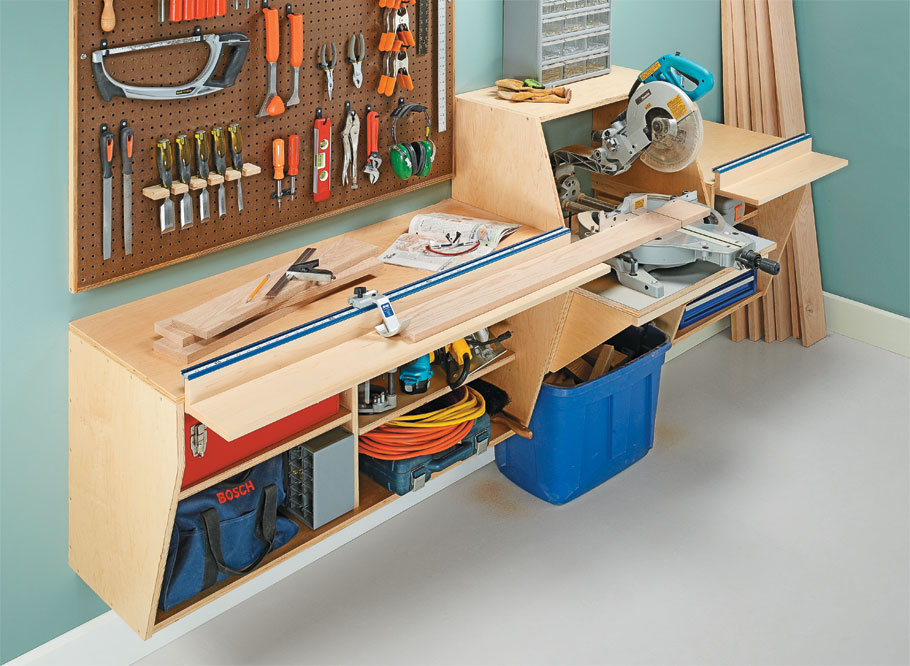
Whatever setup you use, the workpiece needs to sit flat on the saw table and firmly against the fence.
GET THE STEP-BY-STEP PLANS: Build A Wall-Mounted Miter Saw Station
How to Cut Accurately to a Layout Line
Sometimes you don't need a dimension or stop block—you simply need to cut precisely to a pencil line. Instead of immediately making a full-depth cut, you can sneak up on the layout mark.
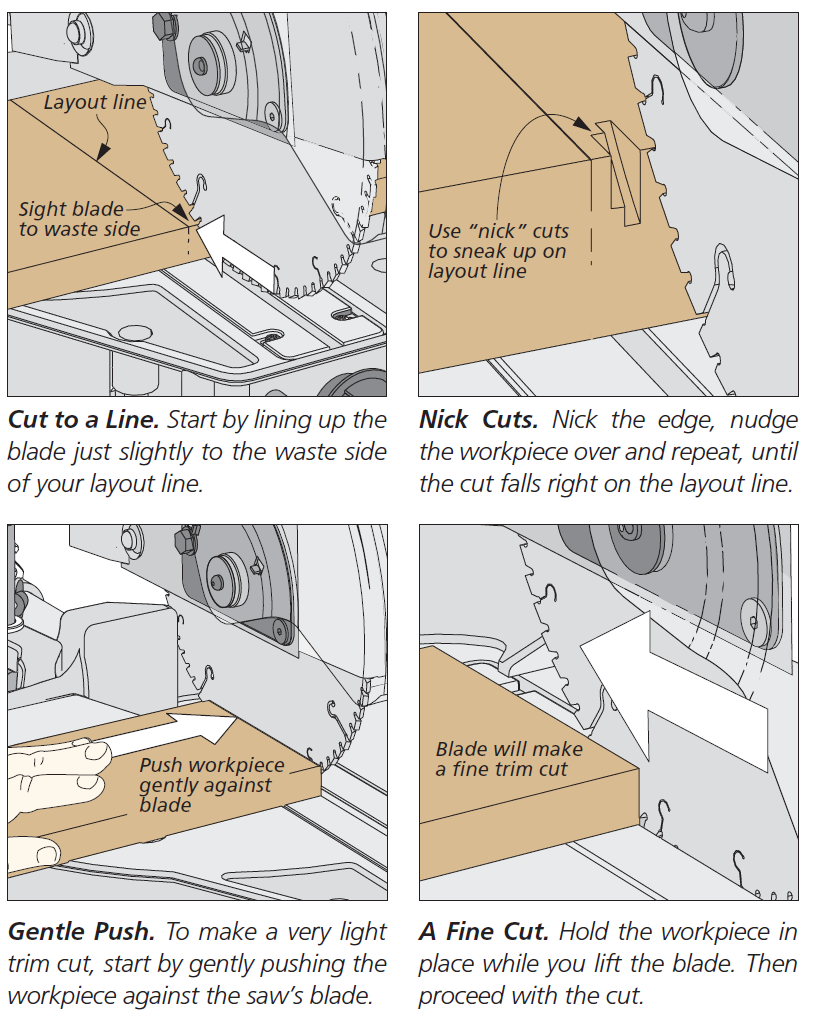
Make a shallow nick at the edge of the workpiece and check its position against your layout line.
Adjust the workpiece as necessary and make another light nick. Once the blade is exactly where you want it, make the full cut.
This avoids making a rough cut and then repeatedly trimming the workpiece to reach the line.
Making Fine Trim Cuts
A miter saw can also shave a very small amount from the end of a workpiece.
The original technique uses the slight flexibility of the blade to establish an extremely fine trim cut: With the saw off, lower the blade and lightly position the workpiece against it. Hold the workpiece in place as you raise the blade, then make the cut normally.
For precision work, another straightforward approach is simply to establish the blade location with a light test or nick cut and sneak up on the final dimension.
How to Cut Accurate Miters
Miters are one of the jobs a miter saw does particularly well.
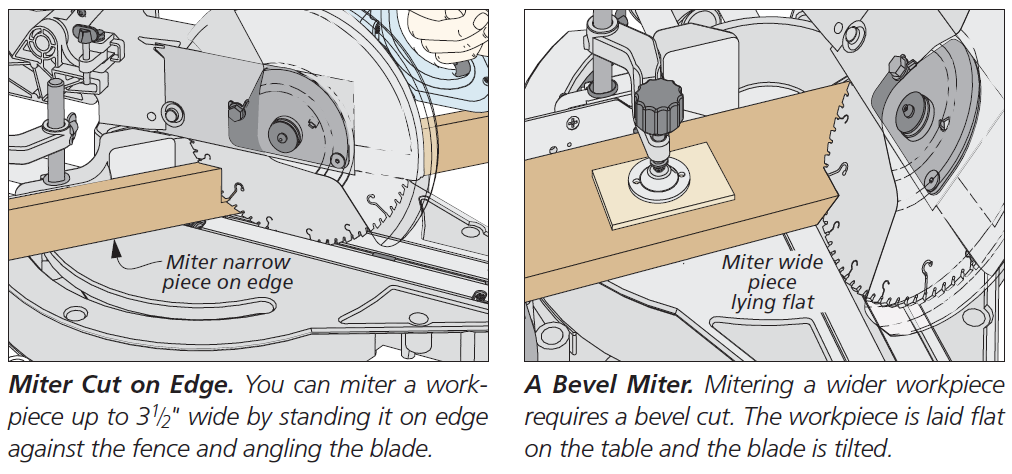
Depending on the workpiece and cut, you may be able to rotate the saw and keep the workpiece in its normal orientation, or tilt the blade and place the workpiece flat on the table.
Whenever possible, choose the orientation that gives you solid support against both the table and fence and keeps the workpiece easy to control.
Clamp the Workpiece for Better Control
Workpiece movement can ruin an otherwise accurate miter.
With a square crosscut, much of the cutting force is directed toward the fence. On an angled cut, those forces change and the workpiece can be more likely to shift.
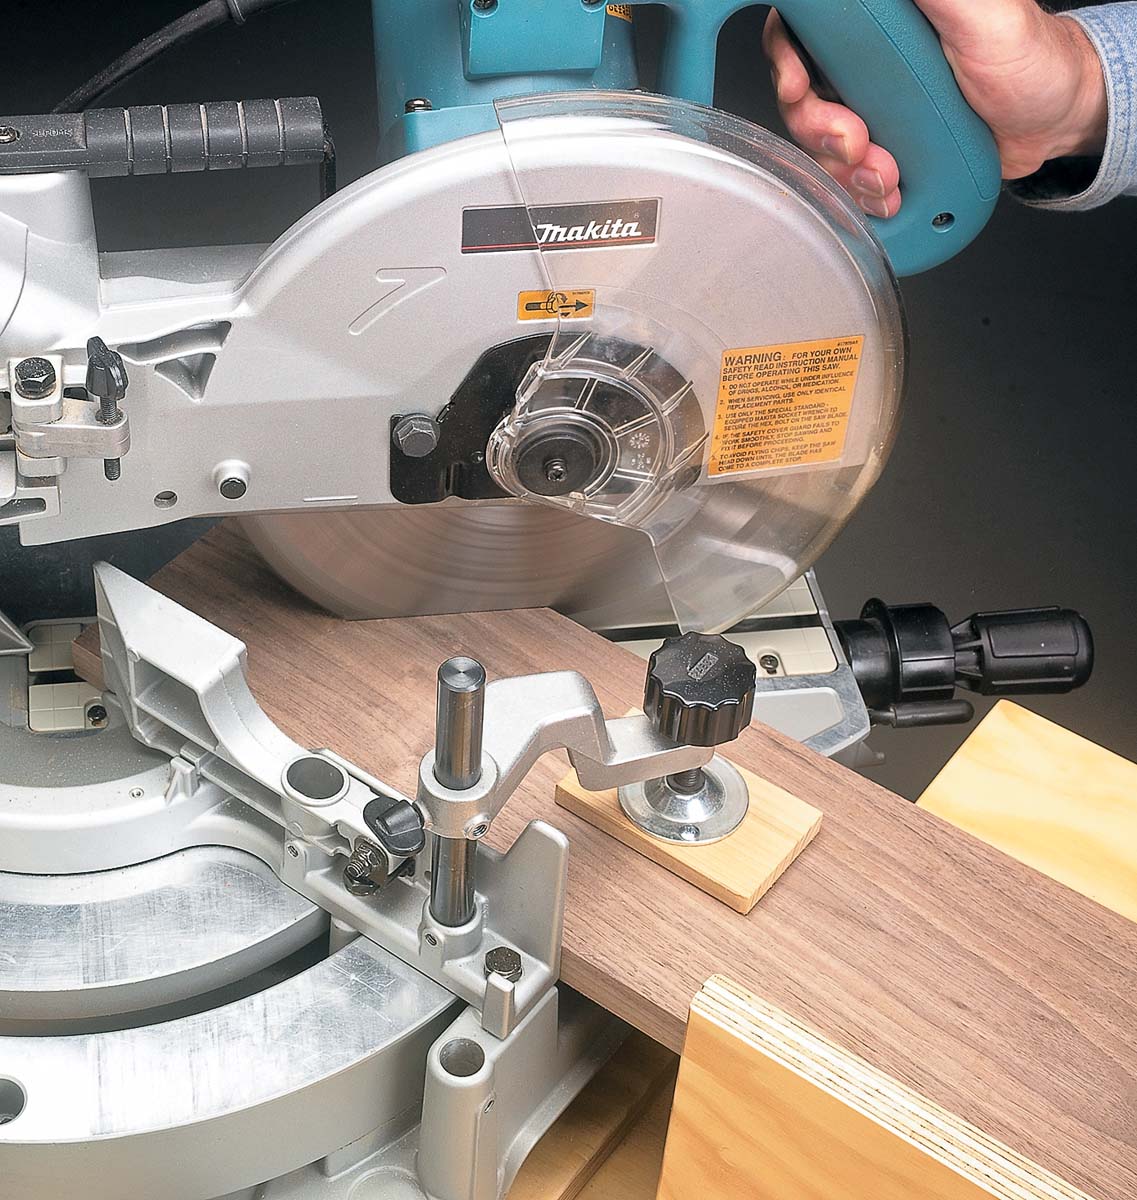
A hold-down or clamp keeps the workpiece firmly seated against the table and fence while you make the cut.
It's particularly useful when working with shorter parts or making angled cuts where maintaining control by hand would put your fingers too close to the blade.
Use a Stop Block for Repeatable Cuts
When several parts need to be exactly the same length, don't measure and mark each one separately.
Use a stop block.
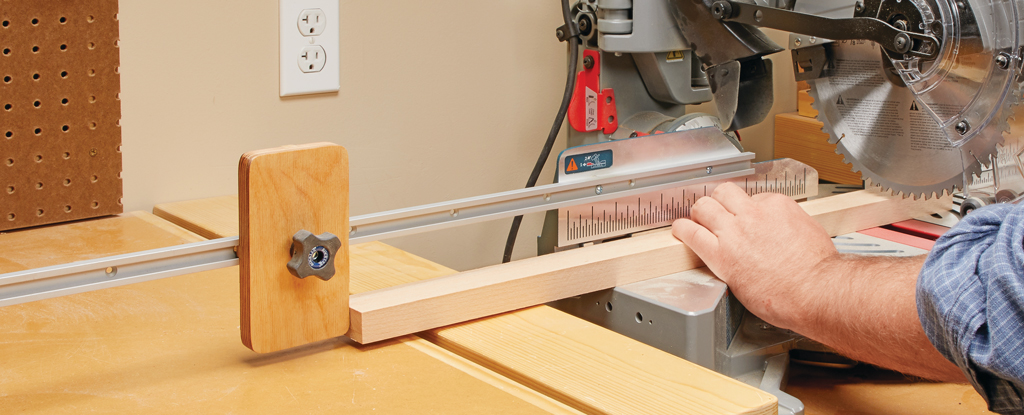
A stop attached to an auxiliary fence gives you a repeatable reference point. Butt each workpiece against the stop and every part can be cut to the same length.
For short cutoff pieces, however, there's an important detail.

The original setup uses both a stop block and a removable spacer on the cutoff side of the blade. The workpiece is positioned against the spacer to establish its length.
Before making the cut, remove the spacer.
This leaves clearance so the freshly cut piece isn't trapped between the blade and the stop.
That's a simple technique that provides both repeatability and clearance for the cutoff.
Cutting Crown Molding & Compound Miters
Compound miter saws are particularly useful for cutting crown molding because they can combine a miter angle and bevel angle in a single cut.
There are two basic approaches.

Cut Crown Molding in Position
If the saw has enough capacity, the molding can be positioned between the table and fence at the same angle it will occupy when installed.
It's actually placed upside down on the saw.
This approach can simplify the setup because the molding itself is positioned at its installed spring angle.
Cut Crown Molding Flat
Wide molding may not fit against the fence in its installed position.
In that case, lay the molding flat on the saw table and make a compound cut, with the blade both rotated and tilted.
The correct miter and bevel settings depend on the molding and installation angles.
How to Make Acute Miter Cuts
What if the angle you need is beyond the normal miter adjustment of the saw? Don't try to hold the workpiece at an awkward angle freehand.
A simple auxiliary jig can change the reference angle and extend the range of cuts you can make.

The jig has two faces meeting at 30°. That additional reference angle allows the setup shown to produce miters up to 75°.
Both the jig and the workpiece need to be securely clamped before making the cut.
Get Cleaner Miter Saw Cuts with a Zero-Clearance Insert
There's another simple upgrade I'd add to this original article because we now have a dedicated resource for it.
The factory throat plate on many miter saws leaves a sizable opening around the blade. As the blade exits the bottom of the workpiece, those unsupported fibers can tear away.
A zero-clearance miter saw insert supports the workpiece close to the blade and can help reduce that bottom-face tearout.
Our shop-made version uses a UHMW plate with a replaceable hardboard center strip, so you don't have to rebuild the entire insert when the kerf gets worn.
RELATED VIDEO: How to Make a Zero-Clearance Insert for a Miter Saw
This is a great contextual link because someone reading a fundamentals article is exactly the reader who's likely to want the next-level upgrade.
Sliding Miter Saw Safety
A sliding miter saw is convenient and accurate, but there's a lot happening close to the operator. A few basic habits are essential: - Wear eye and hearing protection. - Keep the blade guard installed and operating properly. - Keep your hands well away from the blade and use a clamp or hold-down when needed. - Lock the miter, bevel, and other adjustable mechanisms securely before starting a cut. - Keep the workpiece firmly supported against the table and fence. - Wait for the blade to stop before raising it from a completed cut when directed by your saw's operating procedure. - Follow the manufacturer's instructions for your particular saw, especially for sliding cuts.
Get More from Your Sliding Miter Saw
A sliding compound miter saw earns its space in a woodworking shop because it can handle a surprising range of operations.
It can make quick crosscuts, accurately trim parts to length, cut miters and bevels, produce repeatable parts with a stop block, and handle compound cuts for molding and trim.
The key is treating it as a precision woodworking tool rather than simply a cutoff saw.
Give the saw a solid setup, use an appropriate blade, support and secure the workpiece, and learn how the miter, bevel, and sliding adjustments work together. Once those fundamentals become second nature, the sliding miter saw becomes one of the quickest ways to make accurate crosscuts and angled cuts in the shop.