

Choosing the right tool and technique for the job can shave time and effort off your sanding tasks.
Sanding is the necessary evil that comes near the end of just about every woodworking project. If you’re like me, this is where your motivation starts to drag. But it’s while you’re sanding that a project really comes alive, showing off the beauty of the wood. And a good sanding job is also the key to adding the perfect finish to your project.
This is where the right power sander comes in, delivering great results in a short amount of time. From belt sanders for the rough work to random-orbit, finish, and detail sanders designed to fit into the tightest spaces, there’s one for just about every smoothing and finishing task. So, it’s usually just a matter of matching the right tool to the job.
And while operating these sanders doesn’t involve a steep learning curve, there are still a few things to keep in mind when using each of the different types. Here are some simple techniques that will help you get a smooth surface, ready for a finish in no time.
 Random Orbit Sander Random Orbit Sander |
 Detail Sander Detail Sander |
 Finish Sander Finish Sander |
BELT SANDER
Some woodworkers might argue that a belt sander isn’t a tool often associated with fine craftsmanship. But the belt sander is a great choice for a number of everyday woodworking tasks. In fact, by using the proper techniques, a belt sander can save time and produce a dead flat surface.
Of course, belt sanders can hog off wood at a surprising rate, so they’re not for use on delicate plywood veneers. But when it comes to leveling a glued-up panel that won’t fit through your planer, a belt sander may be the best solution. It may not be the tool for a final finish, but it should still be a part of your sanding arsenal.
A QUICK CHECKUP.
 |
 |
Before you can get good results with a belt sander, it’s worth taking a few minutes to inspect the tool. The most important thing to look for here is the flatness of the platen (the thin metal plate under the belt).
If it’s bent, dented, or damaged, the sander won’t leave a flat surface and it may have a tendency to dig into the wood. The good news is that the platen is fairly easy to replace (your owner’s manual will show you how). Other than that, you just need to make sure the belt is tightened and tracking properly before getting started.
How-To: Sand a Glued-up Panel
 |
 |
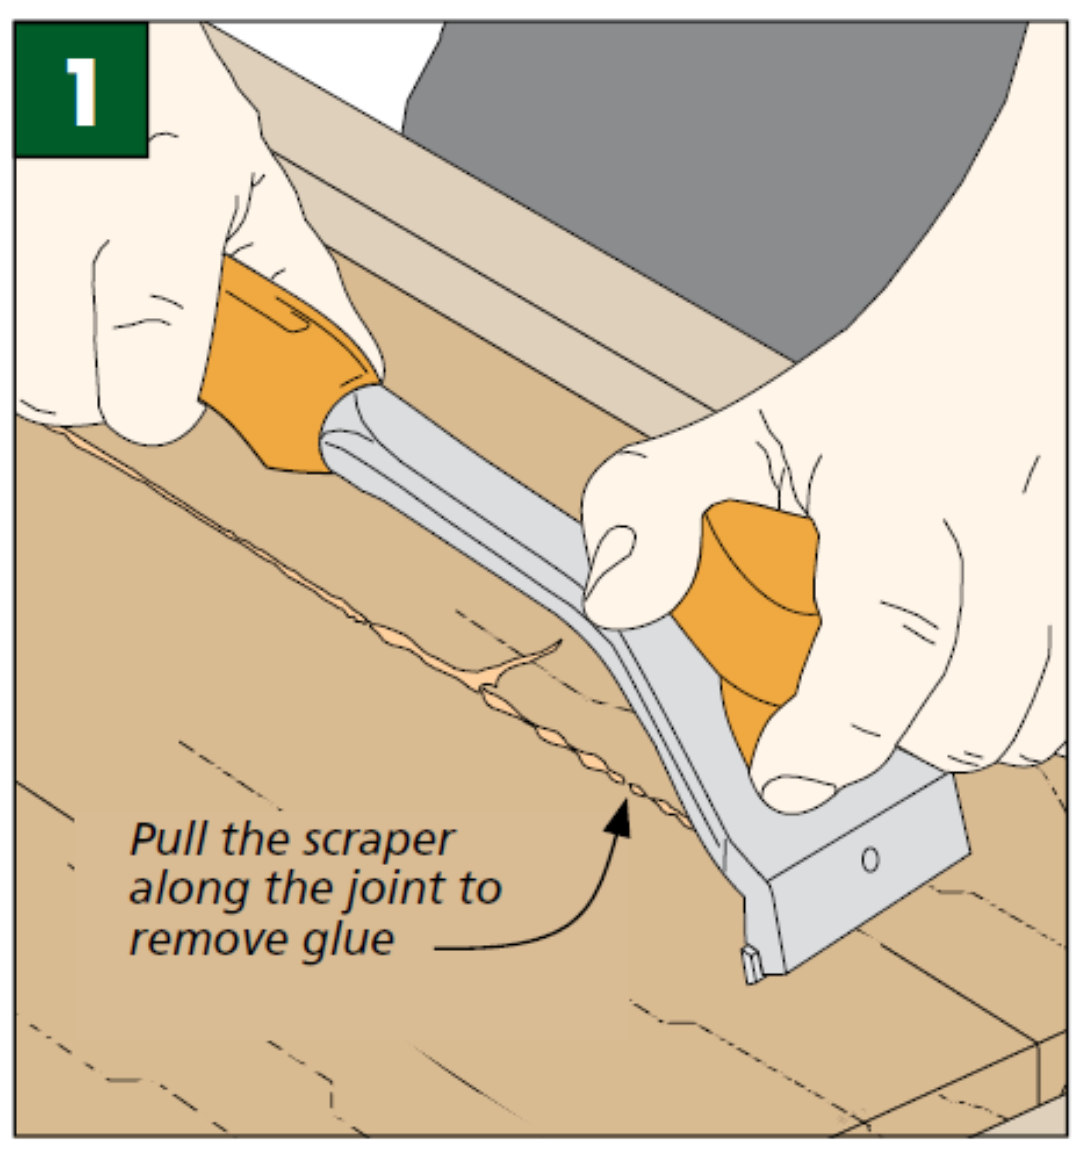
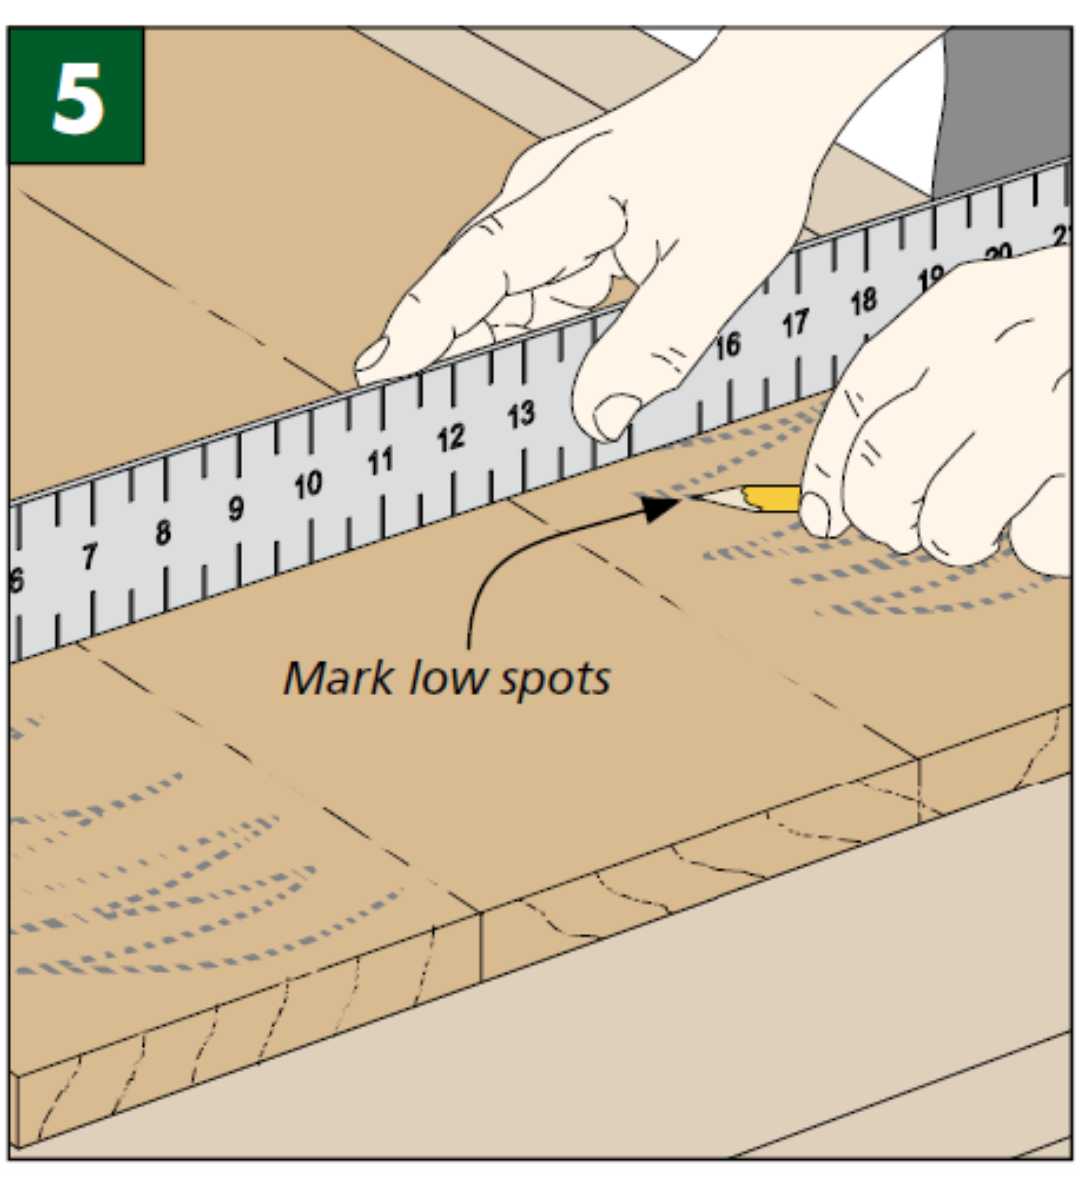
| Scrape First. Use a scraper to remove the beads of dried glue that have squeezed out of the joints during assembly. | Draw Reference Lines. Pencil lines across the panel allow you to see high spots and low spots as you sand. |
 |
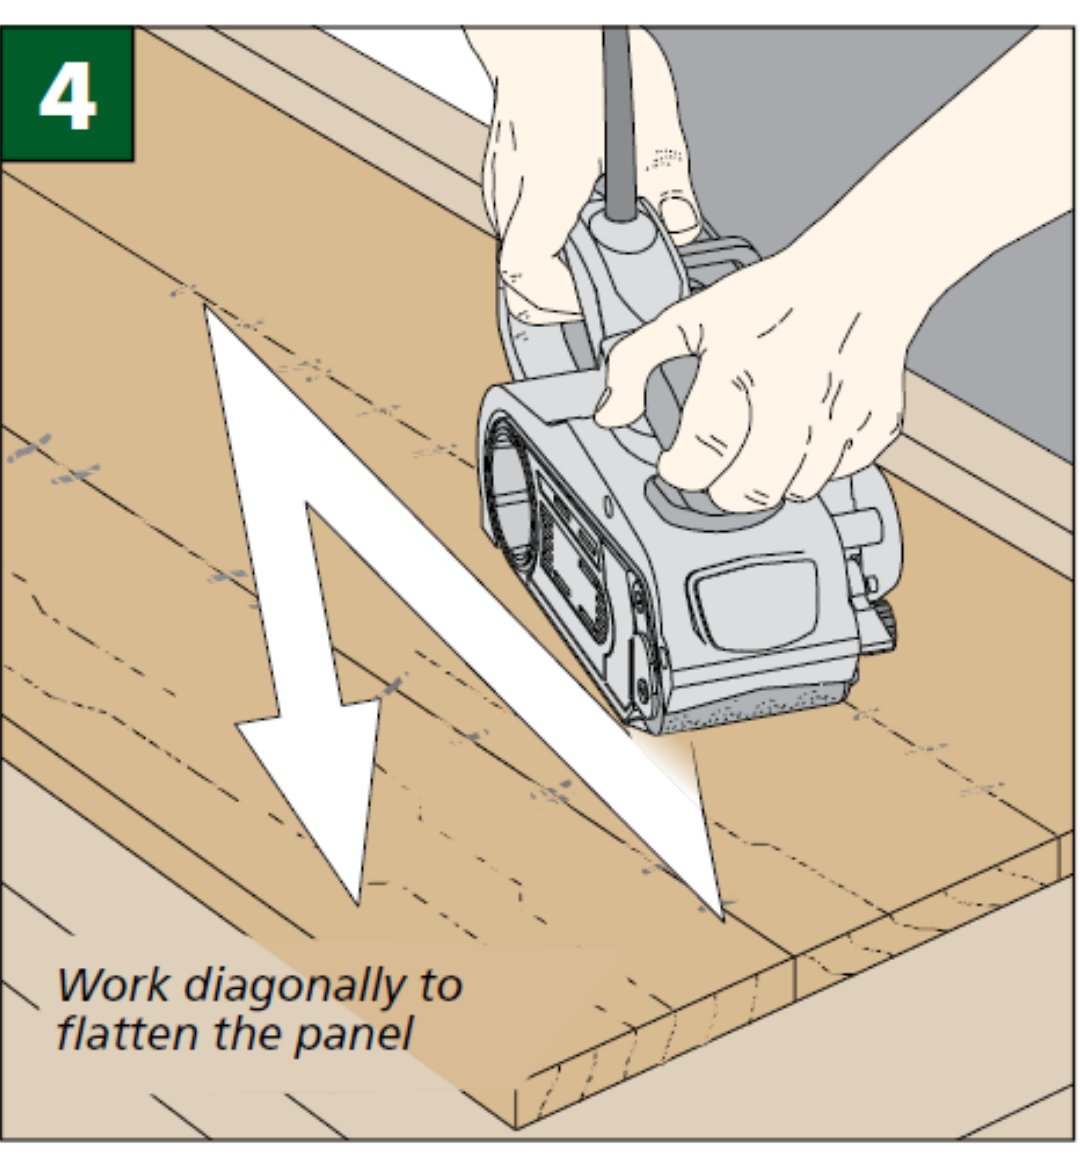 |
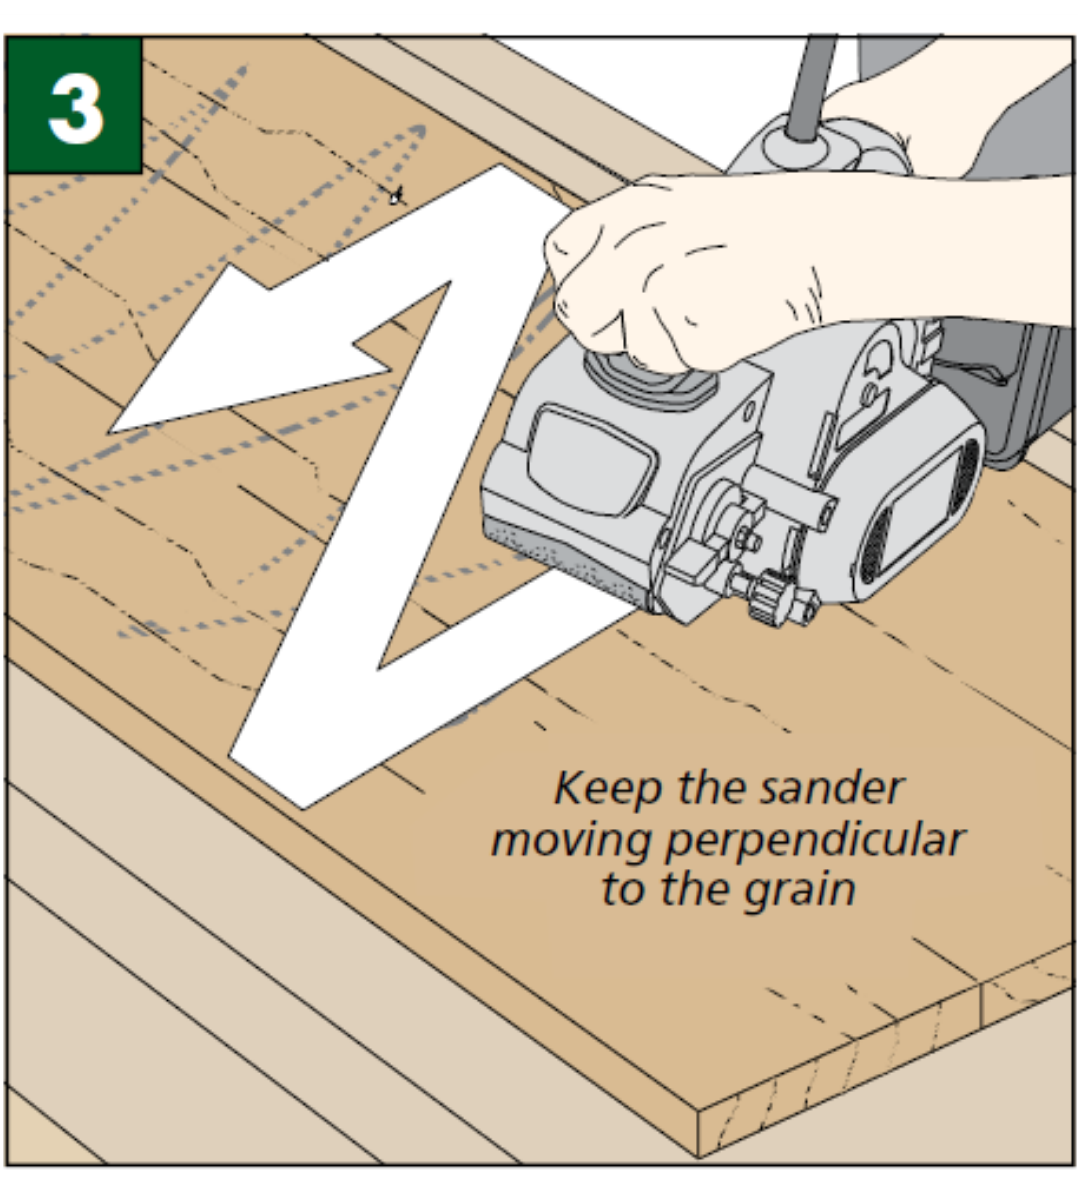
| Sand Cross-Grain. With an 80-grit belt installed, move the sander across the grain to level the surface of the panel. | Sand Diagonally. Switch to a 100-grit belt and move the sander at an angle to the grain, alternating directions. |
 |
 |
| Check Your Work. Lay a long straightedge across the width of the panel to identify and mark any remaining low spots. | Sand With the Grain. Finish by sanding with the grain to remove cross-grain scratches using a 120-grit belt. |
SCRAPE FIRST.
With your sander tuned up, you’re almost ready to get started. But first it’s a good idea to scrape off the glue squeezeout from the joints. The hardened beads of glue often have a soft center that will gum up your sandpaper in a hurry. A scraper does a great job of removing the squeezeout.
INITIAL FLATTENING.
When that’s done, I draw some pencil marks on the surface to help measure the progress. Then, I start with an 80-grit belt for most panels. This aggressive grit cuts quickly and makes short work of leveling the surface.
For these first few passes, you’ll just want to keep the sander moving to avoid gouging the workpiece. Sanding across the grain will get rid of ridges and erase the pencil marks. Then, a couple of diagonal passes with a 100-grit belt levels the panel. By this point, it should feel flat to the touch, but you’ll need to mark it to make sure.
CHECK YOUR PROGRESS.
One way to do this is to use a straightedge and mark the low spots with a pencil. Step 5, at right, shows you what I mean. Then it’s just a matter of sanding down the high spots until the panel is level.
Finish with the belt sander by making a final pass using a 120-grit belt and moving the sander with the grain. This removes the marks left by the previous grits and prepares the surface for further smoothing with a random-orbit sander.
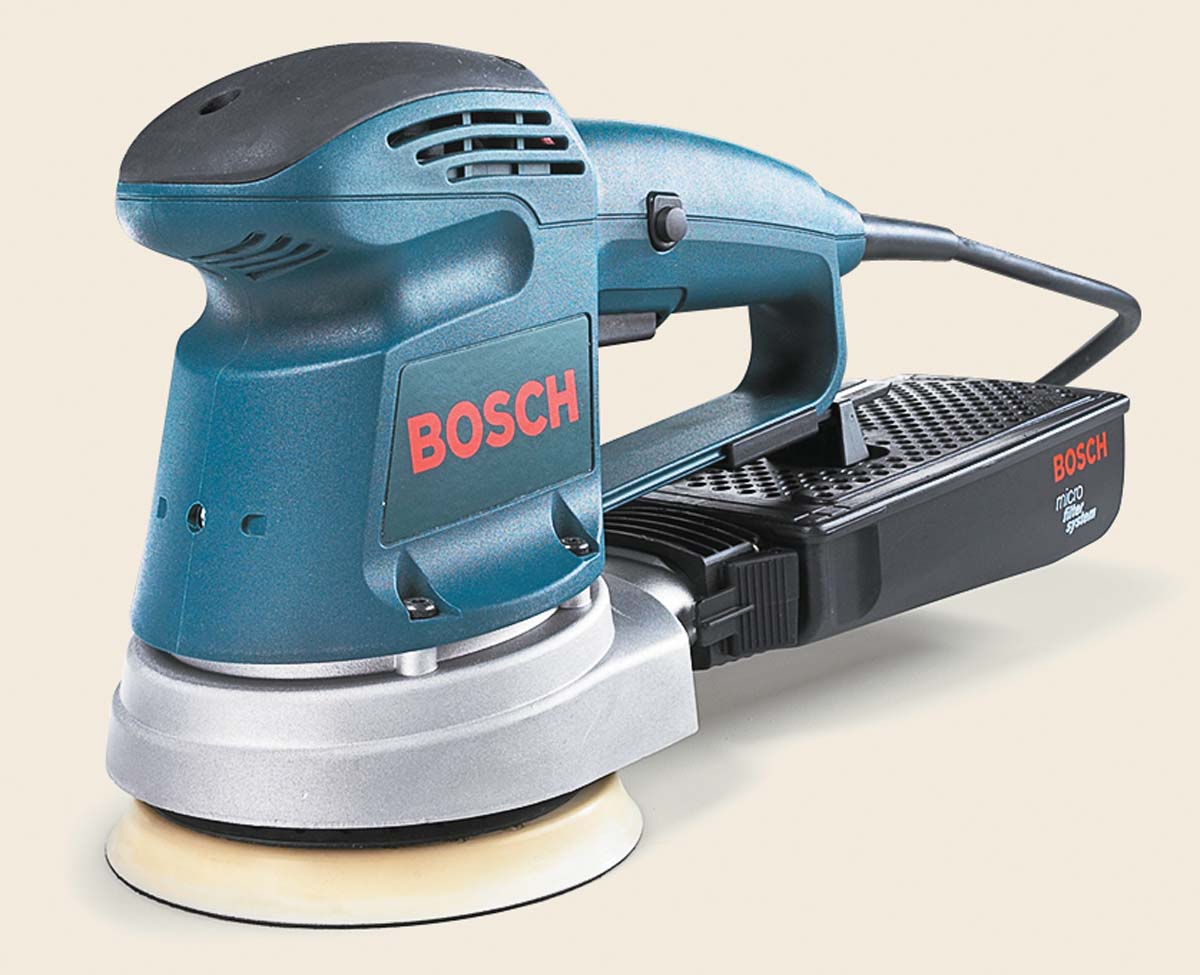
RANDOM ORBIT
For projects that don’t require the rapid stock removal of a belt sander, a random-orbit sander, like the one shown at right, has become the go-to tool for most woodworkers. And their versatility is the reason why. They can be aggressive enough to remove a lot of material quickly, or gentle enough for the final sanding on your most treasured pieces.
But the biggest advantage of a random-orbit sander is you can sand in any direction without leaving cross-grain scratches caused by moving the sander against the grain. And manufacturers supply an assortment of sandpaper and other abrasives for these sanders (see the box below).
HOW THEY WORK.
The mechanics of a random-orbit sander are designed to move the abrasive disc in both a circular motion and on an elliptical path in the opposite direction. This helps conceal the swirling marks made by the sandpaper and allows you to move the sander in any direction over the workpiece.
RANDOM-ORBIT SANDING TECHNIQUE.
 |
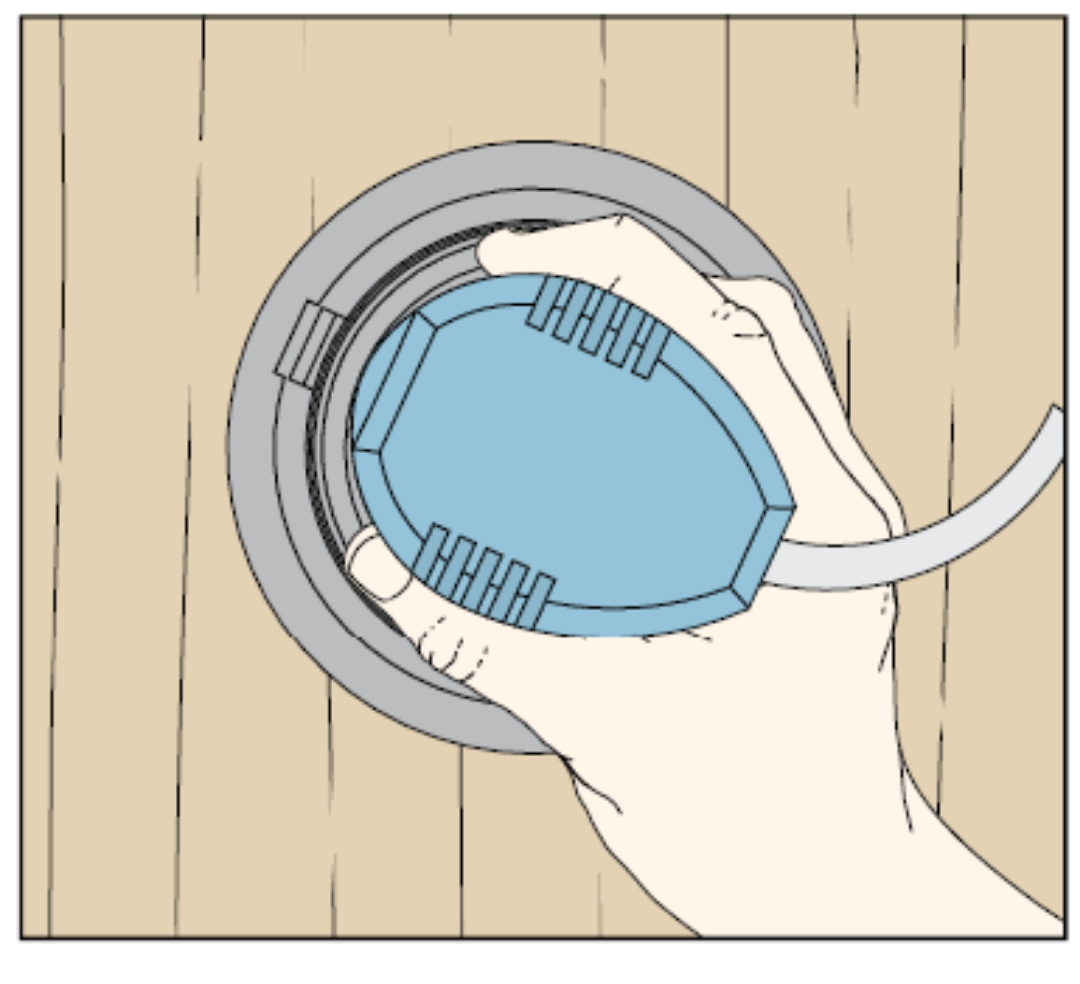 |
| Don’t Push Down. Hold your hand on the side of the sander to guide the tool with the grain. |
Using a random-orbit sander is such a common activity that we assume there’s not much to it other than turning it on and moving it around. But there are a few key things to keep in mind. First, and most important, don’t press down on a random-orbit sander.
You should use your hand to just guide the sander. Pushing down actually decreases the sander’s efficiency by slowing down the rotation of the disc. That can cause the sander to dig into the wood, marring the surface.
Another common mistake is moving the sander too quickly across the surface. I like to take slow, overlapping passes moving only about one foot in ten seconds. This “feed rate” results in consistent smoothing and reduces the visibility of the swirl pattern left by the abrasive. Finally, you need to take the time to carefully inspect the workpiece between grits.
The key thing to keep in mind is that you want to remove imperfections in the surface with the first (lowest) grit. Each subsequent grit should only be used to erase the swirling sanding marks from the previous sheet. Usually, even on a fairly rough surface, you can start with a 120-grit disc and achieve a smooth surface. Moving through the grits (150, 220, and beyond) involves lighter sanding to make progressively finer and less visible scratch patterns.
FINISH SANDERS
 Although you can prepare a surface for a finish using only a random-orbit sander, many woodworkers prefer to use a finish sander (photo below) for the final (highest) grit abrasive. These thir or quarter sheet sanders have been around for a long time. Though they’re no longer as common as random-orbit sanders, they still have their uses.
With a finish sander, you need to sand with the grain, just like you would by hand. That’s because the motors in these sanders produce a straight line, back-and-forth motion designed to imitate hand sanding. Moving this sander across the grain will result in scratches.
But these models still come in handy, especially for sanding a large surface. For instance, I’ll use my finish sander on a large table top with 320-grit paper to get an ultra smooth surface. It’s a lot easier than doing the same thing with a sanding block by hand.
DETAIL SANDERS
 So far, the sanders I’ve talked about are all designed for flat surfaces. But what can you do when it’s time to sand moldings or other curved surfaces? The answer may be found in a detail sander (above right).
Detail sanders take a multitude of forms. Most offer interchangeable heads with shaped profiles designed to get into tight spaces or match common moldings. These shapes include coves and beads of all sizes. Like a finish sander, detail sanders work in a back-and-forth motion, so you’ll need to keep it moving
with the grain. Another option for detailed, curved profiles is a handheld, oscillating spindle sander shown in the box below.
DUST COLLECTION
Whatever type of sander you’re using, it’s going to produce a lot of fine dust. In addition to keeping the air in your shop breathable, dust collection in the sander also improves the quality of the finish by removing the small particles that would otherwise be ground back into the wood. Dust extraction also prevents the sandpaper from loading up too quickly.
Most sanders have dust collection ports that are easily adaptable for your dust collector or shop vacuum. Then it’s just a matter of hooking up a hose and getting down to business. Modern sanders have taken some of the tedium out of sanding. And by choosing the best tool and technique for your projects, you’ll be assured of good results.
Sandpaper Alternatives
When it comes to selecting abrasives for your sander, there are lots of options. In addition to conventional sandpaper, there are some newer products that you may want to consider. You can find out where to get them in Sources on page 51.
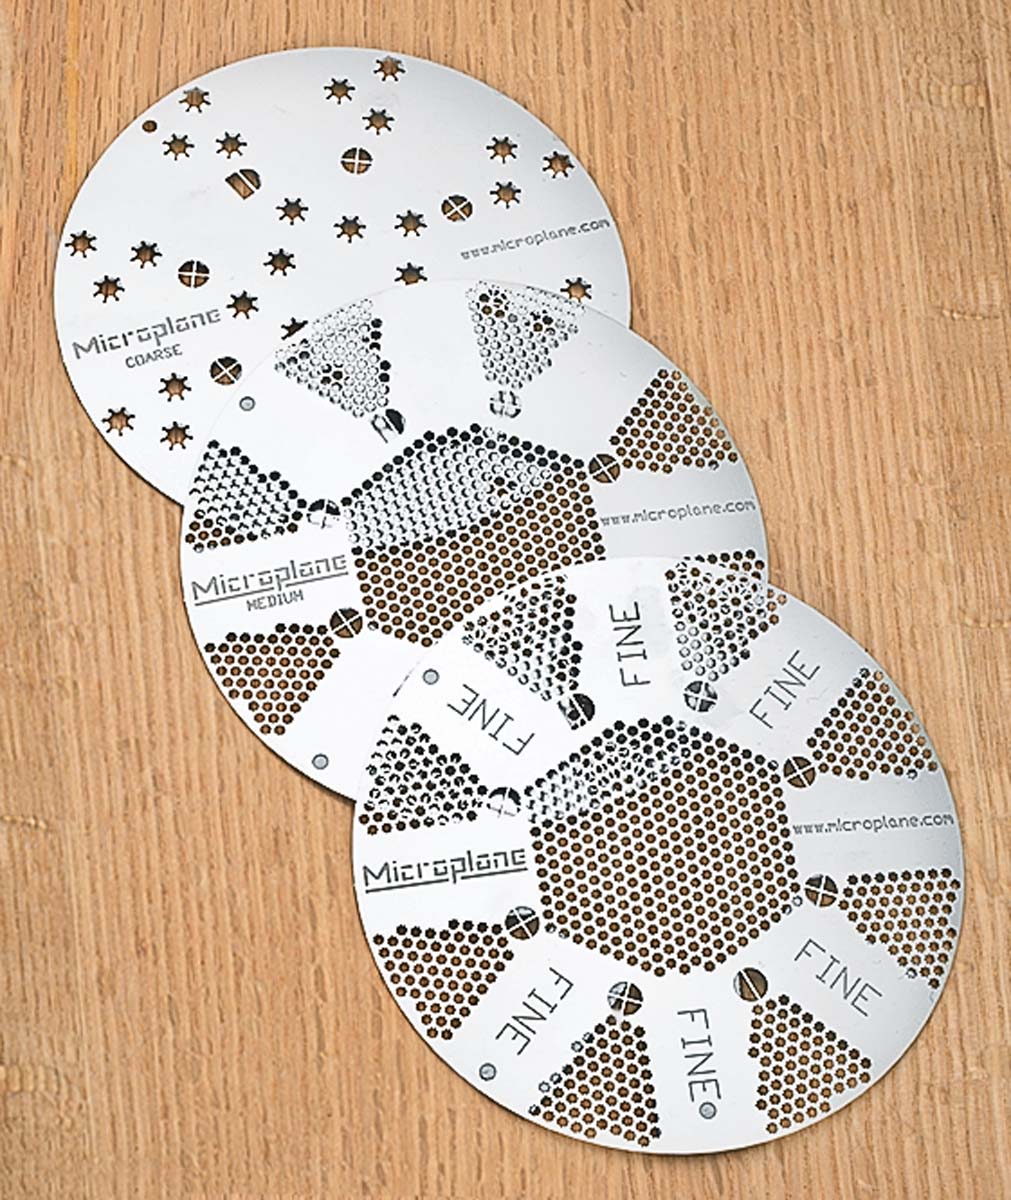
MICROPLANE.
One of the most revolutionary sanding discs comes from Microplane (known for their line of razor-sharp rasps). Those same stainless steel cutting edges are now offered on hook-and-loop sanding discs. Available in coarse, medium, and fine (roughly equating to 40, 80, and 120-grit sandpaper) they work great, especially on rough-sawn wood.
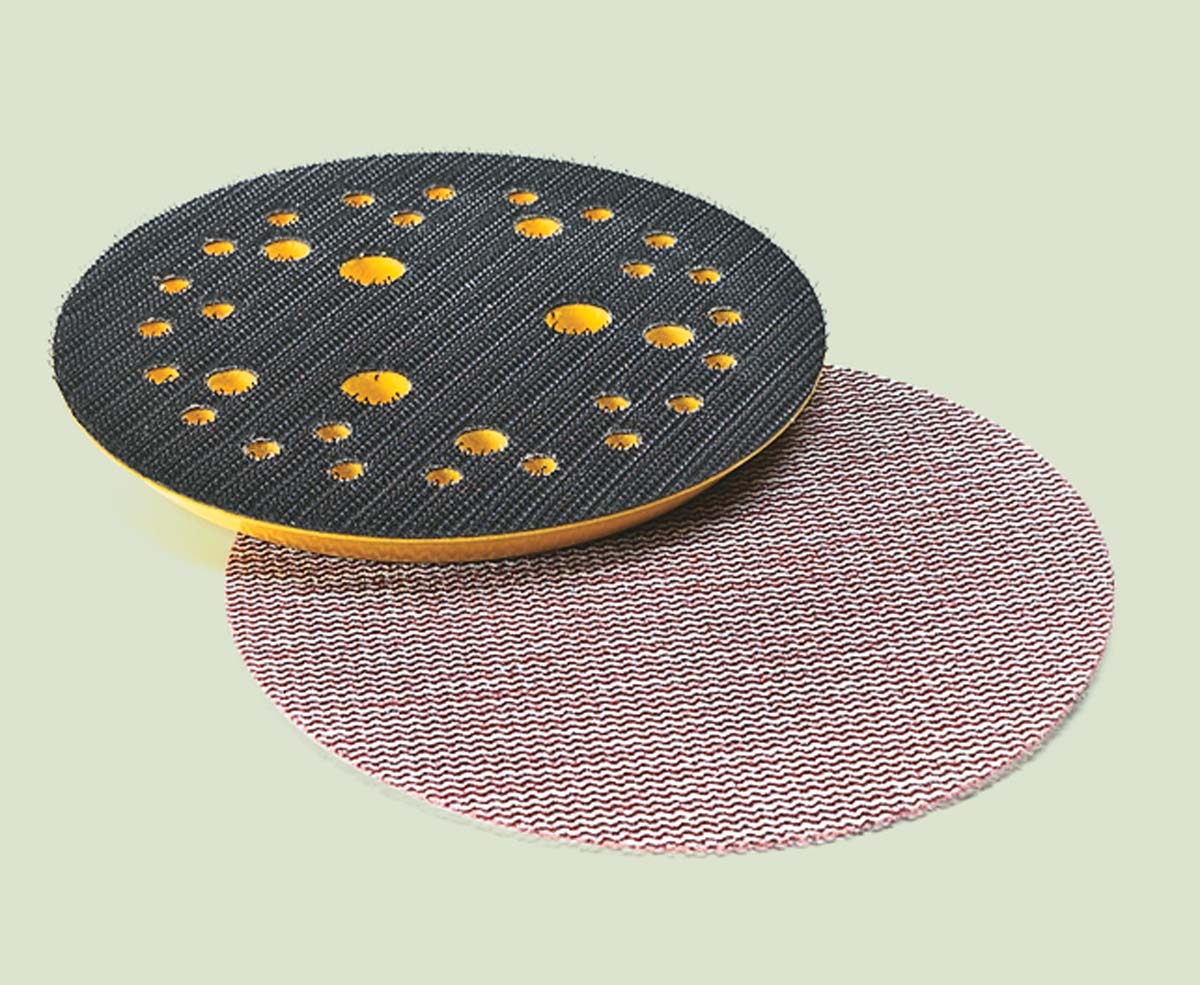
ABRANET DISCS AND PADS.
Although they look like drywall sanding screens, Abranet discs are great for woodworking. The woven material offers the added benefit of allowing your sander’s dust collection port to work more effectively. To get the most out of them, however, you’ll want to remove the pad on your sander and add the Abranet cushioned replacement pad.
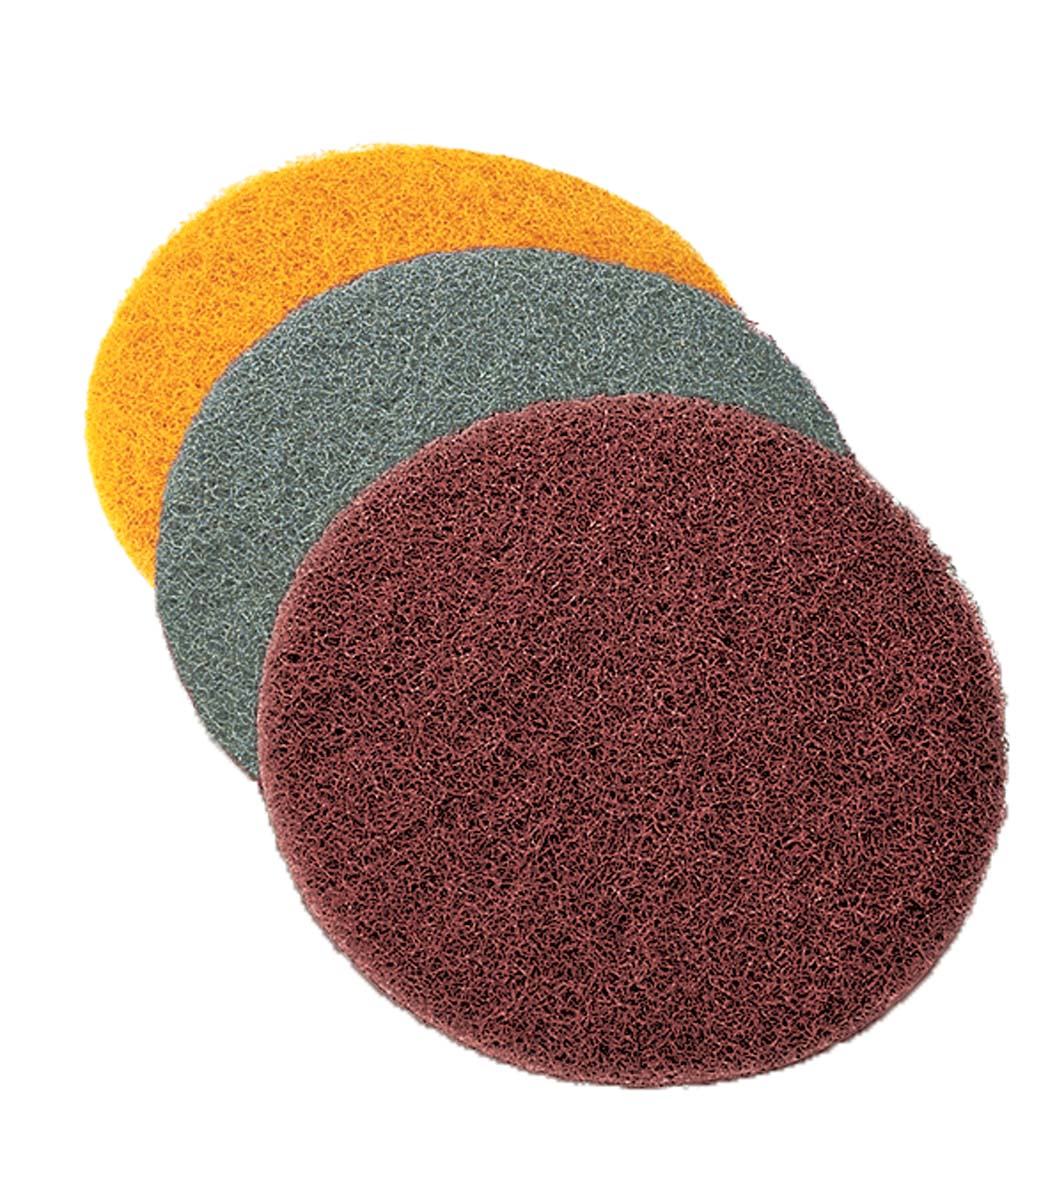
NON-WOVEN PADS.
Non-woven pads were not designed for sanding raw wood, but they excel at fine finishing work. For instance, the 1200-grit gold pad works exceptionally well when used between coats of sprayed or brushed finishes.
 |
 |
 |
| These alternatives to conventional sandpaper may be the right choice for your next project. |


