


Sometimes the simplest workshop solutions are the most useful. A marker can help you keep track of carbide cutter edges, masking tape makes mounting a power strip easier, and a couple of magnets can keep small accessories within reach.
In this collection of Woodsmith Quick Tips, four readers share clever ideas for tool maintenance, shop organization, and finishing.
1. Mark Dull Carbide Turning Tool Edges

Indexable carbide turning tools make it easy to switch to a fresh cutting edge. But after rotating a cutter a few times, it can be difficult to remember which edges you've already used.
Larry Hilton of Green Bay, Wisconsin, has a simple solution: He marks each dull edge before rotating the cutter.
When an edge starts to lose its sharpness, Larry colors it with a marker. Then he rotates the carbide insert to expose a fresh edge.
The next time he needs to rotate the cutter, he can quickly identify which edges have already been used and which are still sharp.
Woodsmith Tip: Disconnect the lathe from power before adjusting or rotating a cutter. Inspect the insert for chips or damage, and replace it when all usable cutting edges are dull.
Shop tip submitted by Larry Hilton, Green Bay, Wisconsin.
2. Use Masking Tape to Mount a Power Strip
 Mounting a power strip to a workbench or shop wall can be frustrating. The keyhole slots on the back need to line up with the mounting screws, but measuring the spacing accurately isn't always easy.
Sarah Vallient of Princeton, Missouri, uses masking tape to transfer the screw locations.
She places a strip of tape across the back of the power strip and marks the mounting slots with a marker. Then she peels off the tape and applies it to the surface where she wants to mount the strip.

The marks show exactly where to drill pilot holes and install the mounting screws. Once the screws are in place, she can remove the tape and hang the power strip.
There's no need to measure the distance between the slots or repeatedly check their alignment.
Woodsmith Tip: Follow the power strip manufacturer's mounting instructions. Position it away from dust accumulation, liquids, and potential damage, and avoid overloading the strip.
Shop tip submitted by Sarah Vallient, Princeton, Missouri.
3. Keep Drill Bits and Screws Handy with Apron Magnets

Switching between a drill bit and driver bit is common when assembling woodworking projects. But dropping those small accessories into an apron pocket can make them difficult to find, especially when the pocket fills with sawdust.
Carol Roy of Grand Rapids, Michigan, found an easy way to keep them accessible.
She clips a pair of magnets to the front of her shop apron. The magnets provide a convenient place to hold her drill bit, driver bit, and a few screws while she works.
Instead of searching through her pockets, Carol can grab the accessory she needs and get back to work.
Woodsmith Tip: Keep magnets and loose metal accessories away from rotating machinery, where they could become caught or dislodged. Make sure the magnets are securely attached to the apron.
Shop tip submitted by Carol Roy, Grand Rapids, Michigan.
4. Make DIY Painter’s Points from Scrap Foam and Screws
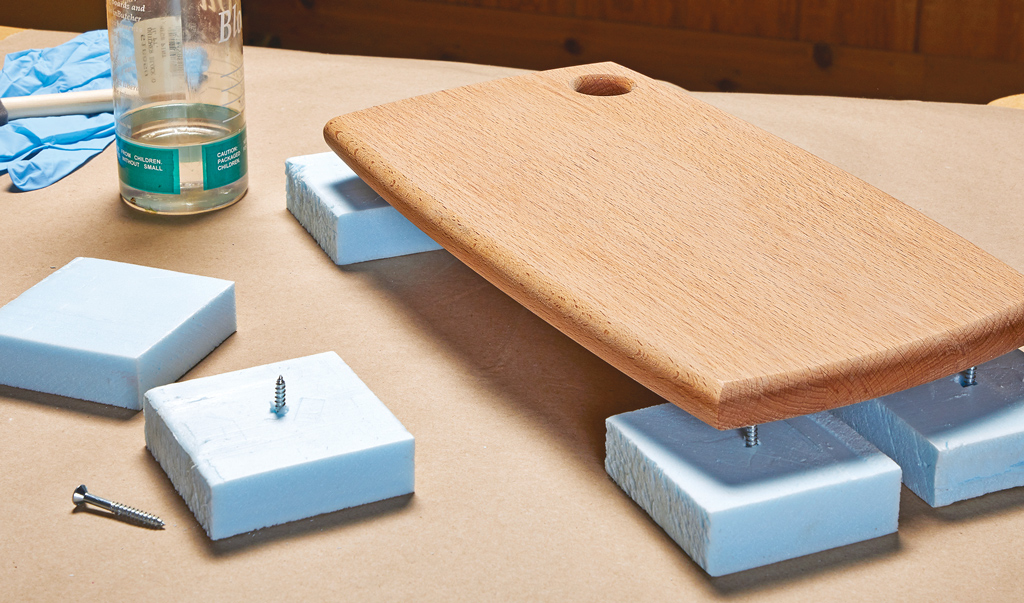
Painter’s points are useful when applying finish to a woodworking project. They raise the workpiece off the bench, providing clearance beneath it and minimizing contact with the freshly finished surface.
When Seth Deitrich of Port Hillard, Massachusetts, needed a few painter’s points, he made his own from scrap polystyrene foam.
He cut the foam into small squares and drove a long screw through each one. The foam acts as a base, holding the screw upright while its tip provides a small contact point beneath the workpiece.
It's a quick way to make finishing supports from materials already in the shop.
Woodsmith Tip: Use enough supports to keep the workpiece stable, and test them on a scrap piece before placing them beneath a finished project. Avoid placing foam near heat or using it where finishing solvents could damage it. Follow the finish manufacturer's drying and recoating instructions.
Shop tip submitted by Seth Deitrich, Port Hillard, Massachusetts.
Simple Ideas for a More Convenient Woodshop
These four reader-submitted tips show how small changes can simplify familiar tasks. Marking carbide cutter edges helps you keep track of their use, masking tape takes the guesswork out of power strip mounting, apron magnets keep small accessories handy, and scrap foam becomes a set of inexpensive painter’s points.
Each idea is easy to adapt to your own tools and workshop.


