


How to Add Storage & Dust Collection to a Drill Press Table
A woodworking drill press table is a great shop upgrade, especially when it includes an adjustable fence, T-track, and a replaceable insert. But there's one more improvement that can make your drill press even more useful: a built-in storage drawer with an integrated dust collection system.
In this final installment of our woodworking drill press table build series, Woodsmith designer John Doyle adds a compact plywood cabinet beneath the table. It provides convenient storage for drill bits, sanding drums, replacement inserts, and a chuck key. Better yet, a hidden dust collection chamber connects to a shop vacuum to help control dust during sanding operations.
The cabinet also raises the work surface slightly, providing additional clearance for the drill press table's height-adjustment crank.
Build your own: Get the complete Woodworking Drill Press Table Plans, including step-by-step instructions and detailed drawings.
Building a Storage Cabinet for Your Drill Press Table
The storage cabinet is a simple plywood box that fits between the drill press's original cast-iron table and the shop-made work surface.
Rather than relying on butt joints, the cabinet uses tongue-and-dado joinery. This approach creates strong, accurately aligned joints while keeping construction straightforward.
The first step is to cut a 1/4"-wide groove along the bottom of the cabinet sides and back. A dado blade at the table saw makes quick work of these cuts.
Next, rabbets are cut along the back edges of the sides to accept the back panel. A dado in each side holds the internal partition, which separates the drawer compartment from the dust collection area.
Finally, tongues are cut on three edges of the bottom panel to fit the matching grooves.
With the joinery complete, the pieces fit together to form a sturdy cabinet that supports the drill press table above.
Separating Storage from Dust Collection
One of the smartest features of this design is the internal partition and top panel.
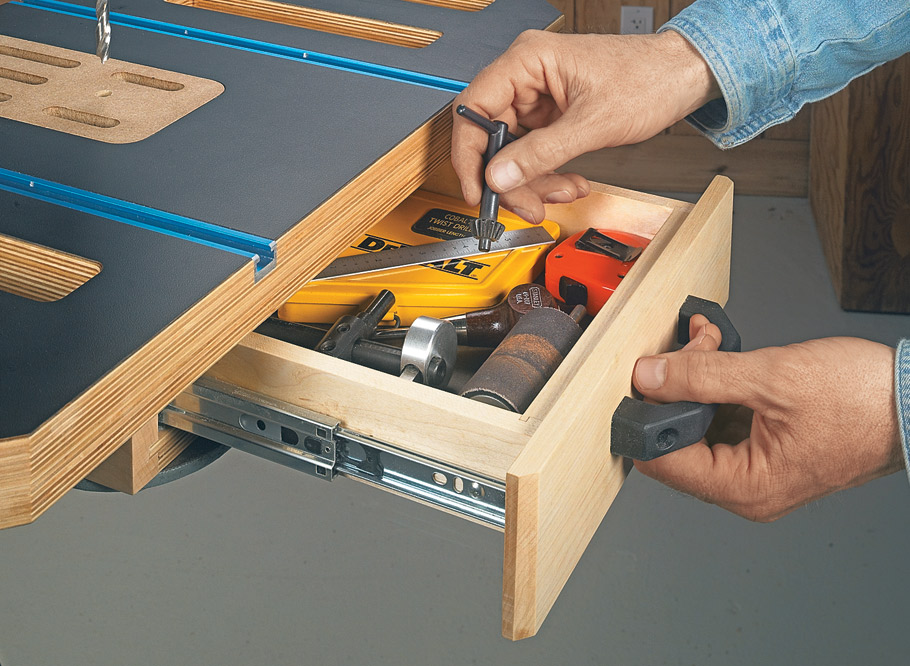
The front compartment houses the storage drawer, while the rear section forms part of the dust collection system. The top panel keeps dust and chips from falling into the drawer.
This arrangement allows the cabinet to perform two different jobs without sacrificing storage space.
Building the Drill Press Storage Drawer
The drawer uses the same basic construction approach as the cabinet, but with smaller joinery.
An 1/8"-wide, flat-bottom groove is cut along the inside lower edges of the drawer parts to hold the bottom panel. Additional grooves and rabbets create the tongue-and-dado joints that connect the drawer sides, front, and back.
A flat-tooth ripping blade makes it easy to cut these narrow grooves at the table saw.
One important tip is to clearly mark each drawer part before cutting the joinery. The front and back receive different cuts than the sides, and it's easy to mix them up.
Once the joinery is complete, the drawer assembles around an 1/8"-thick bottom panel.
Drawer slides provide smooth operation, while a false front and simple black pull complete the assembly.

The finished drawer keeps frequently used drill press accessories close at hand instead of scattered around the shop.
How to Mount the Storage Cabinet to a Drill Press
Most drill presses have slots in their cast-iron tables for attaching accessories. These provide a convenient way to secure the new cabinet.
Before drilling any mounting holes, position the assembled cabinet on the drill press table and mark the slot locations on the bottom.
Drill pilot holes at the mounting points, then counterbore the opposite face to accommodate T-nuts. The T-nuts allow bolts to pass up through the cast-iron table and securely fasten the cabinet in place.

Check Your Drill Press Dimensions First
Not every drill press has the same size table.
The cabinet shown in the video was made slightly larger than the version in the plans to accommodate the drill press used in the Woodsmith shop.
Before cutting your parts, measure your drill press table and check the mounting slot locations. Adjusting the cabinet dimensions ahead of time makes installation much easier.
Adding Hidden Dust Collection to the Drill Press
Dust collection is especially useful when using a sanding drum in the drill press.
Instead of allowing sanding dust to collect across the table, this design uses a replaceable insert with an opening sized for the sanding drum.
As the drum operates, dust can fall through the insert into a shallow collection chamber beneath the work surface. From there, a channel directs the dust toward an exhaust port at the back of the cabinet.
A shop vacuum connects to the port to draw dust away from the work area.
A Replaceable Insert Makes the System More Versatile
The drill press table already includes a replaceable center insert. For ordinary drilling, a solid insert provides support beneath the workpiece and helps reduce tearout.
When using a sanding drum, simply swap it for an insert with an appropriately sized opening.
This allows the sanding drum to extend slightly below the table surface while providing a path for dust to enter the collection chamber.
The result is a versatile drill press table that handles both drilling and sanding operations.
Assembling and Finishing the Storage Cabinet
With the joinery cut and the mounting hardware installed, the cabinet is ready for glue-up.
Apply a thin, even coat of wood glue to the mating surfaces. The tongue-and-dado joints help align the pieces, so only a few clamps are needed to hold the assembly together while the glue dries.
Once the cabinet is assembled, install the drawer slides and drawer. Then attach the top panel that separates the storage compartment from the dust collection chamber.
The completed cabinet is fastened beneath the shop-made drill press table before the entire assembly is mounted on the drill press.
Protecting the Plywood Edges
The table and fence already have durable plastic laminate surfaces, so they don't require an additional finish.
However, applying a few coats of wipe-on polyurethane to the exposed plywood edges and cabinet surfaces adds protection and makes them easier to keep clean.
It's a simple finishing step that helps this shop-made accessory hold up to years of regular use.
A Drill Press Table That's Built to Do More
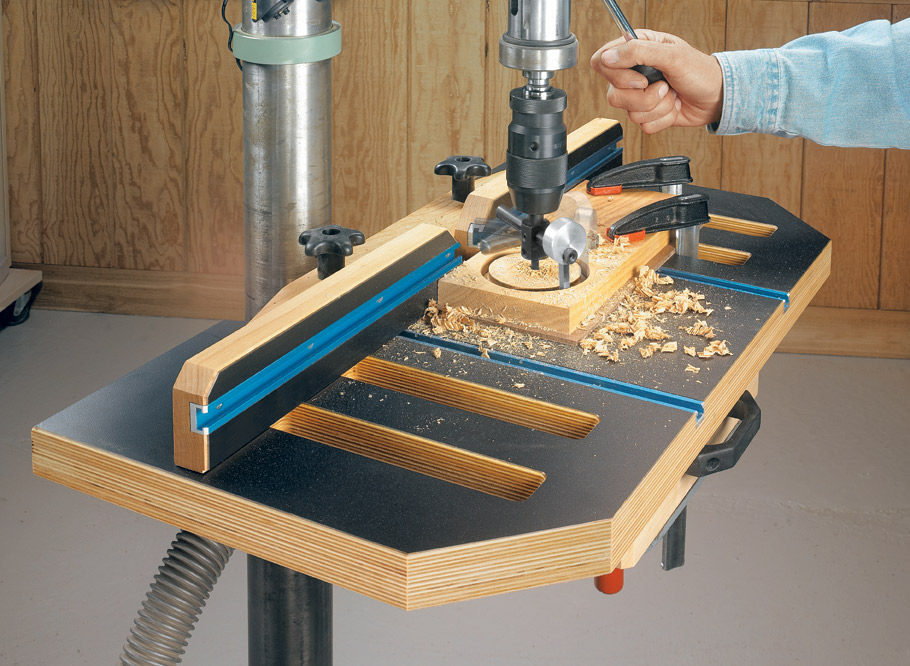
With the storage drawer and dust collection system installed, this drill press table is complete.
The wide laminated work surface provides support for larger workpieces. T-track and clamping slots make it easy to secure material, while the adjustable fence improves accuracy and repeatability.
Now, the built-in drawer keeps essential accessories organized, and the hidden dust collection system makes sanding operations more convenient.
It's a practical upgrade that transforms an ordinary drill press into a more versatile woodworking workstation.
Ready to build your own? Download the complete Woodworking Drill Press Table Plans from WoodsmithPlans.com.
Watch the Complete Woodworking Drill Press Table Build Series
Follow the entire four-part video series to see how the table, fence, and storage cabinet come together.
- Part 1: Woodworking Drill Press Table Overview — Explore the features that make this drill press table a versatile woodworking upgrade.
- Part 2: Building the Main Table — Build the laminated work surface with clamping slots, T-track, and replaceable inserts.
- Part 3: Making the Adjustable Fence — Add a split fence with T-track, adjustable positioning, and dust relief.
- Part 4: Adding Storage & Dust Collection — Complete the project with a storage drawer and hidden vacuum connection. (Video embedded above.)
- Part 5: Making Custom Dust Collection Inserts — Upgrade your drill press table with three easy-to-make replaceable inserts that improve airflow, capture dust and chips, and add versatility for drilling and drum sanding.
For more ideas on improving your woodworking shop, explore our collection of woodworking plans, jigs, and shop accessories.


