


How to Build a Woodworking Drill Press Table: The Tabletop
A standard drill press table works fine for metalworking, but woodworking calls for a larger, more versatile surface. In Part 2 of our DIY woodworking drill press table series, we're building the tabletop — the foundation for a drill press upgrade that makes drilling, clamping, and positioning workpieces easier and more accurate.
This shop-built table features a durable laminate surface, built-in clamp slots, aluminum T-track, and a replaceable center insert. Together, these features turn an ordinary drill press into a more capable woodworking tool.
Building a Strong, Stable Drill Press Tabletop
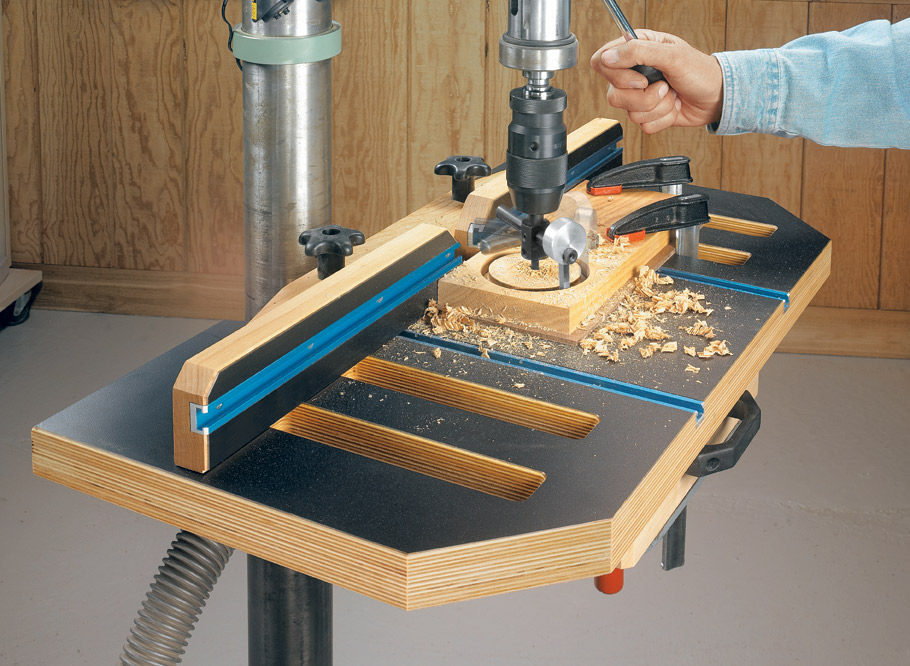
The foundation of this drill press table is made from two layers of 3/4" Baltic birch plywood. Laminating the plywood creates a thick, rigid worksurface that provides plenty of support for drilling operations.
Baltic birch is an excellent choice for shop fixtures because of its stable construction and multiple thin plies. It also provides a clean, attractive edge that looks great on a finished shop project.
The oversized tabletop gives you more room to support boards, panels, and other workpieces than the small cast-iron table that comes standard on most drill presses.
Adding a Durable Laminate Worksurface
One of the best upgrades to this table is the black plastic laminate applied to the top.
While laminate isn't absolutely necessary, it creates a smooth, durable surface that stands up to years of woodworking use. It also makes it easier to slide and position workpieces without wearing down the plywood underneath.
The black surface contrasts nicely with the exposed Baltic birch edges and aluminum T-track, giving the table a clean, professional appearance.
Cutting Clamp Slots for Better Workholding
One of the most frustrating parts of using a standard drill press table is finding a convenient way to secure your workpiece.
This tabletop solves that problem with several elongated slots and cutouts that accommodate standard F-style bar clamps.
The slots let you position clamps around the table, making it easier to secure workpieces of different shapes and sizes. Whether you're drilling a series of holes or working with an awkwardly shaped part, these openings provide convenient clamping access.
The cutouts may look complicated, but they're straightforward to make. Rough out the openings with a jigsaw, then use templates, straightedges, and a flush-trim router bit to clean up the edges.
Installing T-Track for Drill Press Accessories
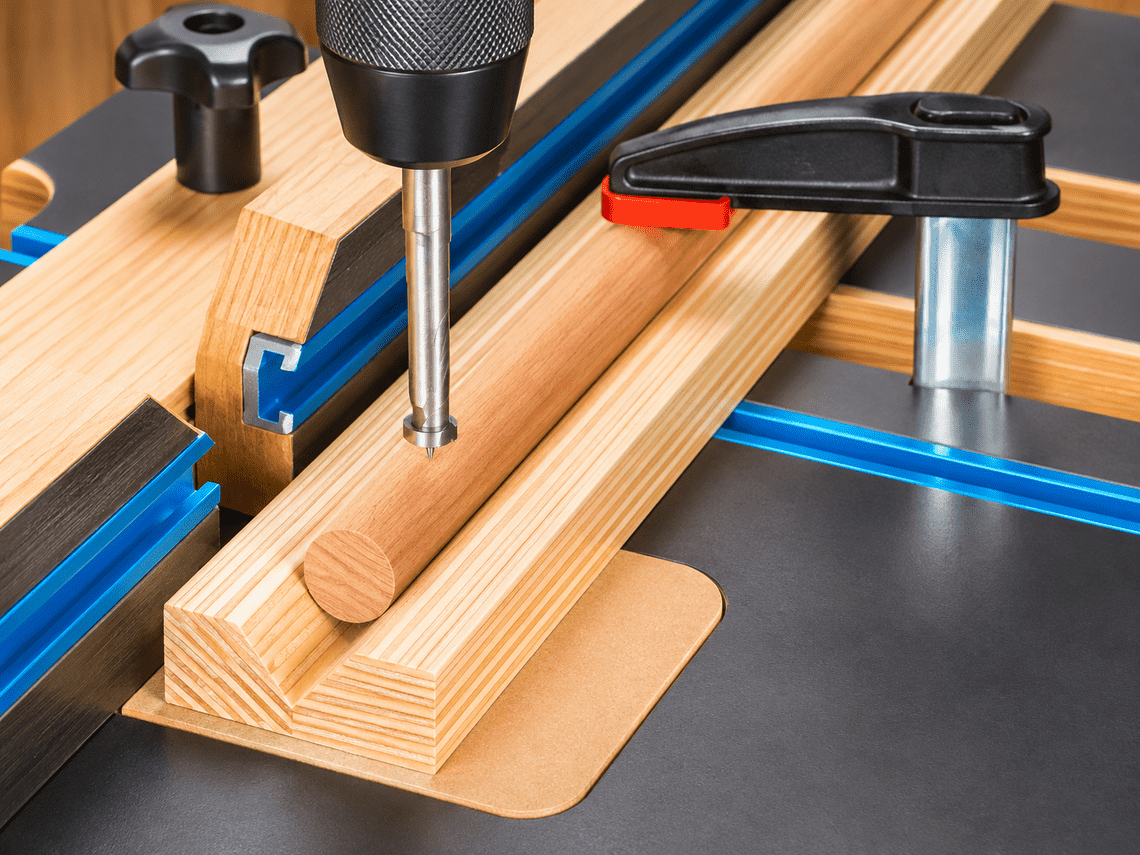
Along with the clamp slots, the tabletop includes aluminum T-track for mounting accessories.
The T-track provides an adjustable mounting system for hold-downs and other fixtures. It's also used to attach the drill press fence, which we'll build in the next installment.
This combination of T-track and clamp slots makes the tabletop especially versatile. Instead of relying on a single workholding method, you can choose the arrangement that works best for each drilling operation.
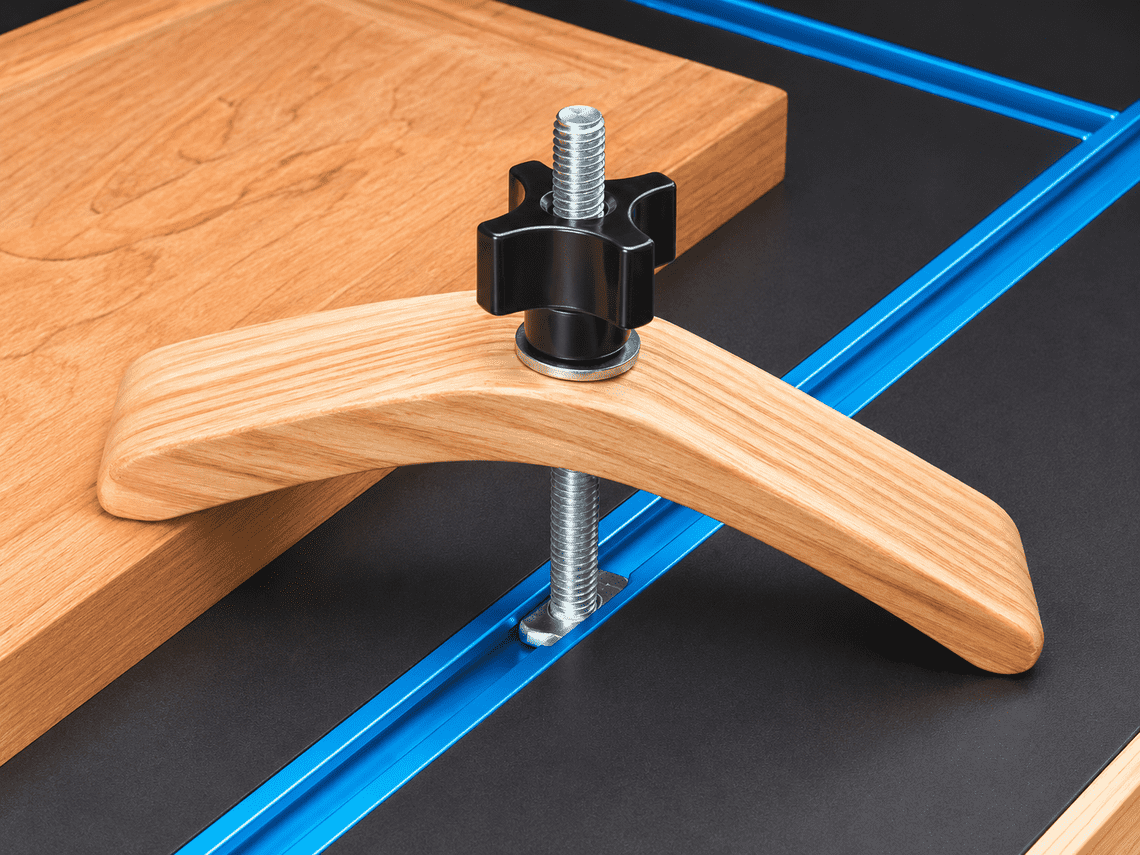
For more ways to hold workpieces securely, check out our guide to shop-made hold-downs.
Making a Replaceable Drill Press Table Insert
Every woodworking drill press table benefits from a replaceable center insert.
When drilling through a workpiece, the insert provides support directly underneath the hole. This helps reduce tearout as the drill bit exits the bottom of the board.
Of course, repeated drilling eventually leaves the insert full of holes. Rather than replacing the entire tabletop, you can simply remove the worn insert and install a fresh one.
The removable design also allows you to make specialized inserts for different operations. Later in this project, we'll use an insert with an opening for dust collection when sanding with a drum sander.

What's Next? Building the Drill Press Fence
With the tabletop complete, the next step is to add an adjustable fence.
The fence will include a durable laminate face, T-track for accessories, and a split design that provides clearance for the drill press chuck when drilling close to the fence.
It also incorporates a dust collection opening that works with the drawer box and dust collection system added later in the project.
Watch the complete build series:
- Part 1: Woodworking Drill Press Table Overview — Explore the features that make this drill press table a versatile woodworking upgrade.
- Part 2: Building the Main Table — Build the laminated work surface with clamping slots, T-track, and replaceable inserts. (Video embedded above.)
- Part 3: Making the Adjustable Fence — Add a split fence with T-track, adjustable positioning, and dust relief.
- Part 4: Adding Storage & Dust Collection — Complete the project with a storage drawer and hidden vacuum connection.
- Part 5: Making Custom Dust Collection Inserts — Upgrade your drill press table with three easy-to-make replaceable inserts that improve airflow, capture dust and chips, and add versatility for drilling and drum sanding.
Get the Woodworking Drill Press Table Plans
A larger worksurface, convenient clamping options, and a replaceable insert make this shop-built drill press table a worthwhile upgrade for almost any woodworking shop.
And with the addition of an adjustable fence, storage drawer, and integrated dust collection, you'll have a drill press setup that's ready to handle a wide range of woodworking tasks.
Ready to build your own? Get the complete step-by-step plans, including detailed drawings and construction instructions.
GET THE COMPLETE STEP-BY-STEP PLANS → Build a Woodworking Drill Press Table Plans


