DIY CNC Wood Signs: Two Custom Workshop Sign Projects
A custom wood sign is a great way to add personality to your workshop while putting your CNC router to work. Whether you're just getting started with CNC woodworking or already have plenty of experience, these two DIY CNC shop signs offer a fun combination of machine-cut parts, traditional woodworking, and hand-carved details.
Both signs feature raised lettering, decorative frames, and tree designs that can be customized to suit your shop. And with downloadable DXF files available, you can spend more time making the signs your own.
Two CNC Workshop Sign Designs
These shop signs share similar construction methods but offer two distinct looks.
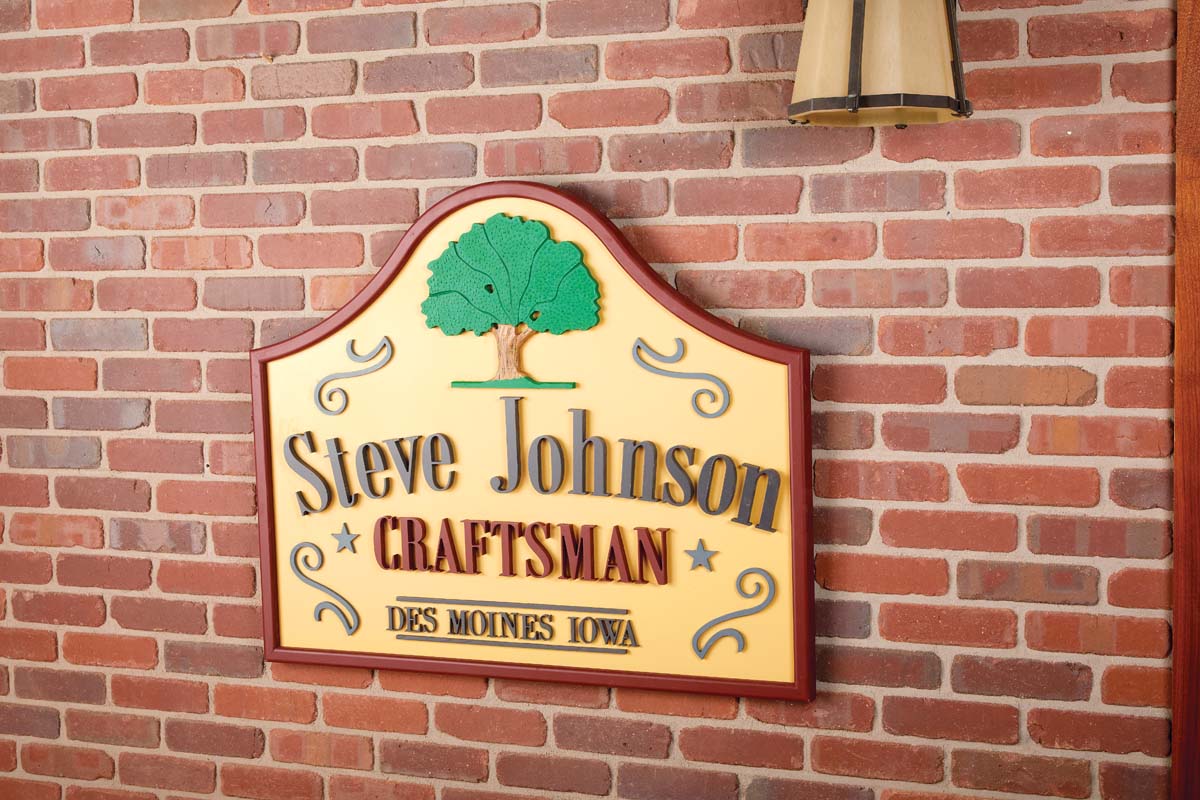
The first is a traditional arched-top sign with a decorative frame, curved lettering, and a carved oak tree. Its formal appearance makes it a great choice for a classic woodworking shop.
The second features a rectangular frame, bold lettering, and a pine tree that extends beyond the frame. This design has a more contemporary, casual appearance.
Both projects use CNC-cut elements along with conventional woodworking techniques, giving you plenty of opportunities to personalize the finished sign.
Choosing Materials for CNC Signs
Medium-density fiberboard (MDF) is an excellent material for indoor CNC signs. Its smooth, consistent surface makes it easy to machine, and it provides a good foundation for painted finishes.
Both Woodsmith sign designs use MDF in several thicknesses for the back panels, frames, letters, and decorative details.
Basswood or birch can also be used if you prefer working with solid wood.
One advantage of MDF is that you can create a variety of decorative profiles without worrying about grain direction. However, the edges require some additional preparation before painting.
Build a Traditional Arched-Top CNC Sign
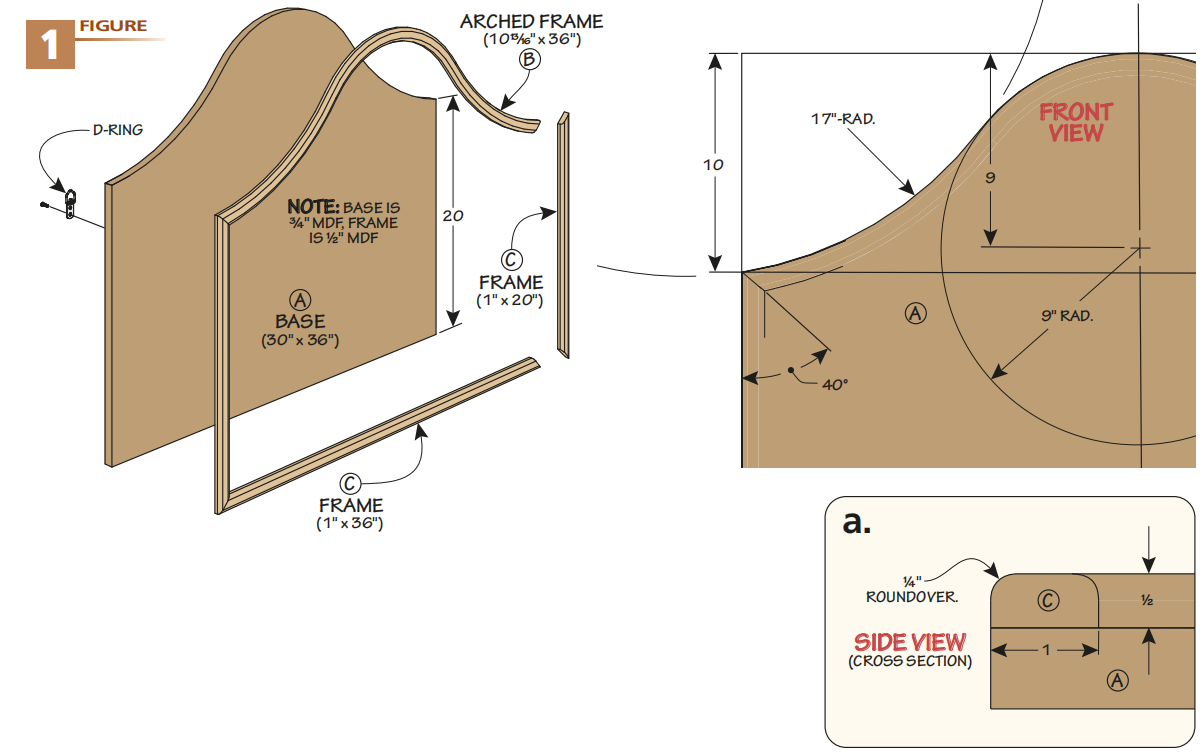
The arched-top sign starts with a shaped MDF back panel. After laying out the arch, cut the profile and sand the edges smooth.
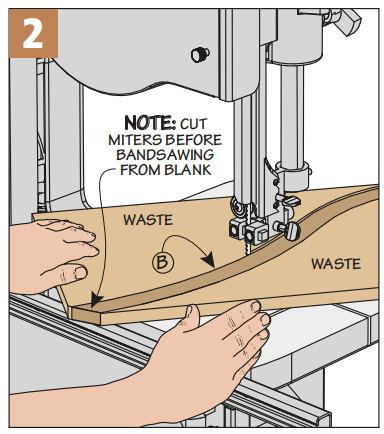
A decorative frame surrounds the panel. The straight sides and bottom are joined with miters, while the curved top frame is shaped to match the arch.
The lettering uses a traditional Bodoni-style font. Rather than arranging the letters in straight lines, the main lettering follows the curve of the sign.
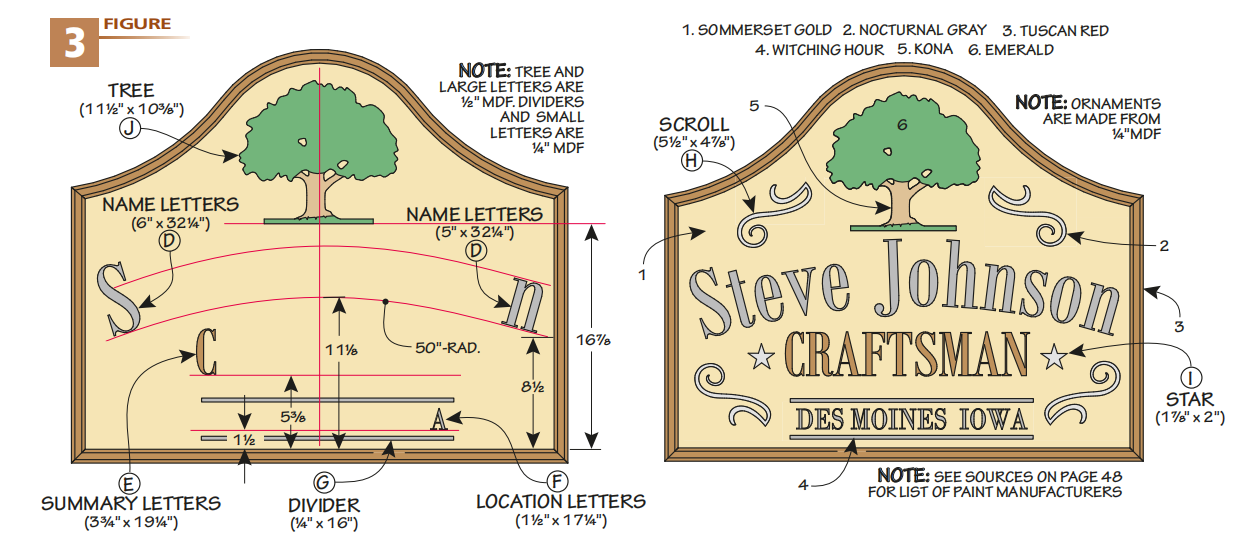
Start with the largest word and establish a curved baseline. Position the letters so they radiate outward from the center of the arch, keeping each letter perpendicular to the baseline.
Before attaching anything permanently, step back and check the spacing. Small adjustments can make a noticeable difference in the finished appearance.
Add a Hand-Carved Oak Tree
The oak tree provides the decorative centerpiece for this sign.
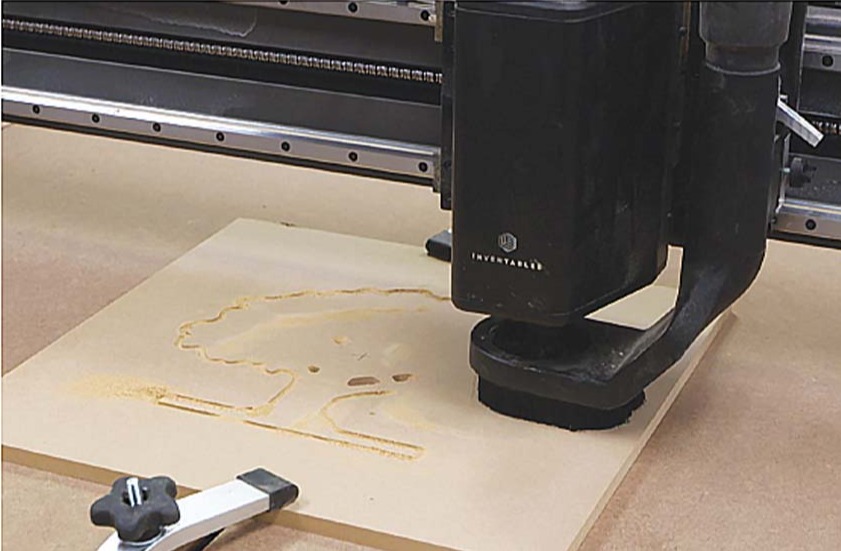
Use the CNC router to cut the tree's outline, then add dimension with traditional carving tools. A V-parting tool defines the branches, while a gouge creates texture in the foliage.
A utility knife can be used to add bark-like details to the trunk.
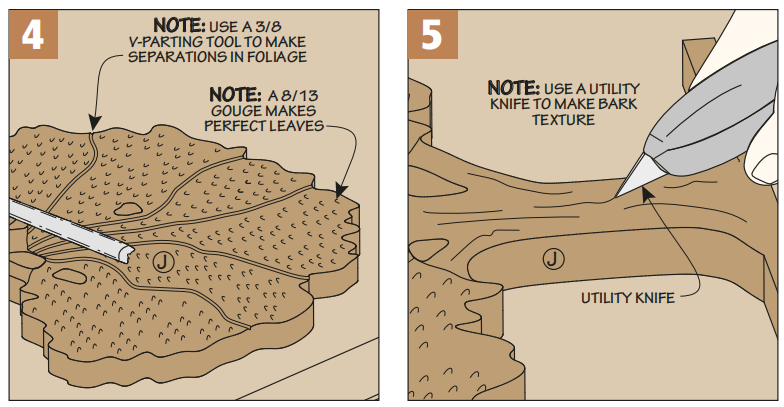
Combining CNC routing with hand carving creates a more detailed, dimensional appearance than a simple flat cutout.
Make a Rectangular CNC Workshop Sign
For a different look, the rectangular sign features a simpler frame, bold lettering, and a decorative pine tree.
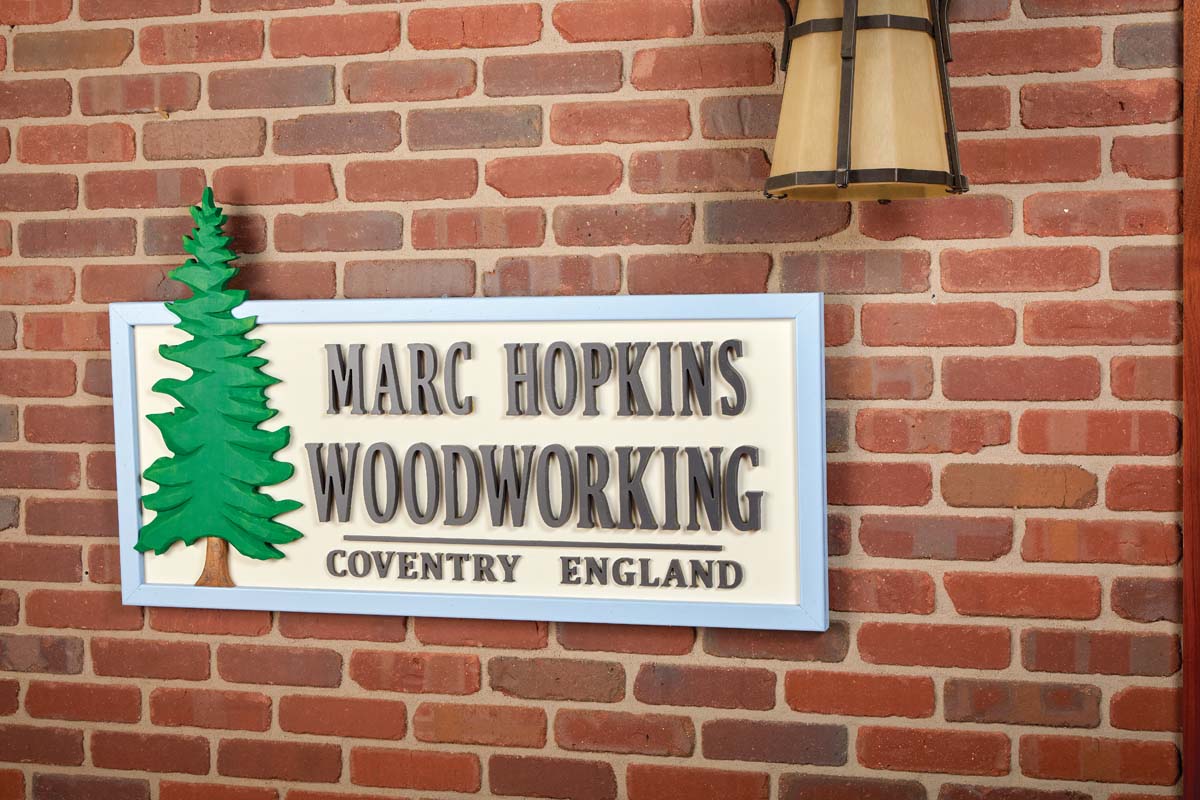
Like the arched sign, this version begins with an MDF back panel and a surrounding frame. The frame features a narrower roundover profile, giving the finished sign a cleaner appearance.
The lettering uses a Cambria-style font with uppercase letters. The words are arranged in horizontal rows, making this design easier to customize with a shop name or location.
Lay Out the Lettering
When arranging the lettering, start with the longest word. This establishes the spacing and helps determine the placement of the remaining lines.

Once the letters are positioned, lightly trace their outlines on the painted back panel.
The letters can then be glued in place. Small pin nails may also be used carefully, but avoid splitting narrow or delicate letters.
Create the Decorative Pine Tree
The pine tree is one of the most distinctive elements of this sign.
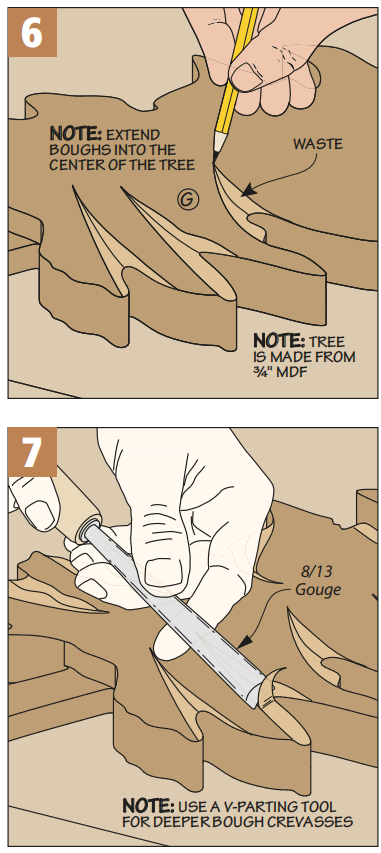
After cutting the outline with the CNC router, use a pencil to lay out the branches. A V-parting tool and carving gouges create the contours and texture that give the tree its dimensional appearance.
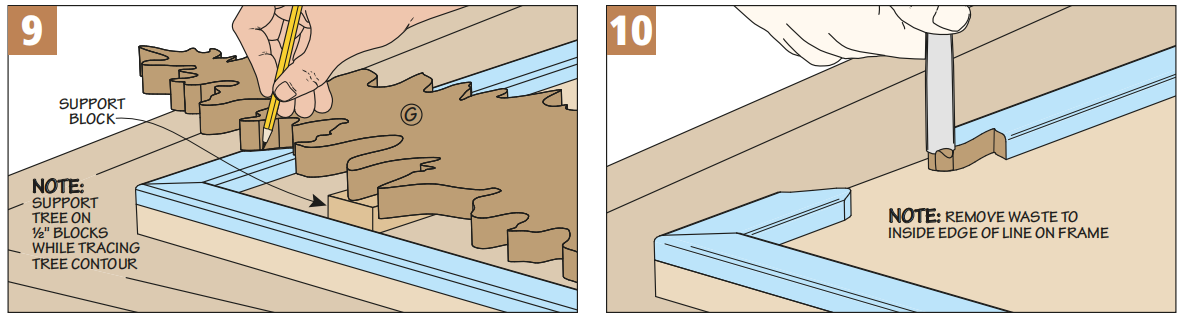
The tree extends beyond the top and left edges of the frame. To achieve this effect, position the tree over the assembled sign and trace the areas where the branches overlap the frame.
Carefully remove the waste from the frame with carving tools, then glue the tree into position.
Painting MDF for Professional-Looking CNC Signs
A painted finish is a great way to make CNC-cut lettering and decorative elements stand out.
MDF has smooth faces that accept paint well, but its exposed edges are more porous and can absorb finish unevenly.
For a smoother result, seal the cut edges with lightweight spackling compound or drywall joint compound. Once dry, sand the edges smooth and apply primer before the final paint.
It's often easier to prime and paint the sign components before assembly. This reduces the amount of masking required around the raised lettering and decorative frame.
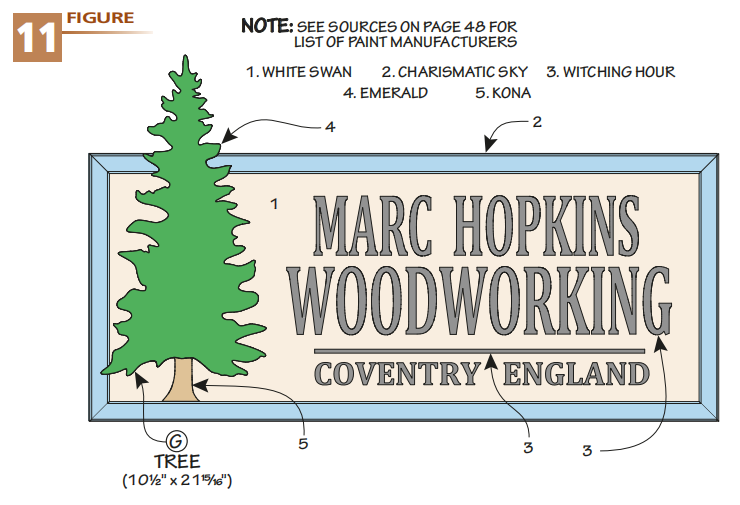
For the best visual impact, choose contrasting colors for the back panel and lettering. Strong contrast makes the words easier to read and helps the carved details stand out.
Featured Project Plans: CNC Shop Signs
Give your workshop a personal touch with a custom CNC sign. Choose from two distinctive designs featuring raised lettering and decorative details. It's a fun way to develop your CNC skills, and the downloadable plans include DXF files to help you get started.
GET THE COMPLETE STEP-BY-STEP PLANS → Build a CNC Shop Sign
Download CNC Sign DXF Files
Ready to create a personalized sign for your own workshop?
These two CNC shop sign projects provide plenty of opportunities to experiment with lettering, colors, decorative elements, and hand-carved details.
Downloadable DXF files for the sign components are included with the plans from WoodsmithPlans.com.
Whether you prefer the traditional arched design or the contemporary rectangular sign, both projects are a great way to combine CNC woodworking with your own creativity.