


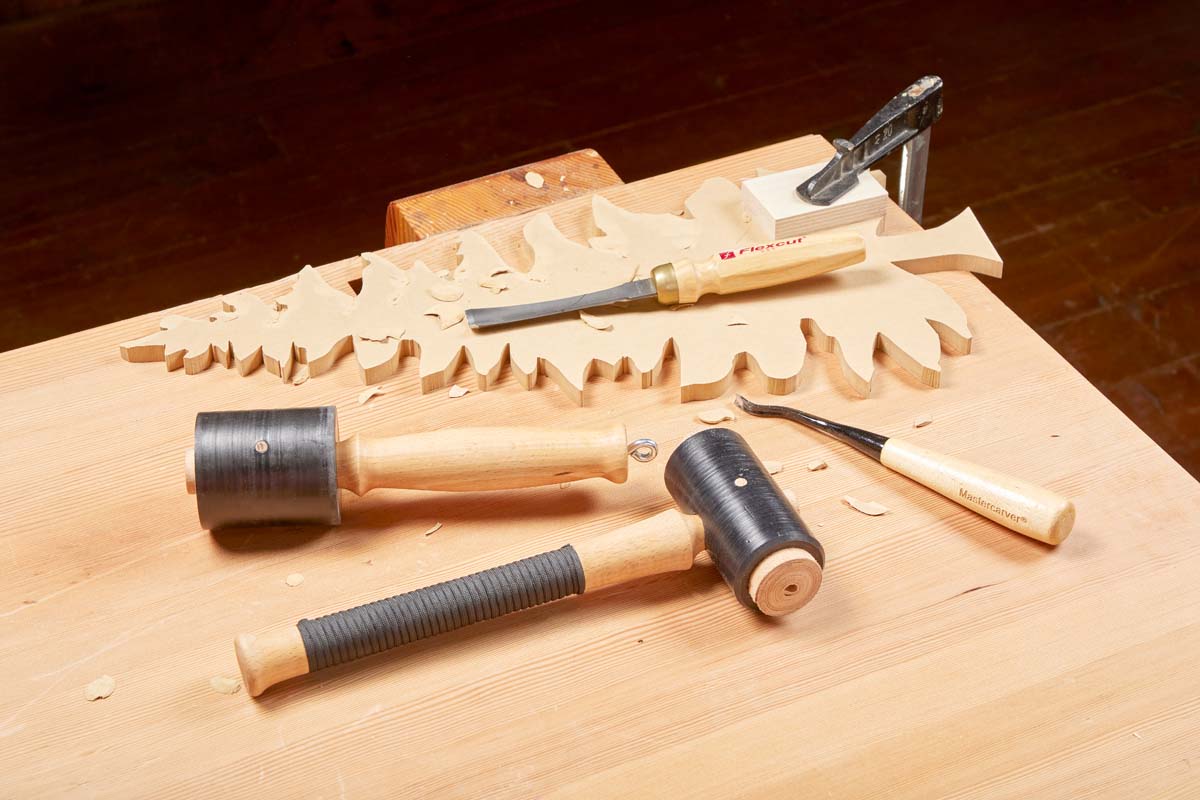
Turned Mallets: Build a Joiner's Mallet and Carver's Mallet
Every woodworking shop needs a good mallet. Whether you're assembling furniture, driving dowels, or chopping a mortise with a chisel, a mallet is one of those tools you'll reach for time and again.
Most mallets are relatively easy to make. But these two projects take a different approach. Rather than building mallets that can be easily replaced, we're focusing on durability — making tools that will stand up to years of use.
We'll start with a heavy-duty joiner's mallet designed for furniture assembly and other tasks that require a solid blow. Then we'll make a smaller carver's mallet that offers greater control when working with chisels and carving gouges.
Both mallets combine turned beech handles with heads made from ultra-high molecular weight (UHMW) plastic. Internal weights add heft, while epoxy and hardwood dowel pins secure the assemblies.
Why Use UHMW Plastic for Mallet Heads?
The most unusual feature of these mallets is their black plastic heads.
They're made from ultra-high molecular weight polyethylene (UHMW), a material known for its exceptional wear and impact resistance.
Despite its toughness, UHMW isn't especially hard. That makes it a good choice for mallet heads because it can withstand repeated impacts while providing a relatively forgiving striking surface.
It's also surprisingly easy to turn on a wood lathe.
Turning the UHMW Heads
Start by mounting the UHMW blank between centers. Use a spindle roughing gouge to turn the square blank round.
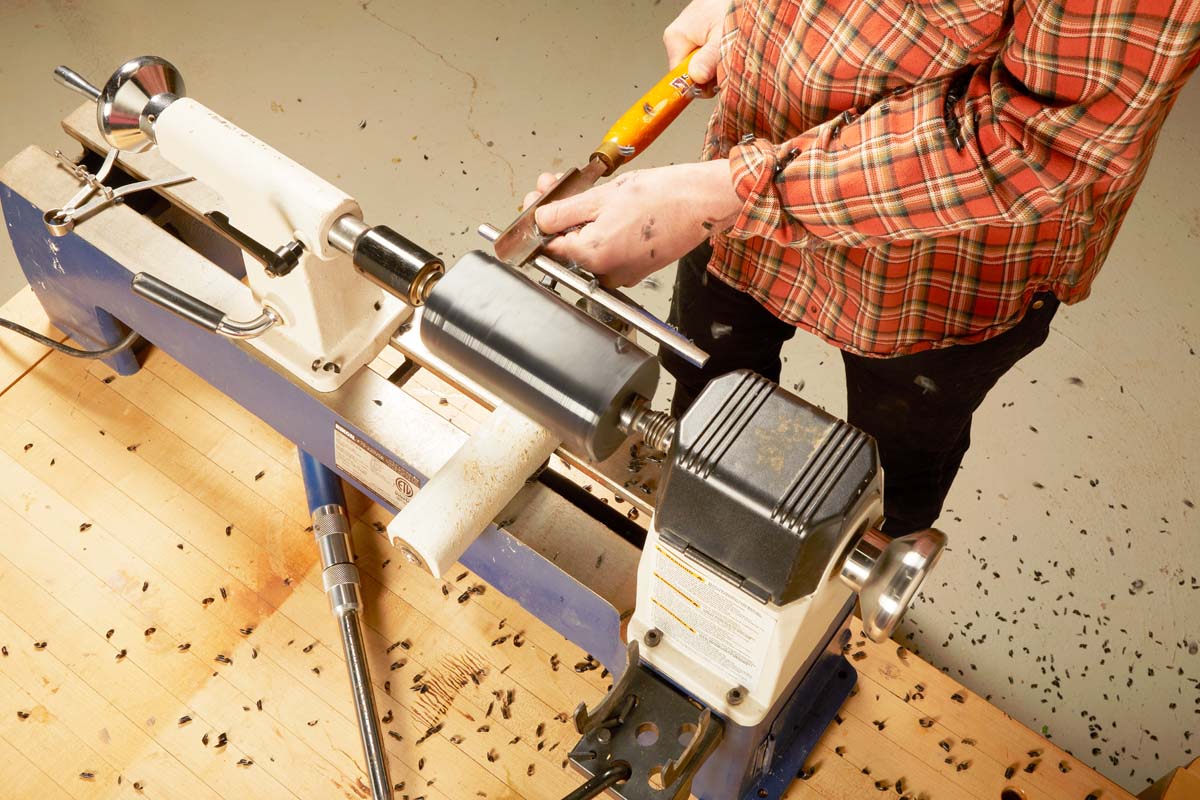
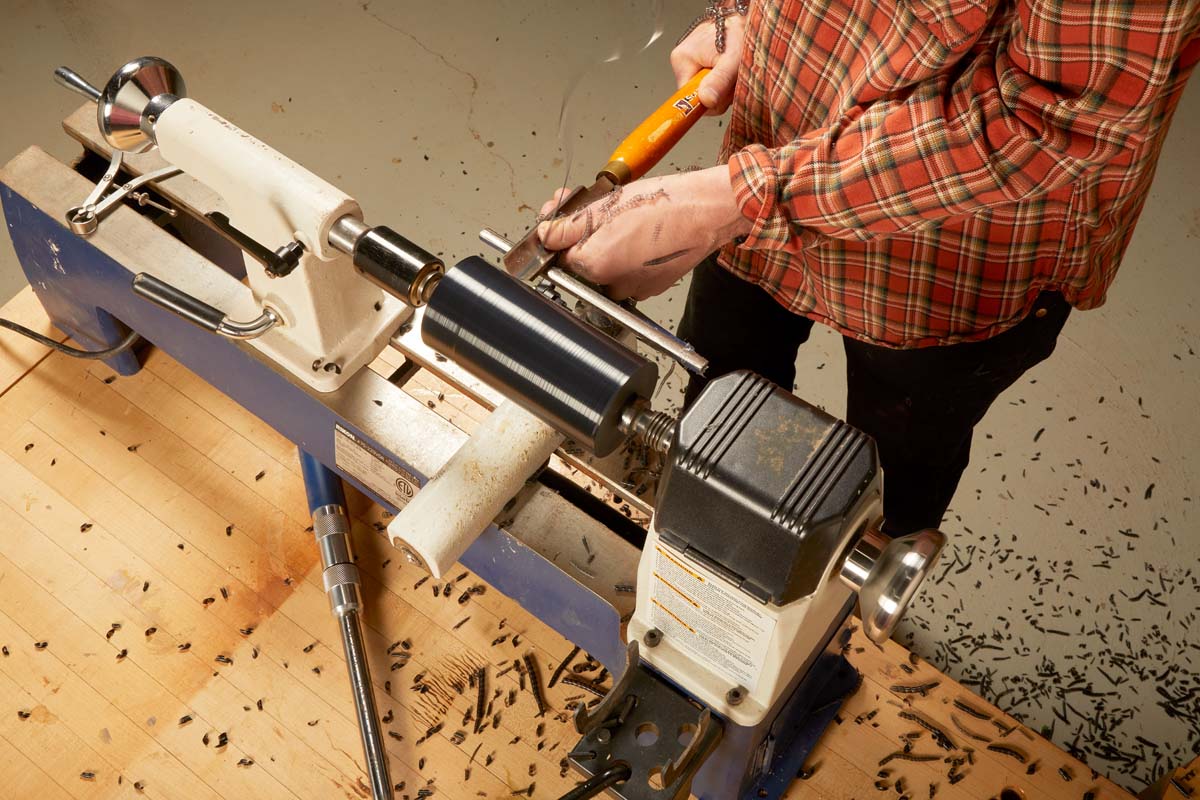
Standard woodturning tools work well with UHMW. A carbide turning tool or negative-rake scraper can help produce a smoother finished surface.
Avoid sanding the plastic. Its low-friction properties cause it to clog sandpaper quickly.
Drilling the Heads
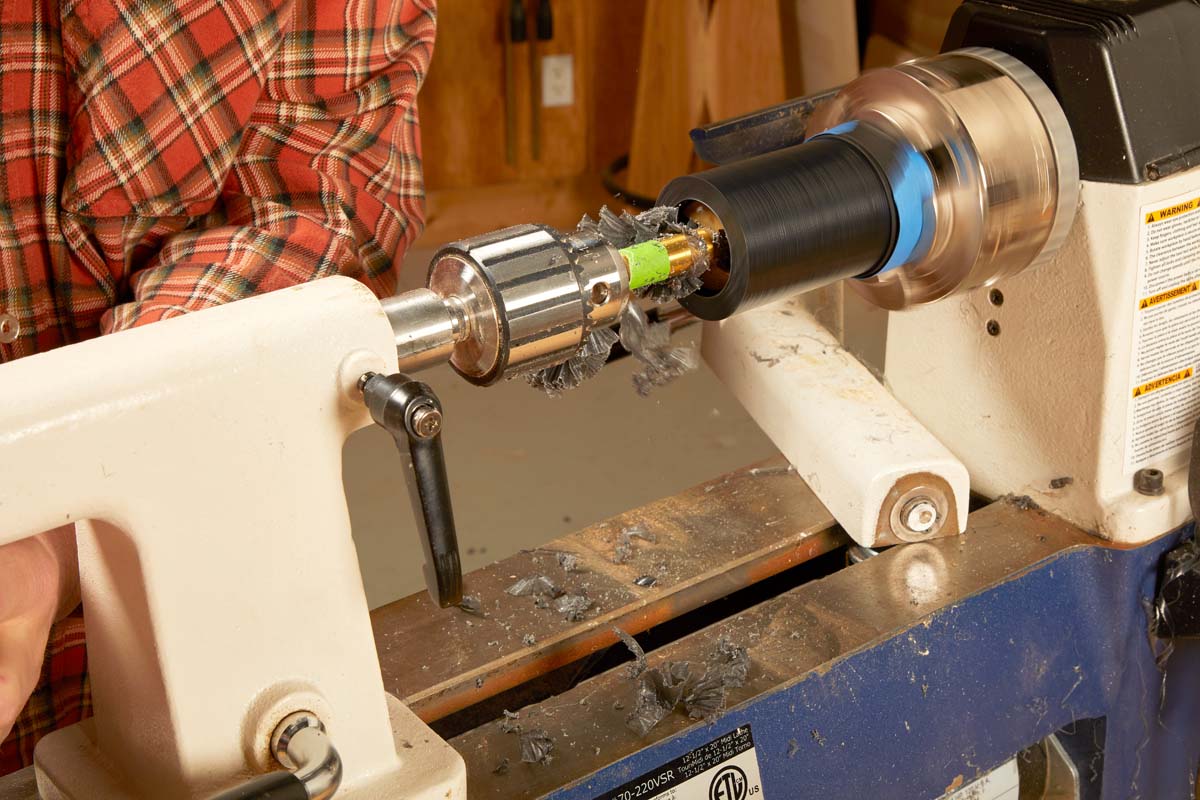
Both mallet heads need centered holes, although their construction differs.
The joiner's mallet requires recesses in both striking faces to hold the internal weights and leather inserts. It also needs a hole for the handle.
The carver's mallet uses a through hole that accepts its turned handle.
You can drill these holes at the lathe using a scroll chuck to hold the blank and a Jacob's chuck in the tailstock to guide a Forstner bit.
The dimensioned drawings for each mallet provide the required diameters and drilling depths.
Build the Heavy-Duty Joiner's Mallet
The joiner's mallet is designed for assembly work where a little extra force comes in handy.
Its weighted head and longer handle provide plenty of striking power, while the rolled leather faces help protect the workpiece.
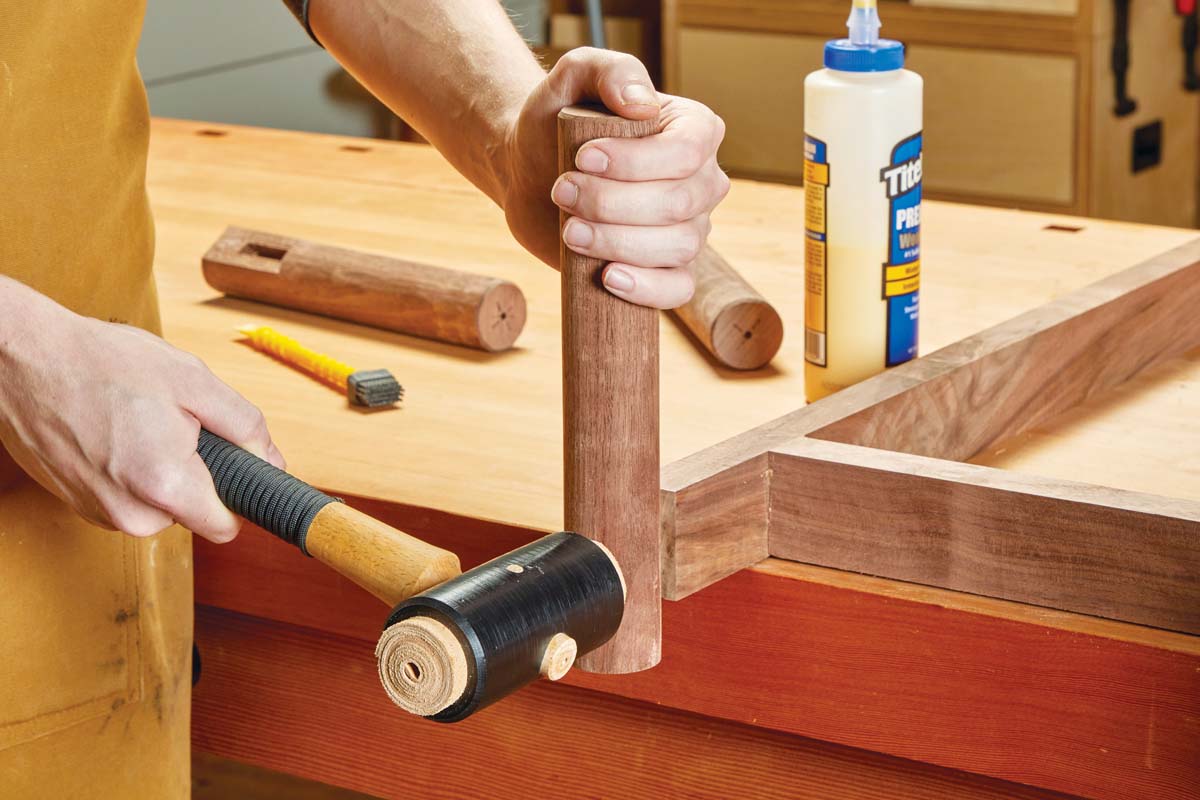
Unlike a traditional wooden mallet, this design uses a UHMW head with weighted recesses, a turned beech handle, and a paracord grip.
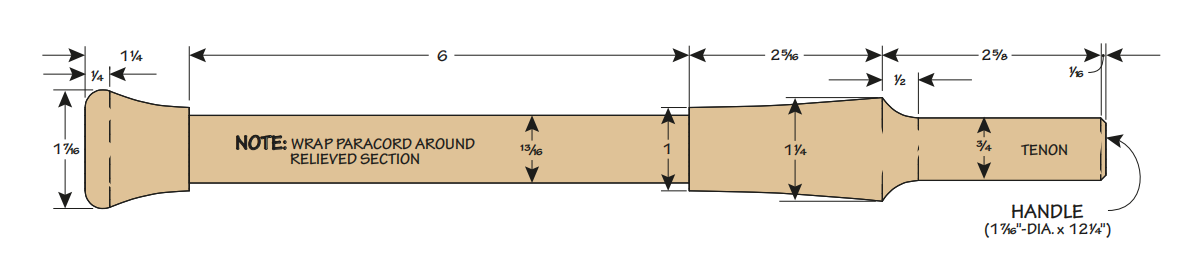
Turn the Beech Handle
Begin by mounting the handle blank on the lathe and turning it round.
With the blank cylindrical, mark the key diameters along its length using the dimensions shown in the drawing.
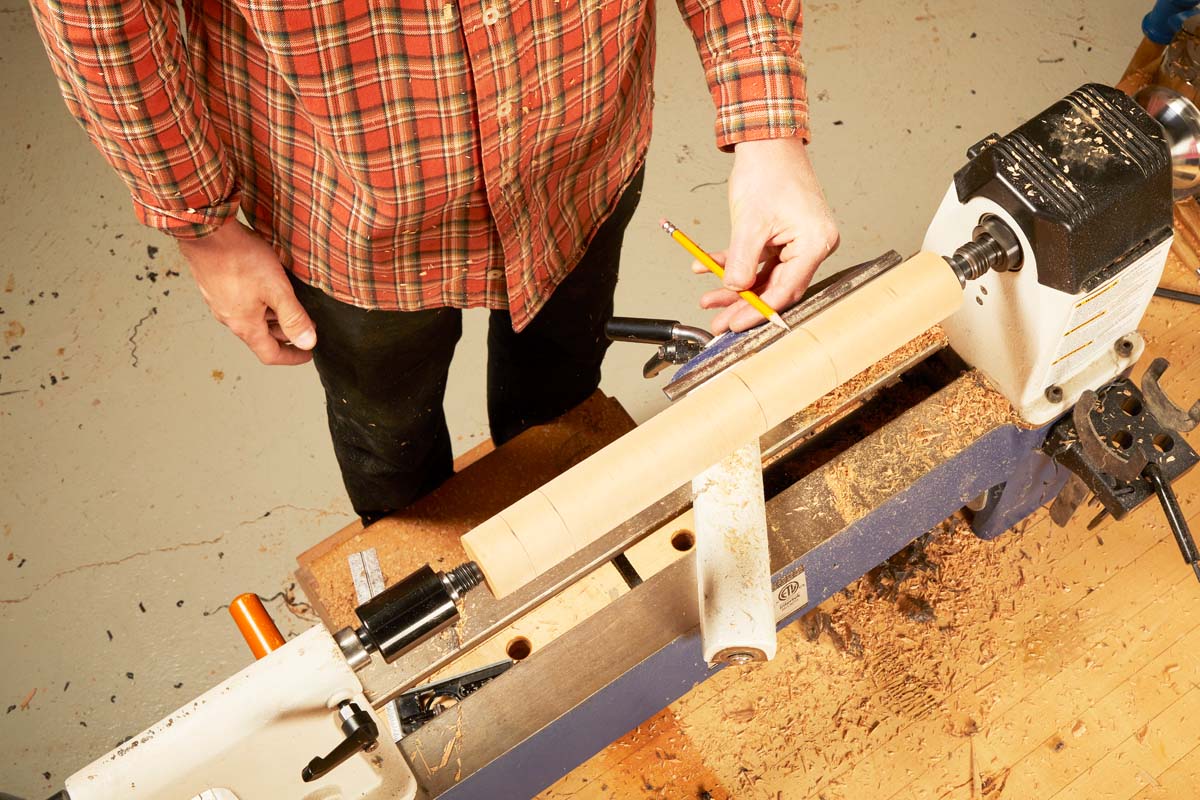
A parting tool and calipers make it easy to establish these diameters accurately.
Once the reference points are established, switch to a spindle gouge to shape the handle.
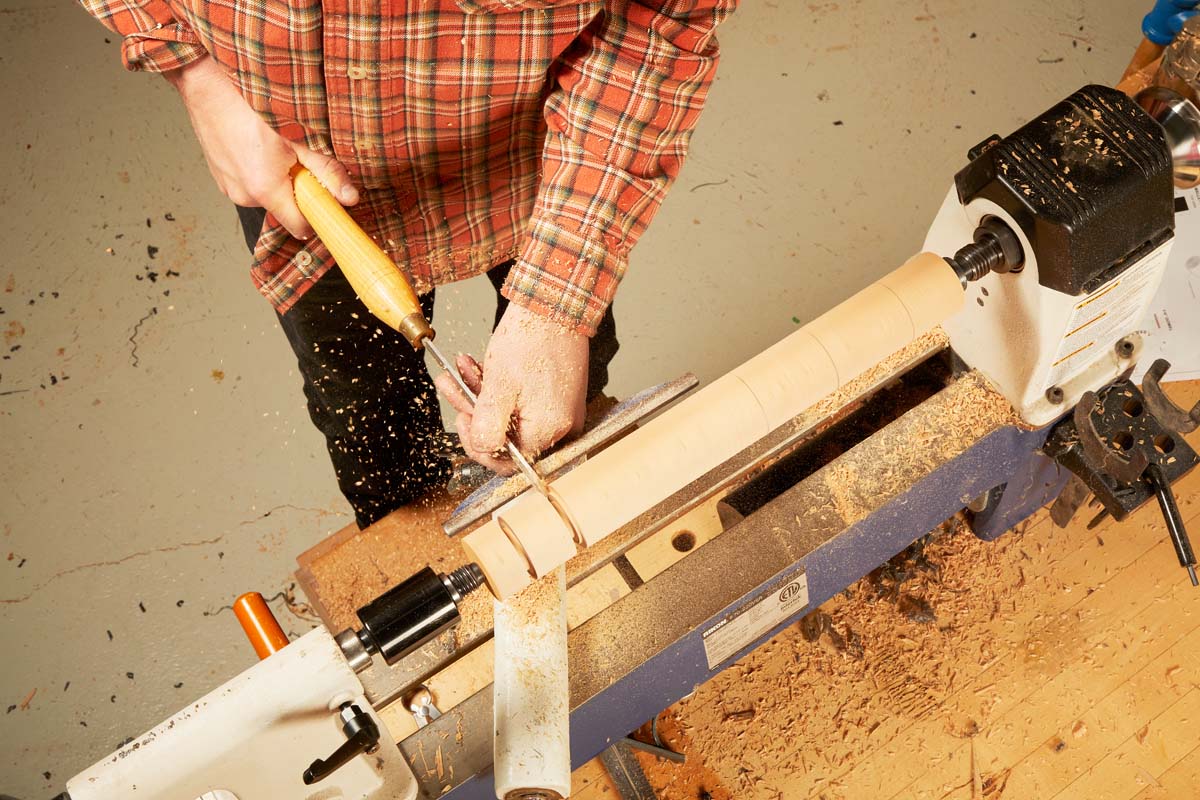
The handle includes a relieved section where the paracord grip will be wrapped.
A skew chisel works well for creating a smooth, straight surface in this area.
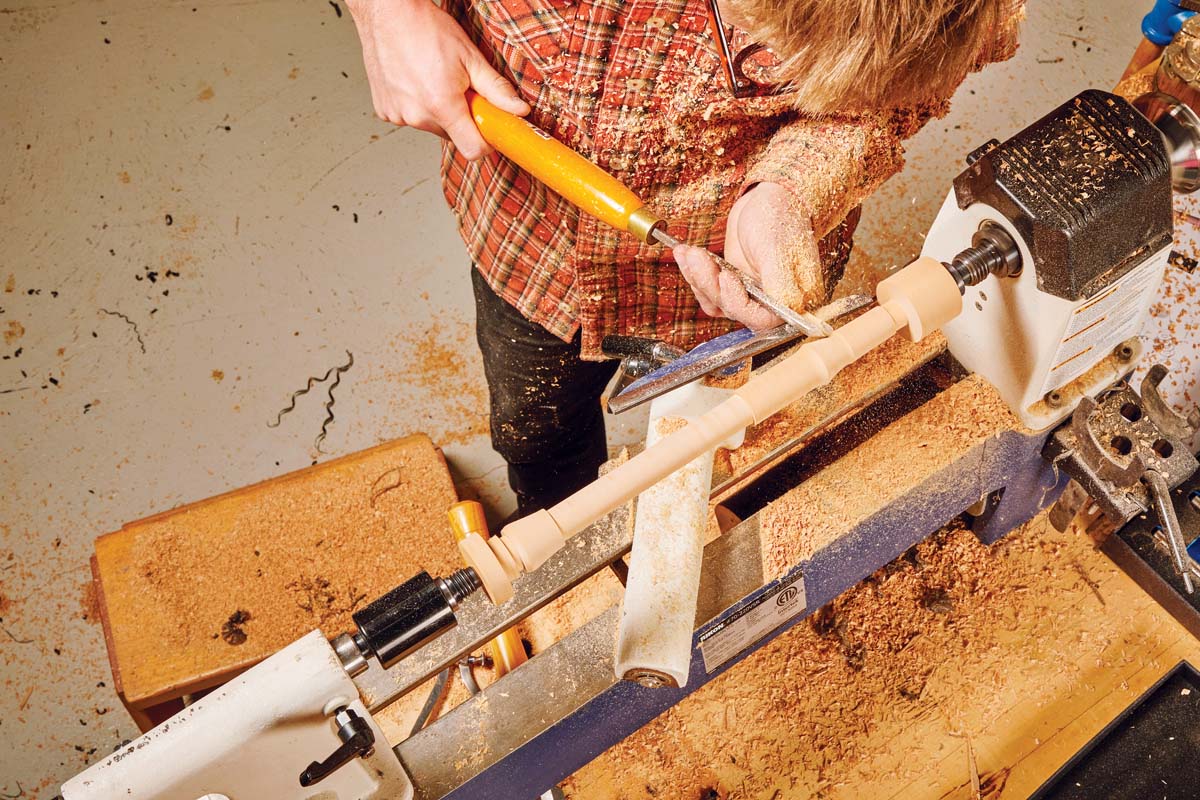
After completing the shaping, sand the wooden handle smooth and part it free from the waste.
Make the Rolled Leather Striking Faces
One of the most distinctive features of this mallet is its pair of leather striking faces.
Rather than using flat leather pads, the striking faces are made from tightly rolled strips of leather. The exposed edges of the leather create a firm but forgiving surface.
Start by cutting a strip of leather to the required width.
Because leather thickness varies, it's best to determine the strip's final length by fitting it directly into the recess in the mallet head.
Curl and fold the end of the strip, then roll the remaining leather tightly around it.
Test-fit the roll in the recess, mark the length, and trim the strip.
Once the leather is rolled to its final size, secure it temporarily with rubber bands.
Repeat the process for the second striking face.
Add Weight to the Mallet Head
The UHMW head is relatively light on its own, so internal weights provide the mass needed for a solid strike.
The original design uses washers and #4 lead shot, all held in place with epoxy.
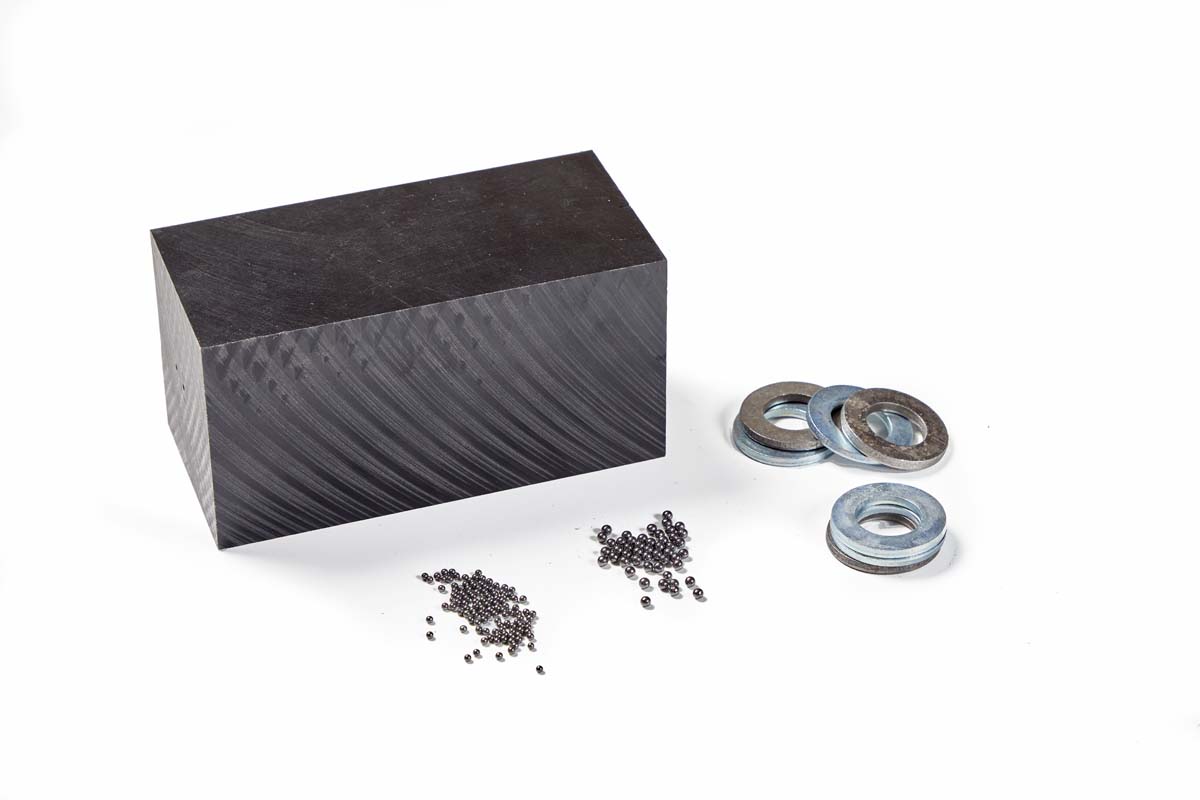
Begin with one side of the head.
Fit four washers into the recess, then fill the remaining space with shot. Pour epoxy into the recess to fill the gaps and secure the weights.
Next, apply epoxy to the end of one leather roll. Remove the rubber bands and press the roll into the recess.
Light clamping pressure helps ensure a secure bond.
Once the epoxy cures, repeat the process on the opposite striking face.
Shop Note: Lead shot should be handled carefully to avoid exposure. Keep it fully encapsulated in the cured assembly. Non-lead weights may also be considered, although changing the material can affect the finished weight and balance.
Attach the Head to the Handle
With both striking faces complete, the head can be mounted on the handle.
The connection uses a hardwood dowel pin that passes through the head and handle.
To ensure the holes align, support the head in a V-shaped cradle at the drill press.
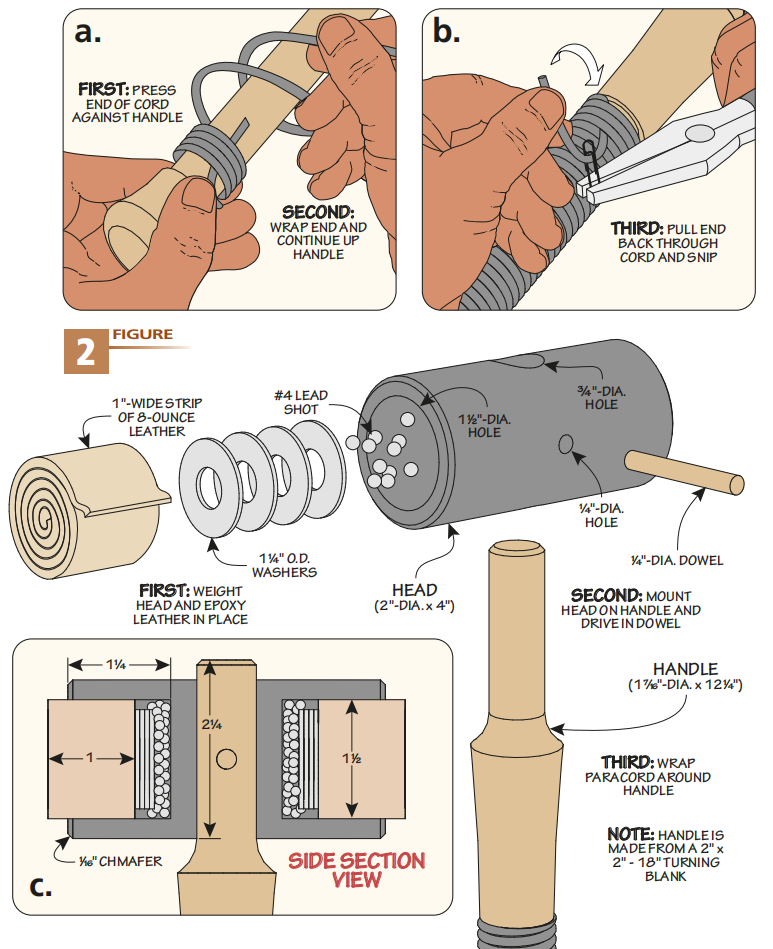
Drill the hole for the handle first, then fit the head onto the handle and drill through both pieces for the retaining pin.
Apply epoxy to the mating surfaces and the dowel pin, then assemble the mallet.
Allow the epoxy to cure before putting the tool to work.
Wrap the Handle with Paracord
The final step is adding a paracord grip.
Paracord provides a comfortable, durable surface that's easy to replace if it becomes worn.
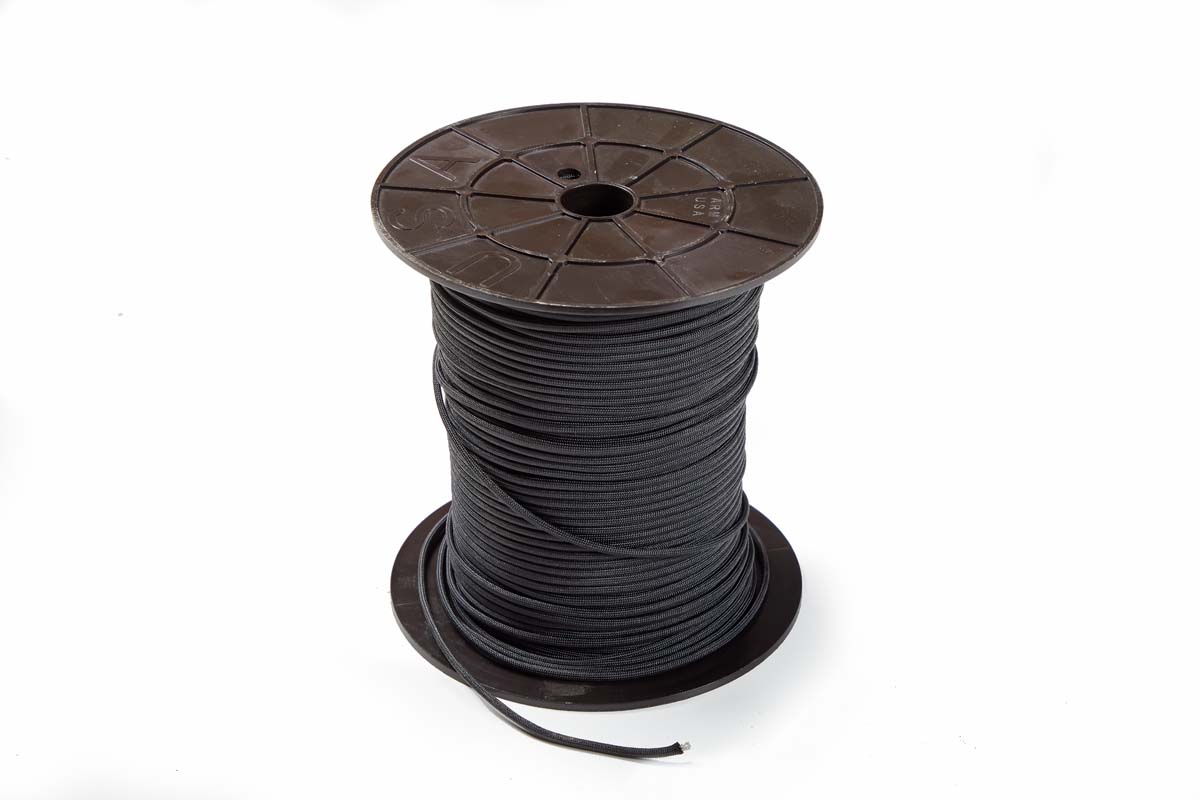
Start by unwinding a generous length of cord, but don't cut it to length just yet.
Hold the end against the handle and begin wrapping over it to lock it in place.
Continue winding the cord tightly around the relieved section, keeping each wrap snug against the previous one.
When you reach the top of the grip, cut the cord and tuck the end beneath the wrapping. A paper clip and pliers can help pull the cord through.
Trim the excess to finish the handle.
The finished joiner's mallet combines a weighted head, cushioned striking faces, and a comfortable grip in a tool that's ready for years of assembly work.
Build the Turned Carver's Mallet
With the joiner's mallet complete, the next project is a smaller carver's mallet.
This mallet is intended for more controlled striking tasks, particularly when using chisels and carving gouges.
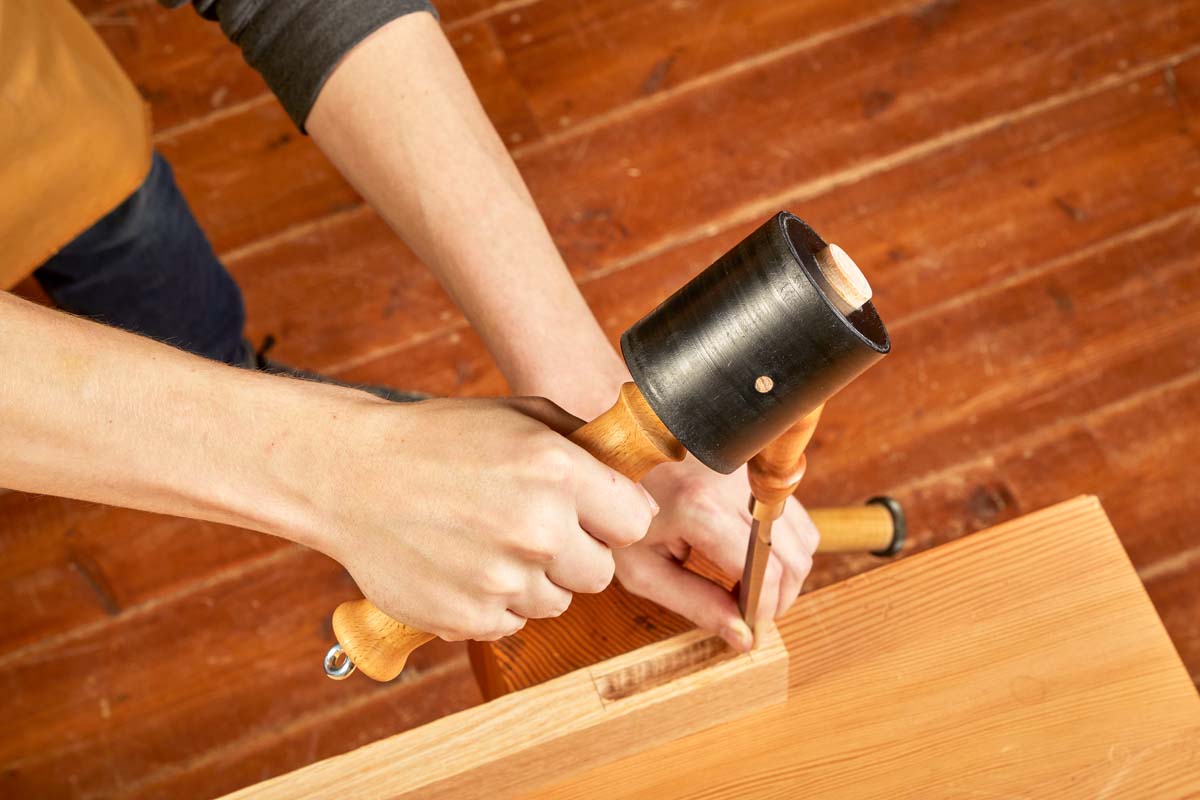
Its cylindrical head makes it easy to strike a tool from different directions without constantly adjusting the mallet's orientation.
And while it's smaller than the joiner's mallet, internal weighting gives it enough heft for effective chisel work.
Turn the Carver's Mallet Handle
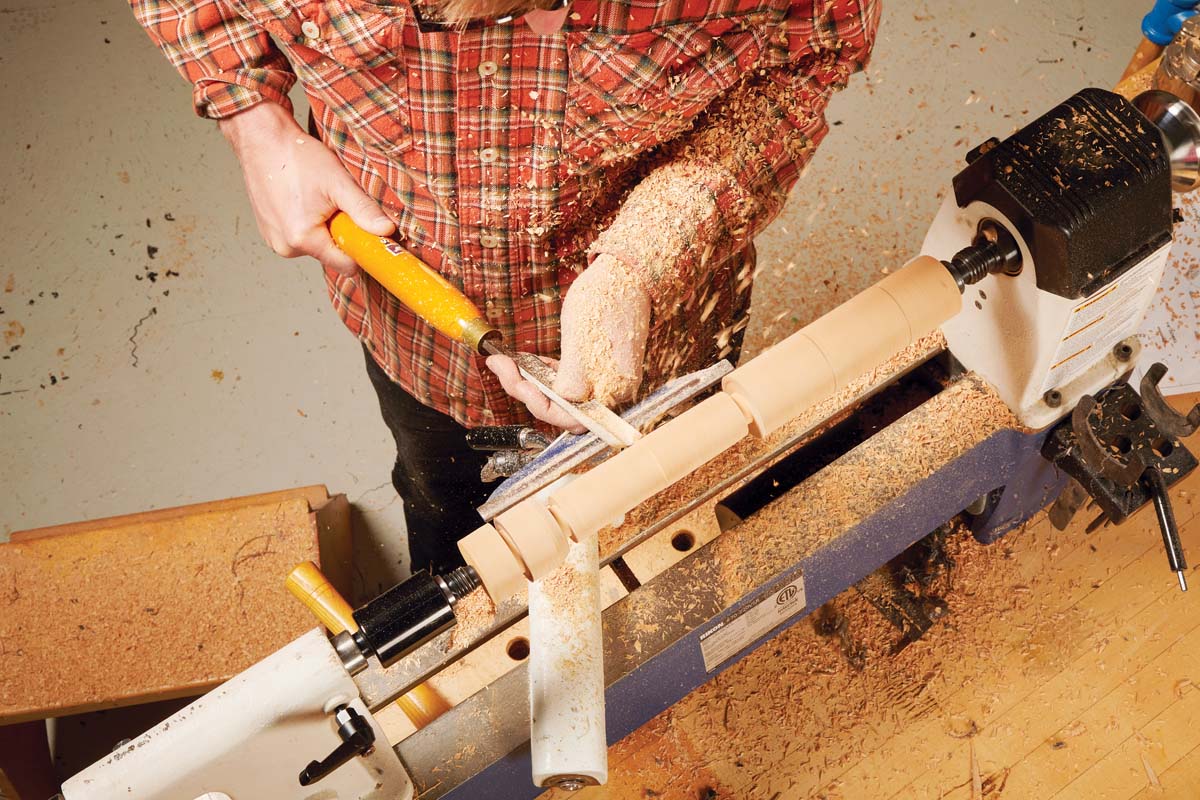
Start with a beech blank mounted between centers on the lathe.
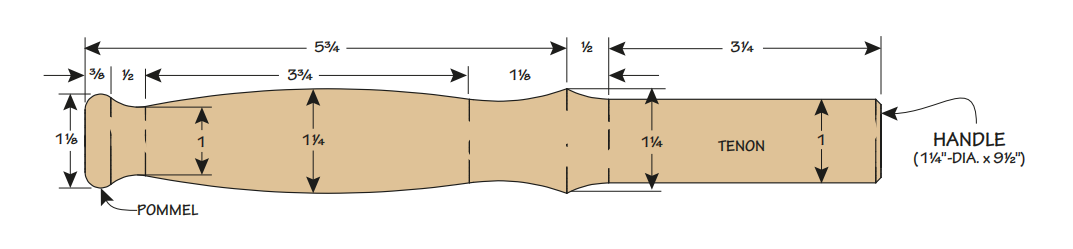
Turn the blank round, then mark the key diameters along the handle.
Use a parting tool and calipers to establish the diameters at the marked locations.
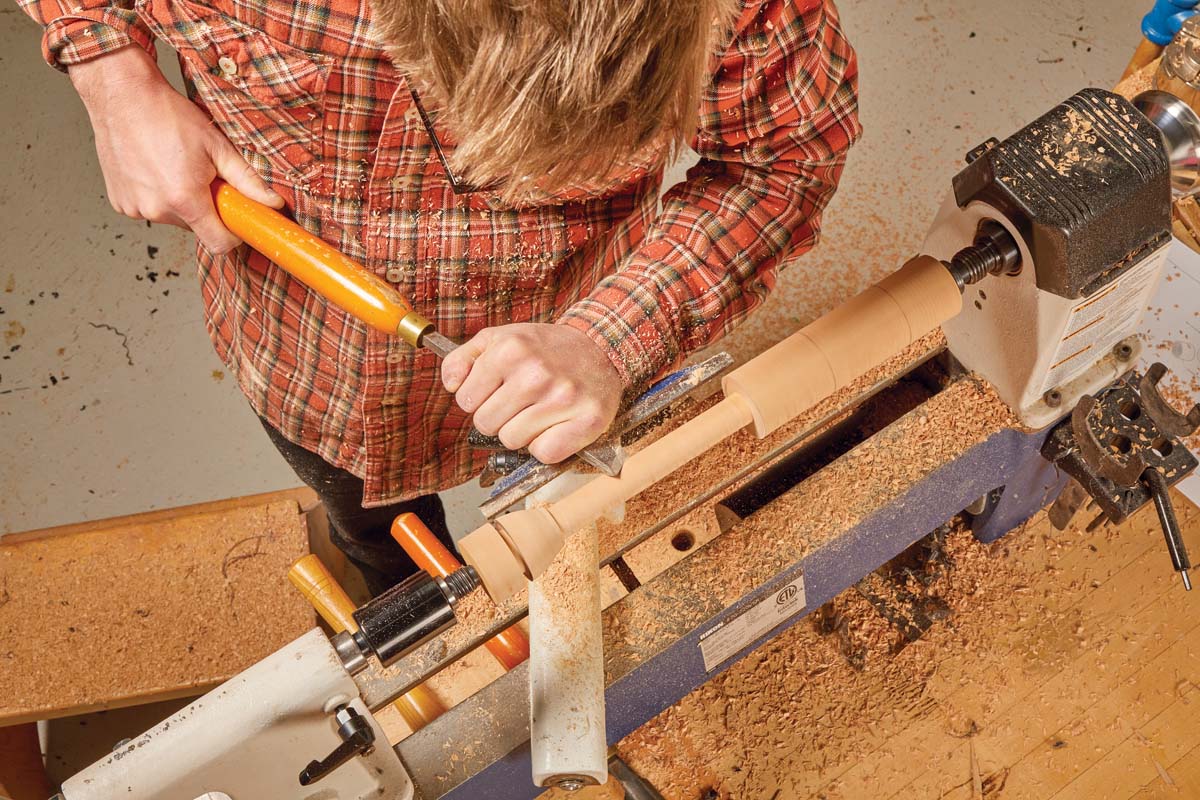
Once these reference points are established, use a spindle gouge to shape the handle.
Begin with the fuller middle section, shaping the curves toward the narrower areas above and below it.
Then shape the pommel and the section that fits into the mallet head.
The handle's rounded shape allows you to change your grip depending on the amount of force needed.
Holding the handle near the head provides more control for light taps. Moving your grip lower allows a longer, more powerful swing.
Drill the Handle for Internal Weight
Like the joiner's mallet, the carver's mallet uses internal weighting.
But rather than placing the weights in the head, this design holds them inside the handle.
Mount the handle in a scroll chuck and install a Forstner bit in the Jacob's chuck at the tailstock.
Drill the recess to the depth shown in the drawing.
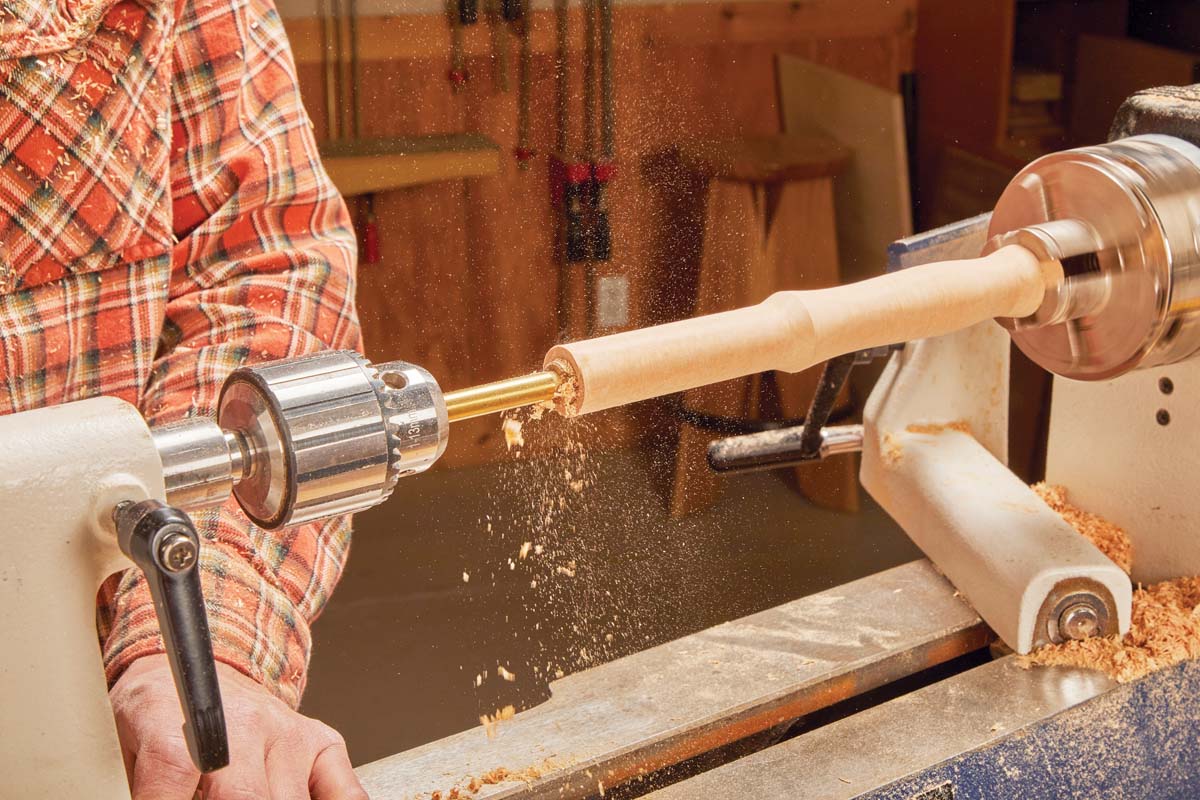
Because you're drilling into end grain, take your time and clear the chips frequently.
If the Forstner bit doesn't have enough reach, a longer twist bit can be used to complete the recess.
Once the drilling is complete, finish shaping the rounded pommel, sand the handle smooth, and part it free.
Assemble the Carver's Mallet
With the UHMW head and beech handle complete, you're ready for assembly.
Fit the head onto the handle and support the assembly in a V-shaped cradle at the drill press.
Drill through both pieces at the same time for the hardwood retaining pin.
This ensures the holes align correctly.
Separate the parts and apply epoxy to the mating surfaces and retaining pin.
Reassemble the mallet and drive the pin into place.
Next, fill the hollow section of the handle with the specified #8 lead shot.
Pour epoxy into the recess to secure the pellets, then install the dowel cap.
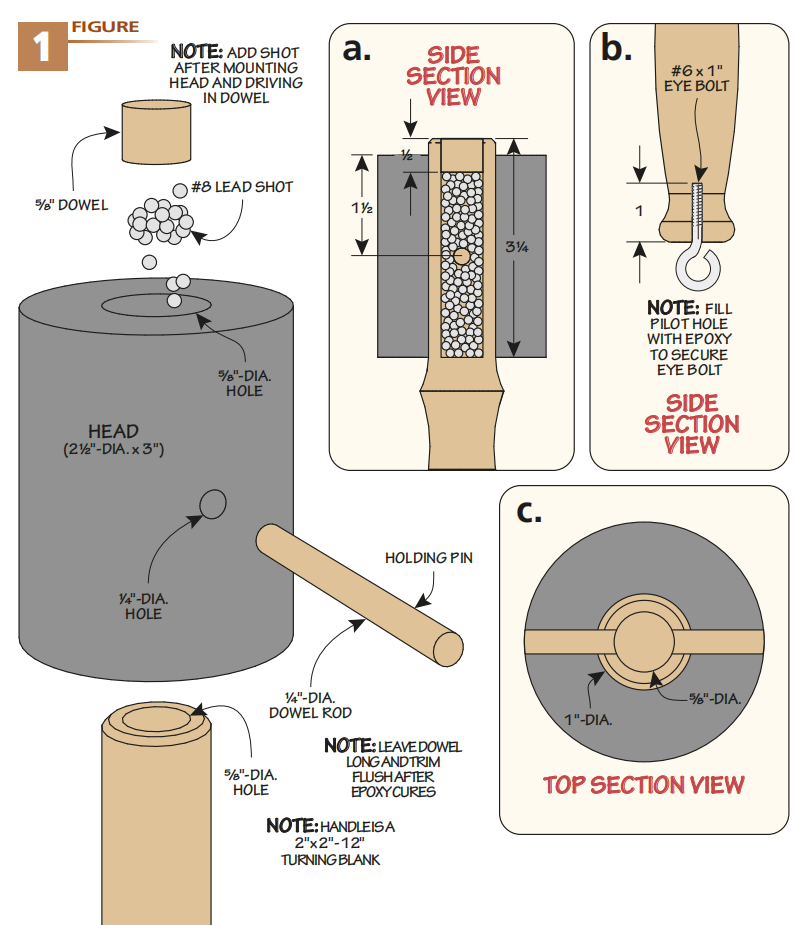
After the epoxy cures, trim the ends of the retaining pin flush.
Finally, drill a pilot hole in the pommel and install an eye screw so the mallet can be hung when it's not in use.
Two Durable Mallets for Different Woodworking Tasks
These two mallets share many of the same materials and construction techniques, but they're designed for different jobs.
The joiner's mallet delivers the additional force needed for furniture assembly, driving dowels, and seating tight-fitting joints. Its weighted head and leather striking faces make it a practical choice for heavier shop work.
The carver's mallet is smaller and easier to control. Its cylindrical head and balanced weight make it well suited to carving, chisel work, and other tasks that require accurate, repeated strikes.
Both projects also offer an opportunity to practice useful woodturning techniques, from shaping handles with spindle gouges to drilling centered holes on the lathe.
Best of all, the finished mallets aren't just decorative turning projects. They're durable, practical tools you can put to work in your shop for years to come.
All About Mallets
From traditional joiner's mallets to carving, deadblow, and brass mallets, each design has a purpose in the woodworking shop.
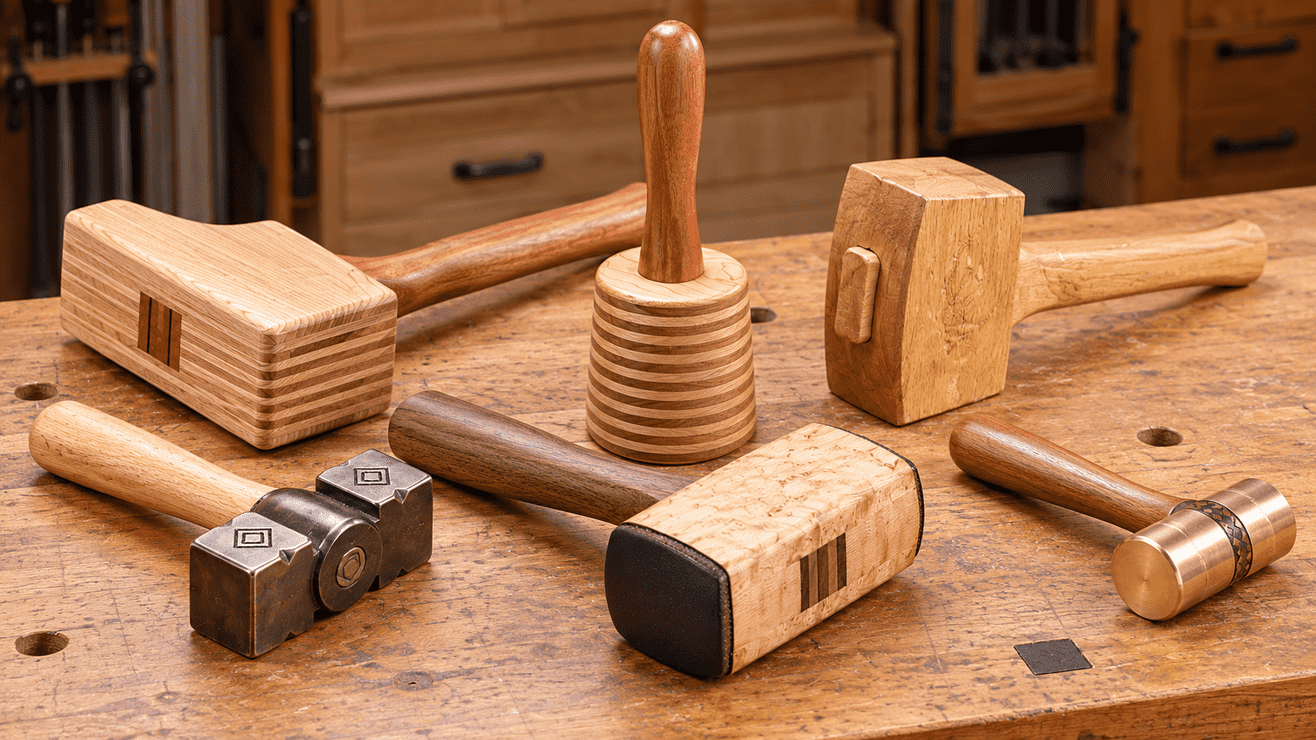
Learn how different head shapes, materials, and weights affect performance, and discover which mallets deserve a place in your tool collection.
EXPLORE TYPES OF WOODWORKING MALLETS → Which Woodworking Mallet Is Right for You?


