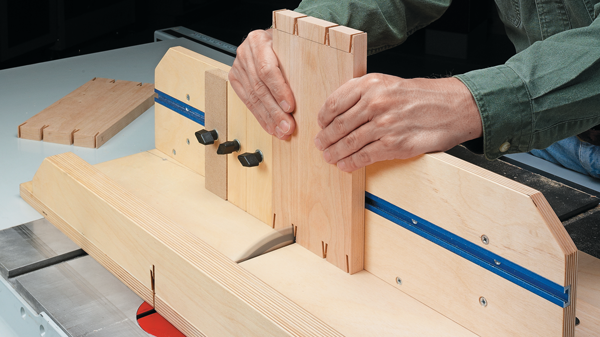
How to Cut Grooves and Dadoes: Table Saw & Router Techniques
There are few woodworking joints I use as regularly as grooves and dadoes. They may not have the decorative appeal of dovetails or the strength of a traditional mortise-and-tenon joint, but when it comes to practical, reliable joinery, they're hard to beat.
Grooves and dadoes are especially useful in cabinetmaking, drawer construction, shelving, and frame-and-panel assemblies. They help align parts during assembly, provide mechanical support, and create a larger glue surface than a simple butt joint.
Best of all, you don't need specialized equipment to make them. With a table saw, router table, or handheld router, you can cut clean, accurate grooves and dadoes for almost any woodworking project.
Let's look at the differences between these joints, the tools you'll need, and some of my favorite techniques for cutting them.
What's the Difference Between a Groove, Dado, and Rabbet?
Before making any cuts, it's helpful to understand the terminology.
Although grooves, dadoes, and rabbets are similar in appearance, their location and orientation distinguish one from another.

Grooves Run with the Grain
A groove is a channel cut parallel to the wood grain.
Grooves are commonly used to hold cabinet backs, drawer bottoms, plywood panels, and the panels in frame-and-panel doors.
They can be cut along the edge of a board or across its face.
Dadoes Run Across the Grain
A dado is a channel cut across the grain of a board.
Dadoes are especially useful for joining shelves, cabinet dividers, and other components to the sides of a case.
The dado provides a shoulder that helps support and locate the mating piece.
Rabbets Are Cut Along an Edge or End
A rabbet is an open-sided recess cut along the edge or end of a board.
Unlike a groove or dado, which is surrounded by wood on both sides, a rabbet has only one shoulder.
Rabbets are frequently used for cabinet backs, drawer construction, and overlapping case joints.
Which Joint Should You Cut First?
When grooves, dadoes, and rabbets intersect, I generally cut across the grain first.
Then I make the cuts that run with the grain.
This allows the second operation to remove any minor chipping or tearout left by the cross-grain cut.
It's a simple way to improve the appearance of the finished joint.
Tools for Cutting Grooves and Dadoes
One of the advantages of these joints is that you probably already have the tools needed to make them.
A table saw equipped with a dado blade makes quick work of many grooves and dadoes. A router table with a straight or spiral bit is another excellent option.
Even a handheld router with a 1/4" straight bit can handle a surprising range of joinery tasks.

Choosing Router Bits
Straight router bits work well for cutting both grooves and dadoes.
For narrow grooves, I often prefer a spiral upcut bit. The spiral cutting edges help lift chips out of the groove, reducing the chance of waste packing into the cut.
When using larger router bits, particularly those 1/2" in diameter or greater, take multiple shallow passes rather than removing all the material at once.
This reduces the load on the router and generally produces a cleaner result.
For stopped grooves and dadoes, you'll also want a marking knife, a sharp chisel, and a reliable guide or stop-block setup.
How to Cut Grooves at the Table Saw
Grooves are commonly used in two different locations: along the edge of a board or across its face.
Both can be cut with a table saw or router, but the best workholding setup depends on the size and shape of the workpiece.
Cutting Edge Grooves for Frame-and-Panel Joinery
Narrow grooves cut along the edges of boards are commonly used to hold panels, tongues, and stub tenons.
A good example is the groove in a rail or stile of a frame-and-panel door.

At the table saw, a dado blade makes this cut straightforward.
However, supporting the workpiece is especially important when cutting a groove along the edge of a relatively wide or short board.
For these situations, I prefer a shop-made vertical cutting jig that rides over the rip fence.

The jig is assembled from four plywood pieces. A tall guide supports the workpiece, a rear cleat pushes it through the cut, and two additional pieces form an L-shaped assembly that straddles the fence.
This setup helps keep the workpiece upright and securely supported throughout the cut.
The rear cleat can also be replaced after it becomes worn.
For narrower grooves, the router table is another good option. A spiral upcut bit is particularly useful because it helps clear chips from the cut.
Cutting Face Grooves for Cabinet Joinery
A face groove runs along the surface of a board rather than its edge.
These grooves are commonly used to join large case components or capture panels.

At the table saw, I like using a wide push block to keep the workpiece flat against the table as it passes over the dado blade.

The broad surface of the push block distributes pressure across the workpiece and helps maintain a consistent depth of cut.
The important part is matching the groove width to the thickness of the mating piece.
This is particularly important when working with plywood.
A sheet labeled 3/4" thick may actually measure less than that. Instead of assuming the nominal thickness, measure the plywood and make a test cut in scrap.
You can start with a slightly undersized dado blade setup and adjust the width until the mating piece fits properly.
A handheld router with an edge guide or clamped straightedge can also produce accurate face grooves.
How to Cut Dadoes at the Table Saw
Dadoes are cut across the grain and are especially useful in cabinet and shelving construction.
They create a channel that helps support the mating piece and keeps it properly aligned during assembly.

Cutting dadoes is similar to cutting grooves, but the cross-grain orientation introduces a few additional considerations.
Use a Miter Gauge or Crosscut Sled
When cutting a dado across a board, I prefer to use a miter gauge or crosscut sled to guide the workpiece.
If the rip fence is needed as a positioning reference, clamp a short stop block to the fence well ahead of the blade.

The workpiece should clear the stop block before reaching the cutter.
This prevents the stock from being trapped between the blade and rip fence, which could cause kickback.
The stop establishes a repeatable position without restricting the workpiece during the cut.
Prevent Tearout When Cutting Dadoes
Because a dado crosses the wood grain, the cutter can chip or splinter the fibers as it exits the workpiece.
A quality dado blade helps reduce this problem. The outside blades score the edges of the joint while the chippers remove the waste between them.
However, even a sharp dado stack can produce tearout in some woods.
One solution is to use a sacrificial backer board or an auxiliary fence that supports the fibers where the cutter exits.
The same approach works at the router table.
A backer board helps support the trailing edge of the workpiece, while lighter passes reduce the amount of material removed at one time.
For larger panels, I often prefer a handheld router with a T-square guide. This provides a stable reference for routing a straight dado across the workpiece.
How to Cut Stopped Grooves and Dadoes
Not every groove or dado needs to extend completely across a board.
A stopped groove or dado ends before reaching one or both edges of the workpiece.
These joints are useful when you want to conceal the groove in the finished project or create a cleaner appearance.
There are two common variations.
Cutting a Single-Stopped Groove
A single-stopped groove begins at one edge of the workpiece and ends before reaching the opposite edge.
You can make this cut with a handheld router and straightedge guide.
Mark the stopping point on the workpiece, then rout along the guide until the cutter reaches the layout mark.
At the router table, you can use corresponding layout marks on the fence and workpiece to identify where the cut should stop.
For repeatable work, a properly positioned stop block can establish the end of the cut.
Be sure to account for the radius of the router bit when laying out the stopping point.
Cutting a Double-Stopped Groove
A double-stopped groove ends before reaching either edge of the board.
This is useful for concealing the ends of grooves that hold shelves, dividers, or tenons.

At the router table, stop blocks can establish the beginning and end of the cut.
However, lowering a workpiece onto a spinning router bit requires careful setup and secure control. For larger workpieces or cuts where control is limited, a plunge router with a guide and stops is often the better choice.
With a plunge router, you can position the bit above the starting point, plunge to the desired depth, and rout to the ending stop.
Make multiple passes when necessary to reach the final depth.
Keep the Stops Clear of Sawdust
When routing stopped joints, sawdust can collect near the stop blocks.
This buildup can prevent the workpiece from reaching the exact stopping point and leave a slightly uneven end.
Chamfering the inside corner of a stop block provides some clearance for the chips.
Even so, it's worth checking for buildup between cuts, especially when routing multiple identical joints.
How to Square the Ends of a Stopped Dado
A router bit leaves a rounded end on a stopped groove or dado.
If the mating piece has a square end, you'll need to remove the remaining material with a chisel.
Fortunately, this is a quick process.
Step 1: Score the End with a Marking Knife
Use a square and marking knife to establish the final end of the groove.

The knife line provides a precise reference and helps guide the chisel.
Step 2: Chop Across the Grain
Use a sharp chisel to cut across the grain at the end of the joint.

Work carefully toward the knife line, removing small amounts of material rather than trying to chop the entire end in one pass.
This helps prevent splitting and tearout.
Step 3: Remove the Remaining Waste
Finally, use the chisel to pare away the waste parallel to the grain and clean up the corners.

Check the end for square and test-fit the mating piece.
With a little careful chisel work, the rounded end left by the router becomes a clean, square joint.
Tips for Cutting Accurate Grooves and Dadoes
Whether you're using a table saw or router, a few habits make these joints more consistent.
Make test cuts. Always check the fit using scrap from the same material as your project, especially when working with plywood.
Support the workpiece. Use a suitable push block, jig, backer board, or crosscut sled to keep the stock stable and properly guided.
Control tearout. A sharp cutter, sacrificial backing, and lighter passes can make a noticeable difference.
Keep your setup consistent. When cutting several matching joints, use stops and guides to maintain the same position from one workpiece to the next.
Check the fit before assembly. The mating piece should slide into the groove or dado without excessive force. A joint that's too tight can cause problems during glue-up.
Stronger, More Accurate Woodworking Joinery
Grooves and dadoes may be simple joints, but they're among the most useful techniques you can learn.
They provide mechanical support, make assembly easier, and work well in everything from small boxes and drawers to large cabinets and furniture projects.
Once you're comfortable cutting them at the table saw or router, you'll find yourself using these joints again and again.
And with the right setup, clean, accurate grooves and dadoes are easy to achieve.
Explore More Woodworking Joinery Tips & Techniques
Grooves and dadoes are just the beginning. Whether you're cutting dovetails, making mortise-and-tenon joints, or looking for a better way to assemble your next project, our Joinery collection is packed with practical hints, tips, and techniques to help you build stronger, more accurate joints.
EXPLORE MORE JOINERY TIPS → Joinery Hints and Tricks to Help You Build Better Projects.