


Sanding may not be the most exciting part of woodworking, but it has a major impact on how a finished project looks and feels. A carefully sanded surface brings out the character of the wood and gives your finish the smooth, consistent foundation it needs.
Fortunately, you don't have to do all that work by hand. The trick is choosing the right power sander for the job.
A belt sander can quickly level an uneven glued-up panel. A random-orbit sander handles most everyday sanding. A finish sander excels at fine surface preparation, while a detail sander gets into corners, curves, and profiles that larger sanders can't reach.
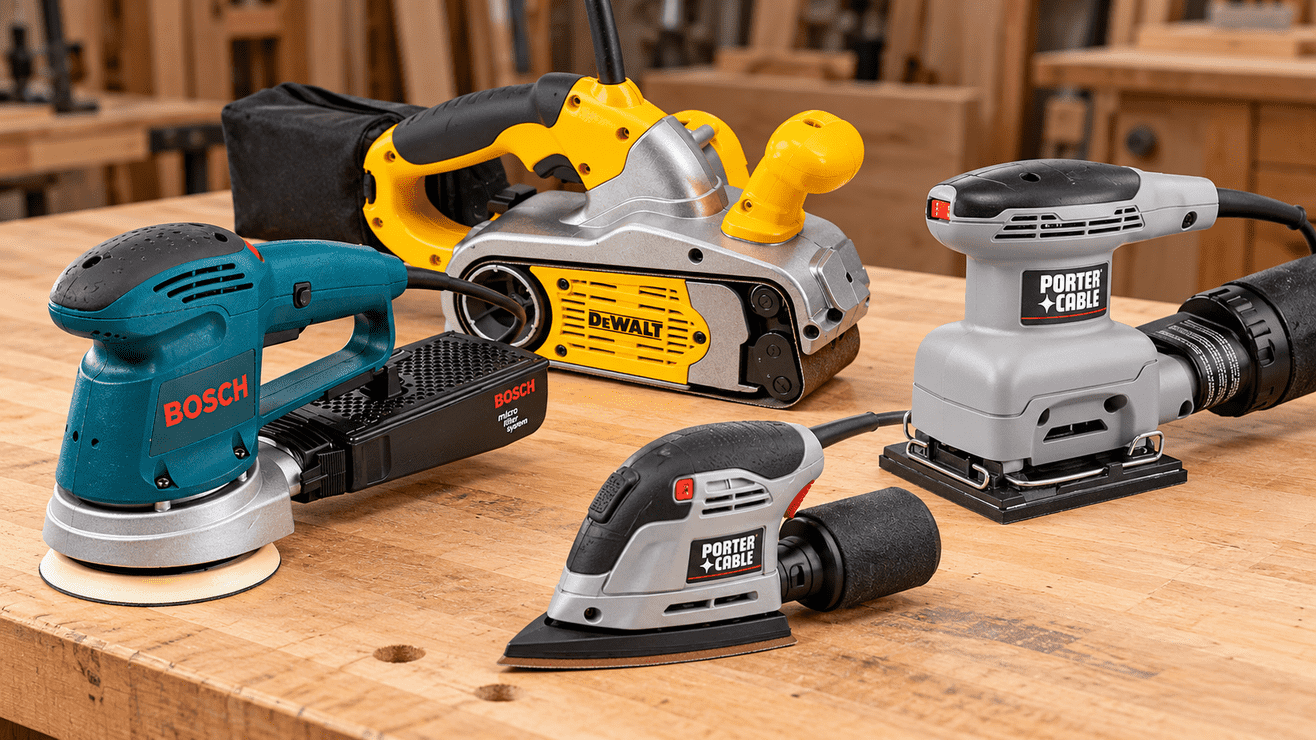
Understanding what each sander does best—and using the right technique—can save time while producing a smoother surface.
Types of Sanders for Woodworking
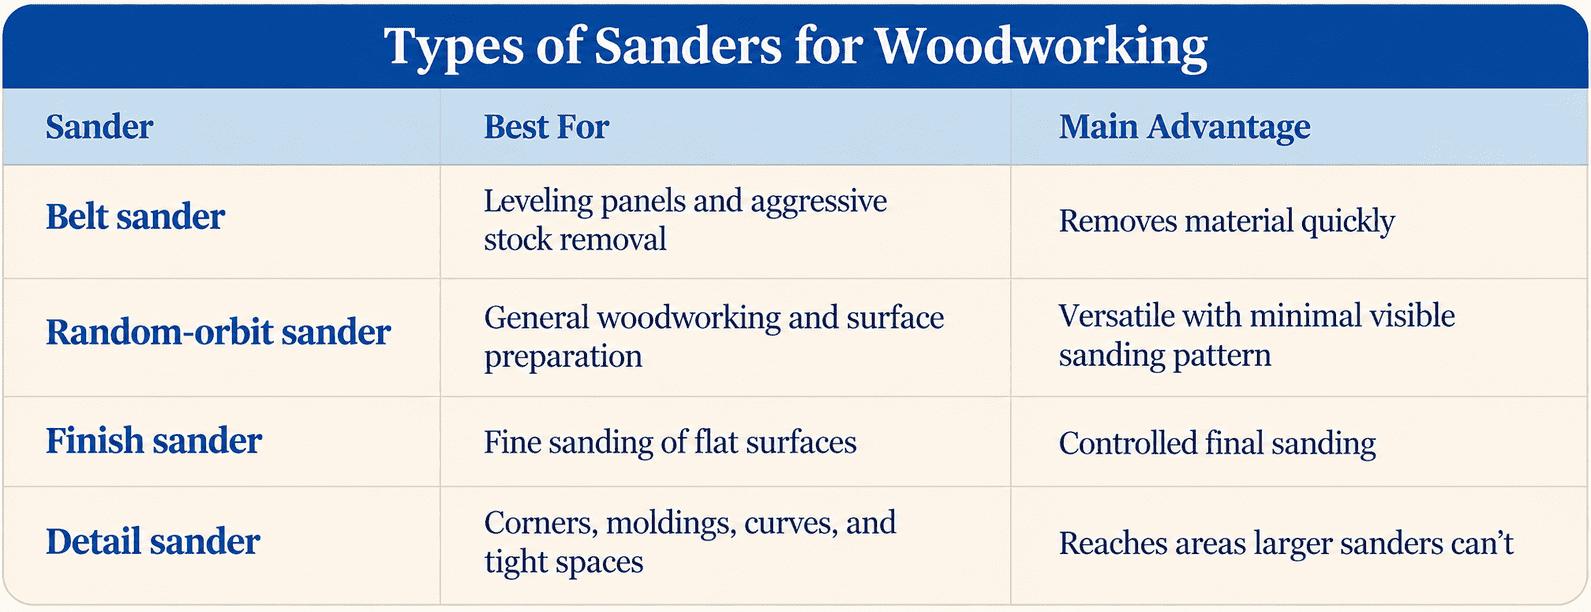
Belt Sander: Fast Stock Removal and Flattening
A belt sander is the heavy lifter of this group. It removes material quickly, which makes it especially useful for leveling uneven surfaces and smoothing glued-up panels that are too wide for a planer.
That aggressive cutting action also means you need to use it carefully. A belt sander can remove wood surprisingly fast and isn't a good choice for delicate plywood veneers. Keep the tool moving so the belt doesn't dig into one area and create a hollow or gouge.
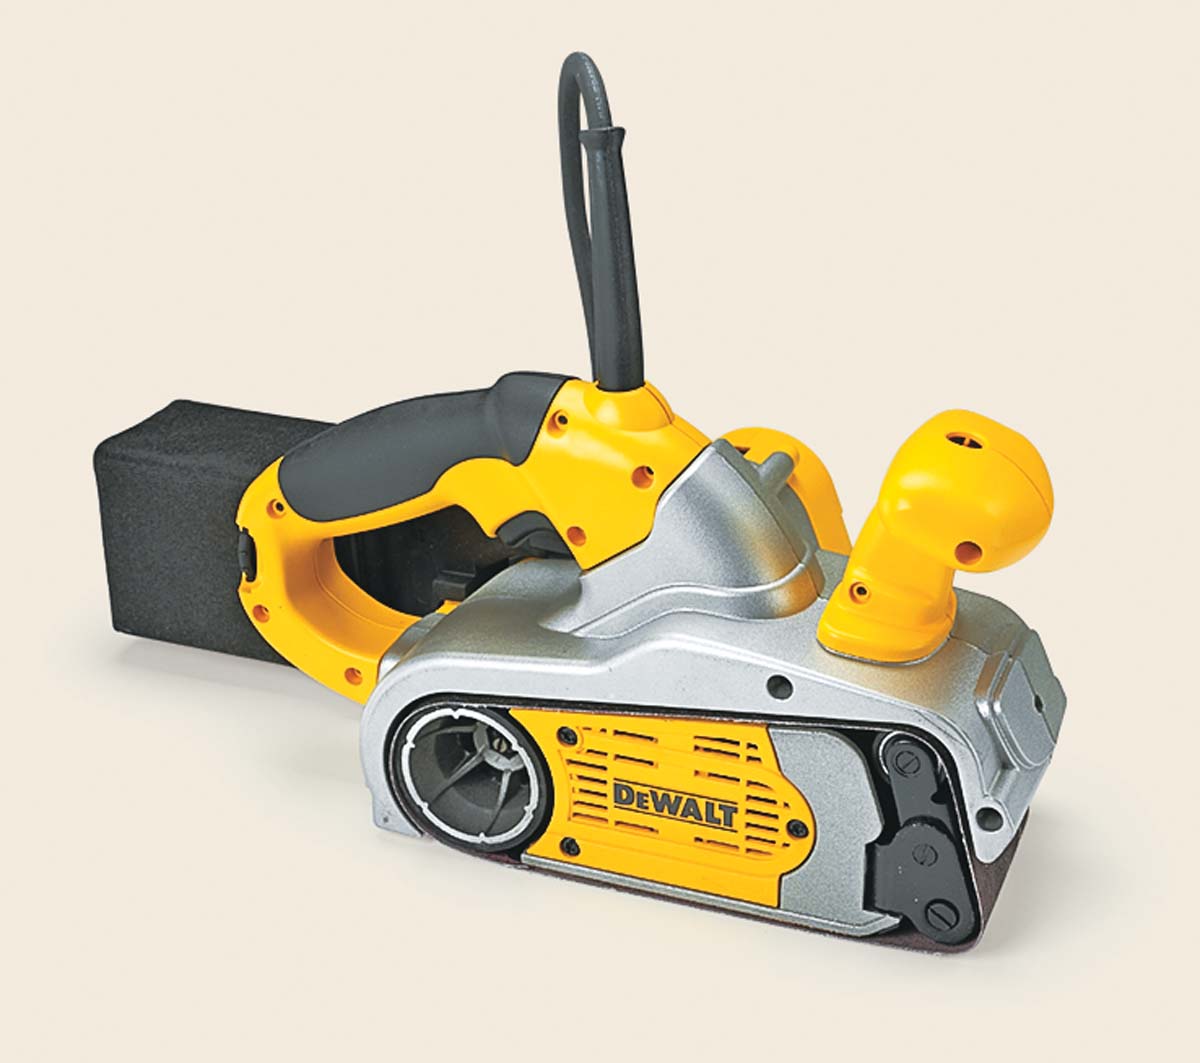
RELATED ARTICLE: How to Choose a Belt Sander: 6 Features That Matter
Check the Belt Sander Before You Start
Before sanding, inspect the platen—the thin metal plate that supports the sanding belt.
The platen should be flat and smooth. A bent, dented, or damaged platen can cause the sander to dig into the workpiece rather than producing a flat surface. Also check that the sanding belt is properly tensioned and tracking correctly.
How to Flatten a Glued-Up Panel with a Belt Sander
One of the best jobs for a belt sander is leveling a large glued-up tabletop or panel.
1. Remove Dried Glue
Start with a scraper to remove beads of dried glue along the joints. This keeps the glue from loading up the abrasive.
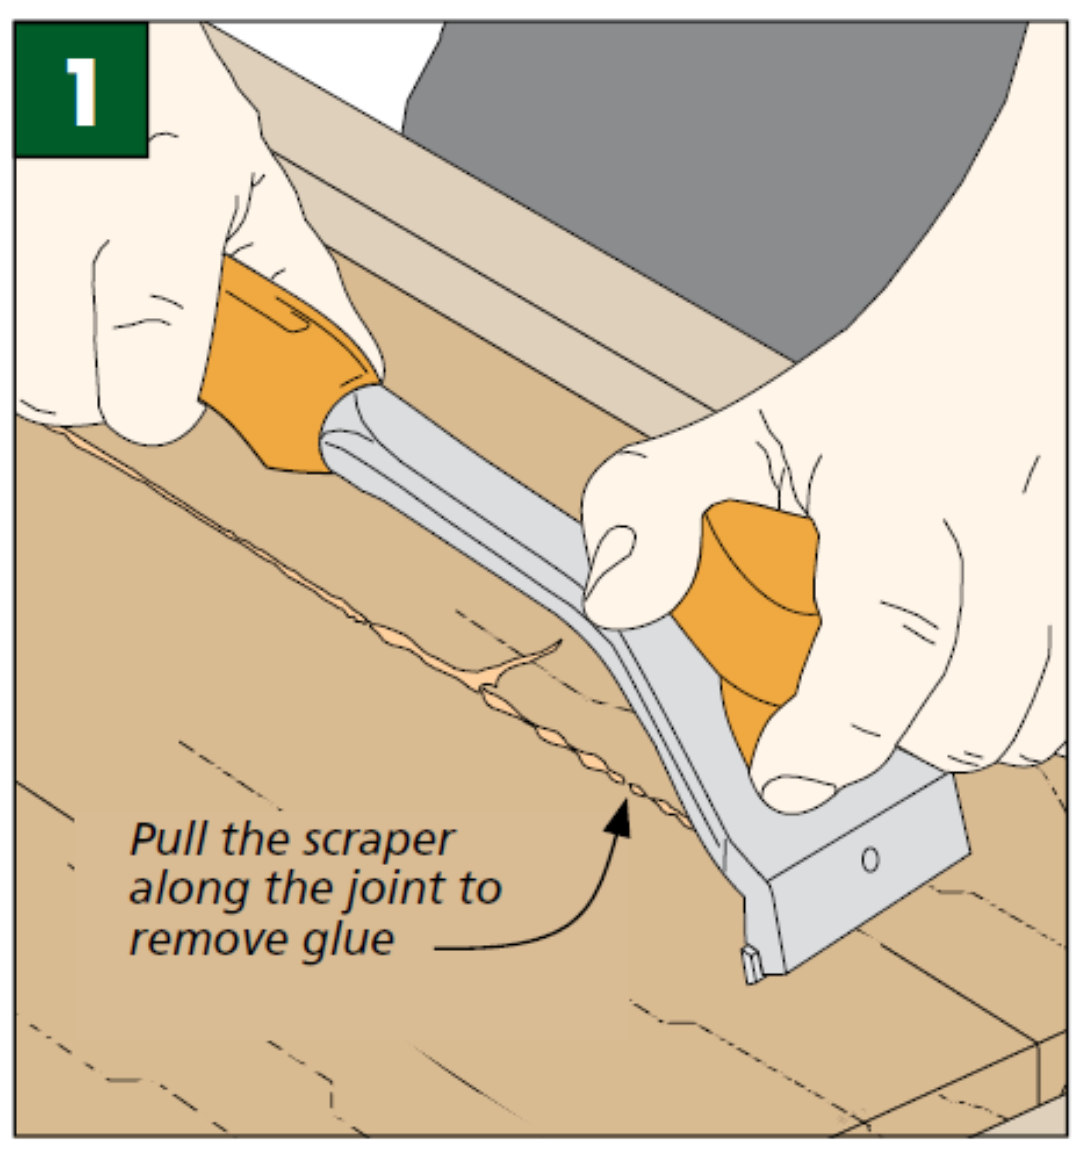
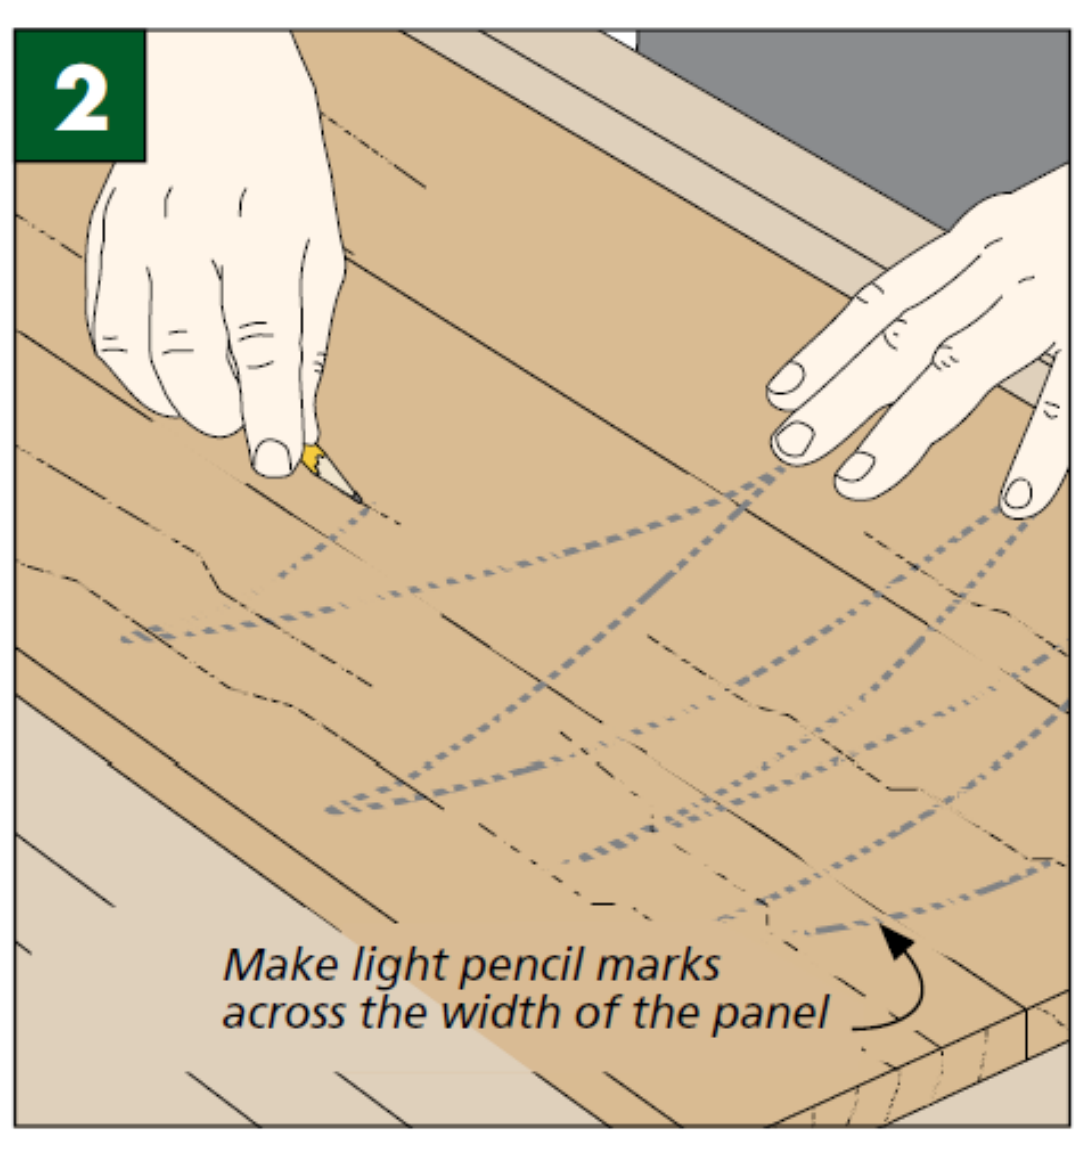
2. Mark the Surface
Draw light pencil lines across the panel. These reference marks make it easier to see your progress and identify areas that still need attention.
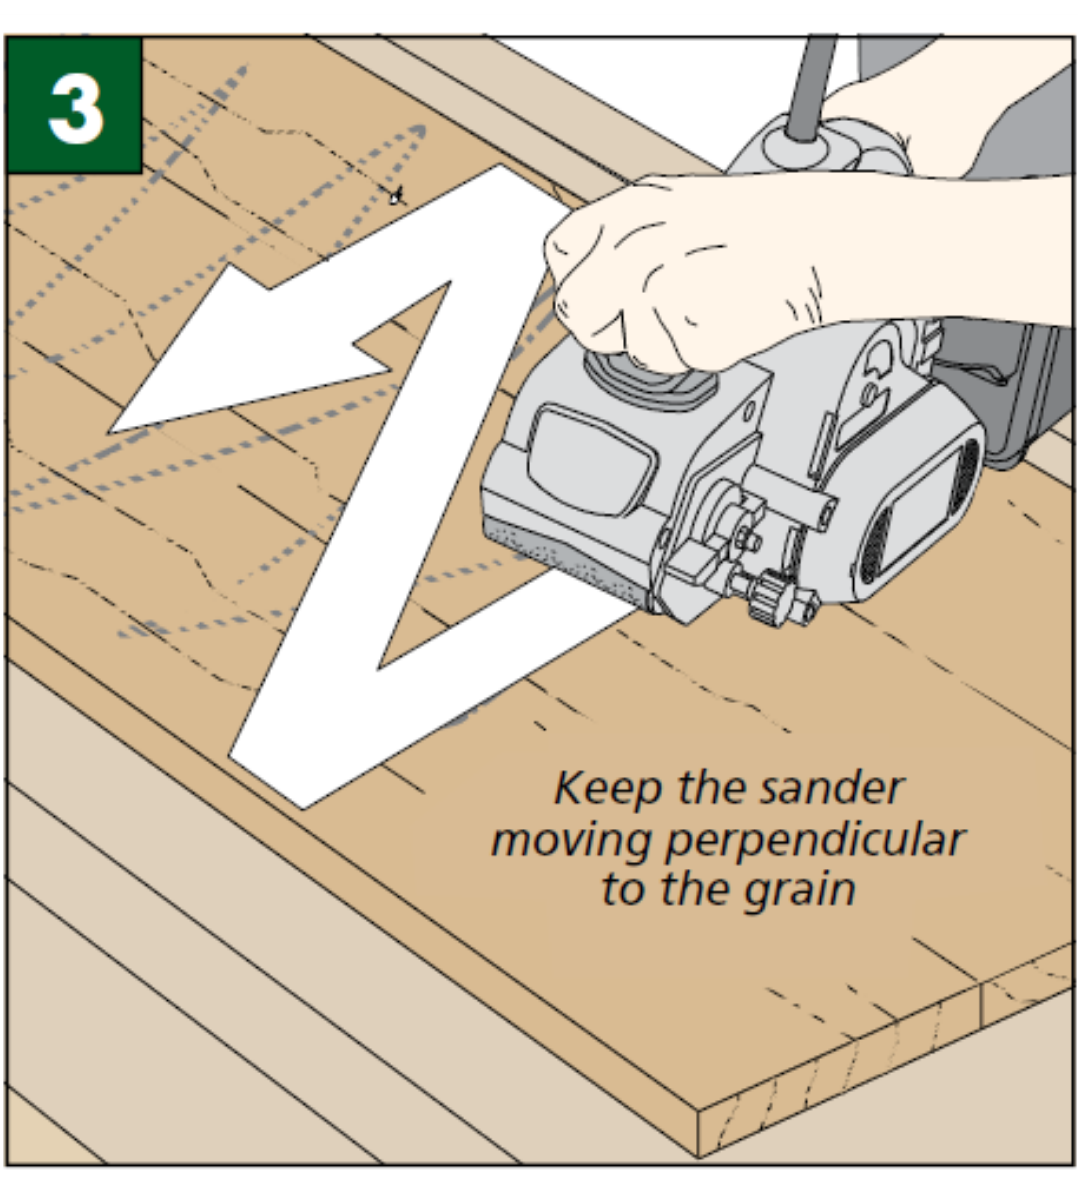
3. Start with 80 Grit
For initial leveling, use an 80-grit belt and work across the grain. Keep the sander moving continuously as you remove ridges and high spots.
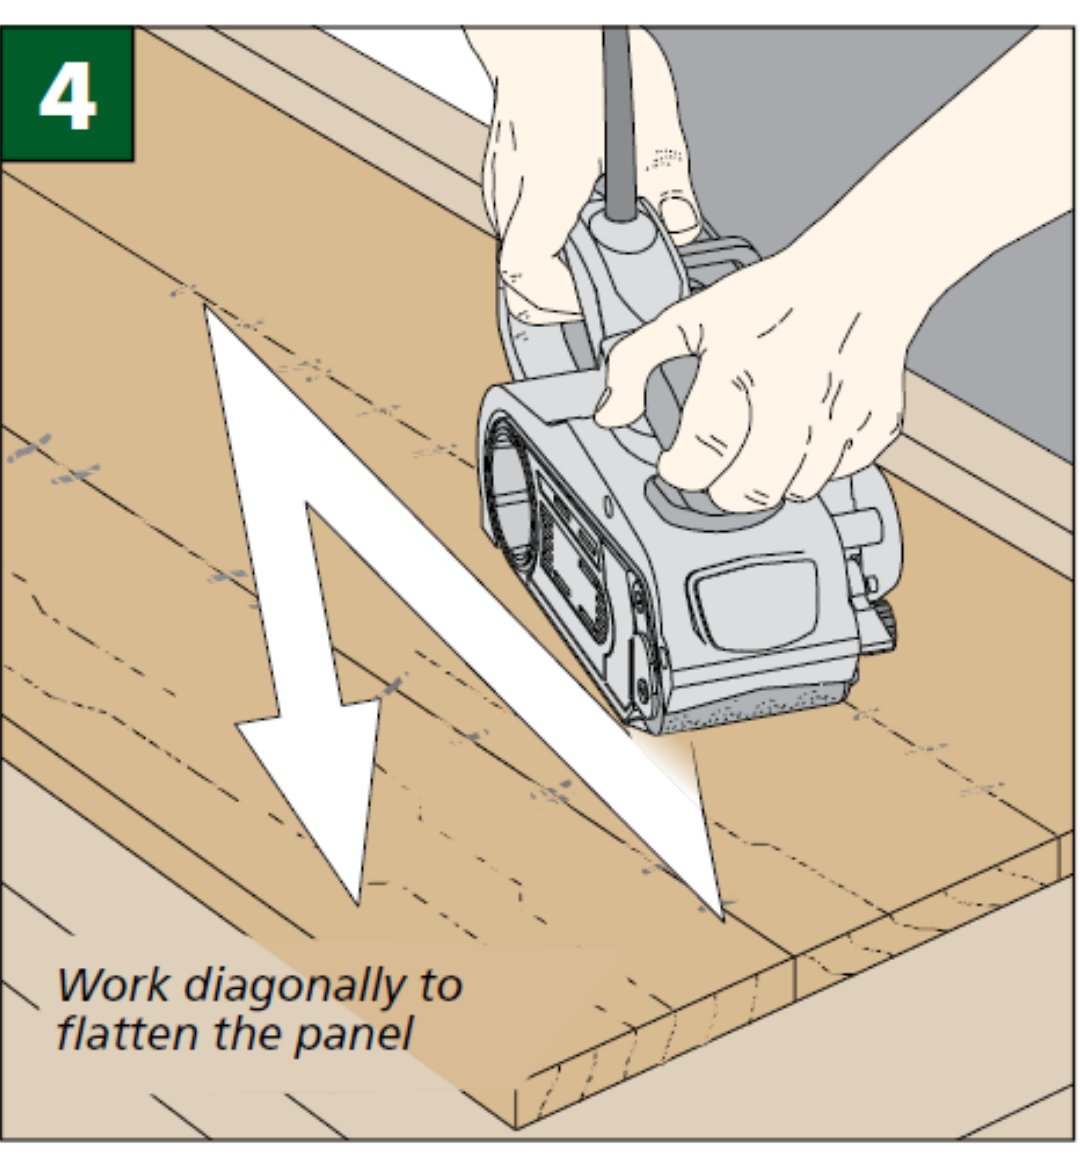
4. Switch to Diagonal Passes
Change to 100 grit and sand diagonally across the panel, alternating directions. This continues the leveling process while refining the scratches left by the coarser abrasive.
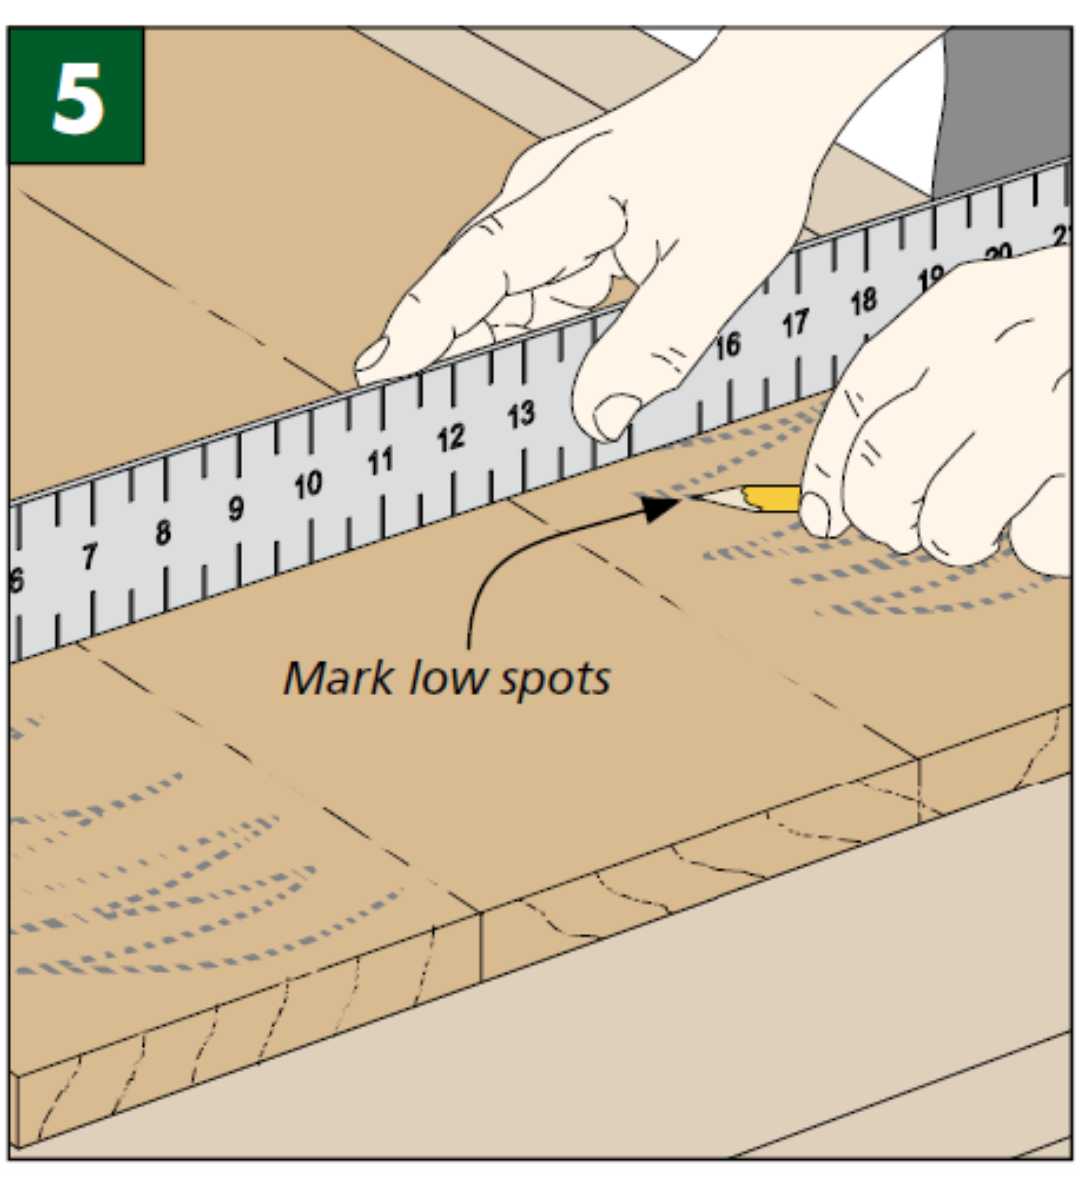
5. Check for Flatness
Lay a long straightedge across the panel and use a pencil to mark any remaining low spots. Continue removing the surrounding high areas until the surface is level.
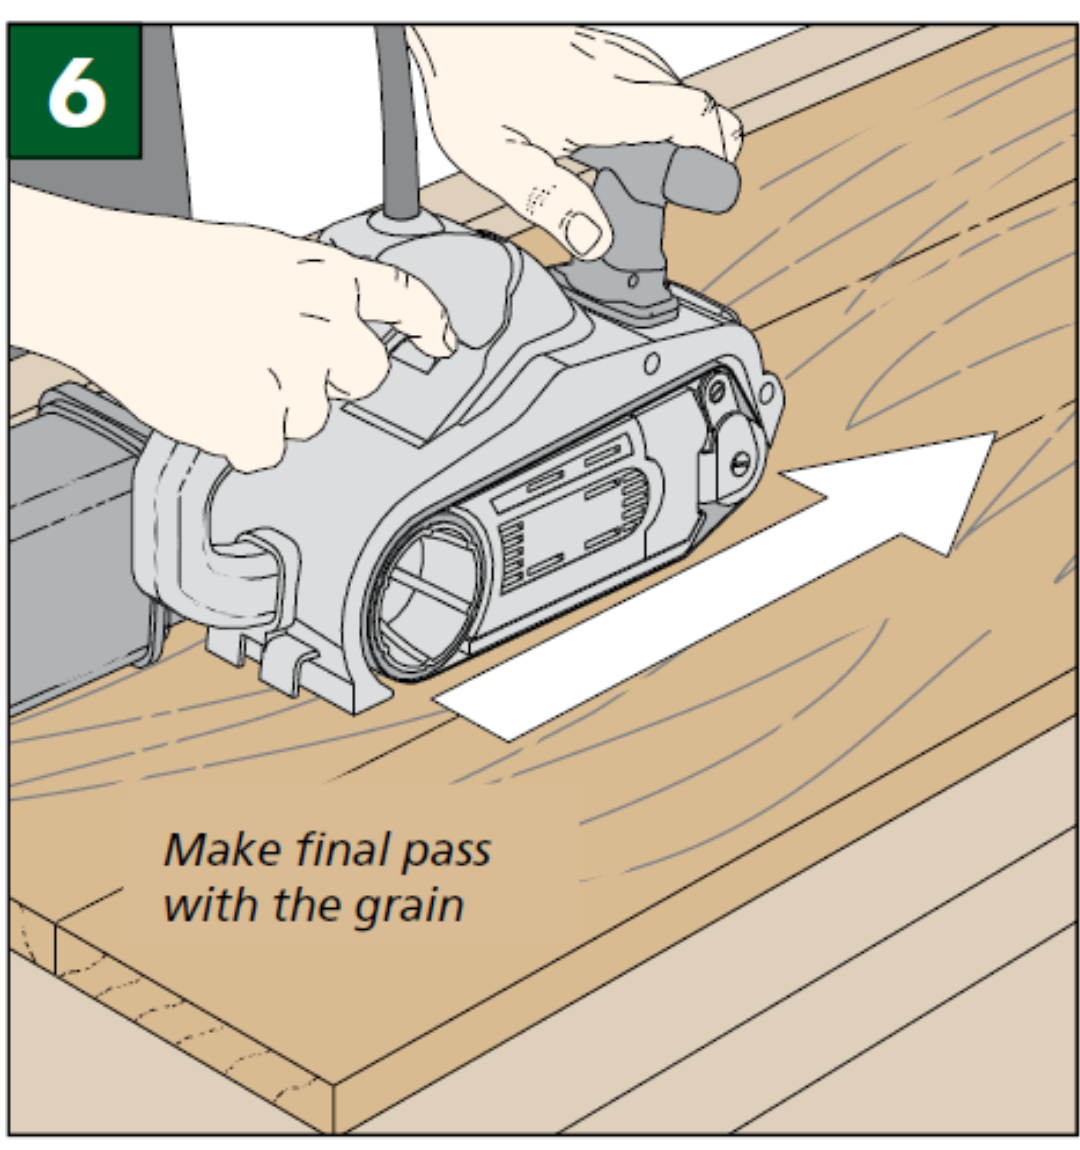
6. Finish with the Grain
Make the final belt-sanding pass with 120 grit, moving with the grain. This removes the prominent cross-grain scratches and prepares the panel for finer sanding with a random-orbit sander.
WOODSMITH TIP: Keep the Sander Moving. A belt sander removes wood quickly. Don't stop or linger in one spot while the belt is contacting the workpiece. Continuous movement helps prevent dips and gouges.
Random-Orbit Sander: The Everyday Woodworking Sander
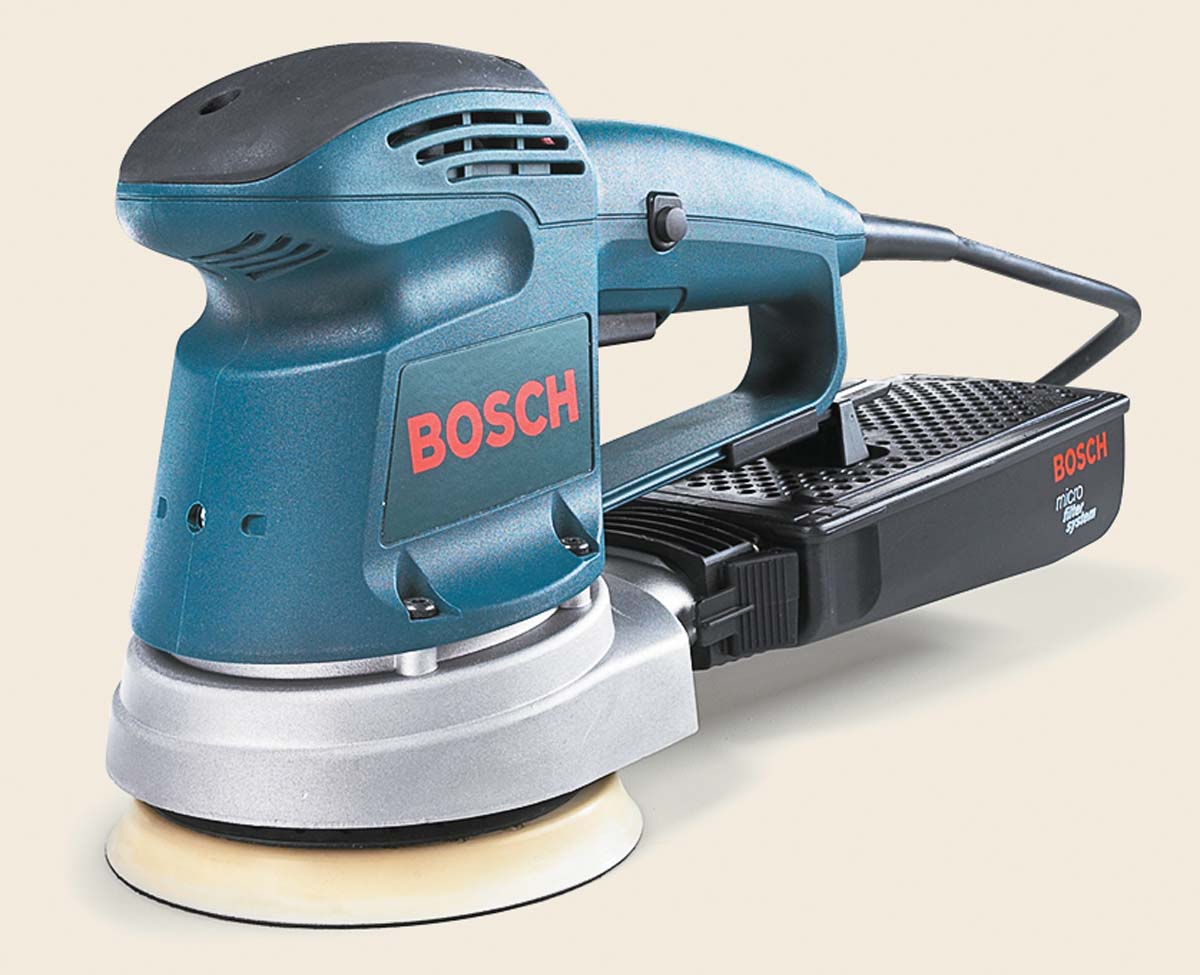
If there's one power sander that handles the widest range of woodworking jobs, it's the random-orbit sander.
It can remove material fairly quickly with coarse abrasive, then switch roles and prepare a project for finish with finer grits. Unlike a traditional finish sander, its sanding action also allows you to move in different directions without producing the same obvious cross-grain scratches.
How to Use a Random-Orbit Sander
A random-orbit sander looks simple to use—and it is—but a few technique changes can make a noticeable difference.
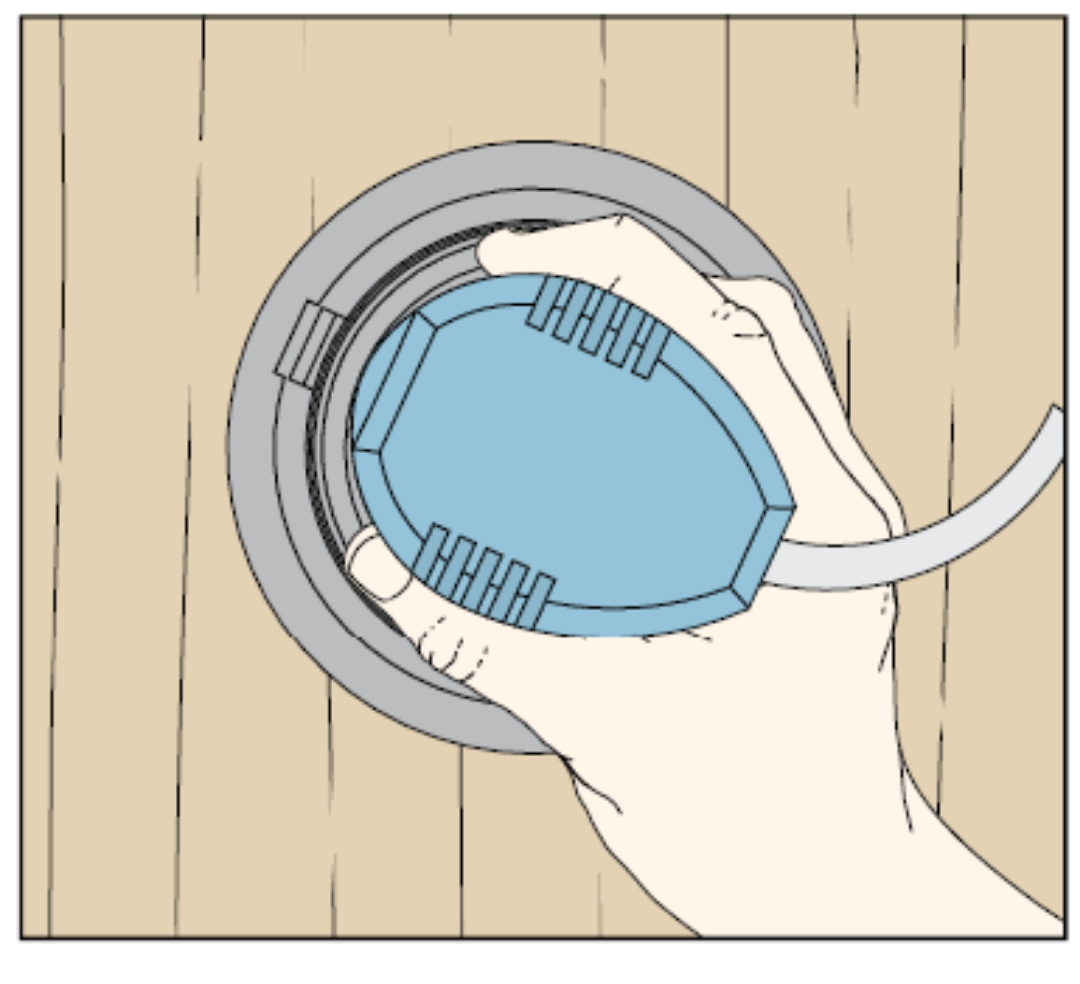
Don't Press Down
Let the sander's weight and abrasive do the work.
Pressing down can slow the rotation of the sanding disc, reducing efficiency and potentially causing the sander to dig into the wood. Your hand should primarily guide the tool across the surface.
Slow Down
Moving a random-orbit sander too quickly is another common mistake. Slow, overlapping passes give the abrasive time to work consistently.
A useful pace is roughly one foot every ten seconds.
Let Each Grit Do One Job
The first grit should remove the defects you're trying to eliminate. Every grit after that primarily removes the scratch pattern left by the previous abrasive.
For a reasonably smooth surface, 120 grit is often a practical starting point. From there, progress through finer grits such as 150 and 220 as needed.
WOODSMITH TIP: Inspect Between Grits. Don't move to the next grit simply because you've sanded the entire surface. Look closely at the wood first. Scratches left behind by a coarse grit become increasingly difficult to remove as you move to finer abrasives.
Finish Sander: Fine Sanding on Flat Surfaces
A finish sander—often called a sheet or quarter-sheet sander—is designed for lighter sanding.

Unlike a random-orbit sander, a finish sander uses a back-and-forth action. That means grain direction matters. Move the sander with the grain to avoid leaving visible cross-grain scratches.
A finish sander can be particularly useful on large flat surfaces when you're working with fine abrasives. For example, you can use a finish sander with 320-grit paper on a large tabletop for very fine surface preparation.
Detail Sander: Corners, Curves & Moldings
Flat surfaces aren't the only areas that need sanding. Moldings, curved profiles, corners, and other confined areas can be difficult or impossible to reach with a conventional sander.
That's where a detail sander earns its place.

Detail sanders are available with different heads and shaped profiles that can reach into tight spaces or follow features such as beads and coves.
Because many detail sanders use a back-and-forth sanding action similar to a finish sander, work with the grain whenever the shape of the workpiece allows it.
Don't Overlook Dust Collection
Sanding creates an enormous amount of fine dust. Connecting the sander to a shop vacuum or dust-collection system isn't only about keeping the shop cleaner.
Dust extraction helps:
- Keep fine sanding dust out of the shop air
- Prevent abrasive discs and sheets from loading as quickly
- Remove loose particles before they're ground back into the surface
- Maintain more consistent sanding performance
Most power sanders include a dust port that can be connected to a shop vacuum or dust-collection hose.
Sandpaper Alternatives
Conventional sandpaper isn't the only abrasive option available for power sanders. Specialty abrasives can offer advantages for certain jobs.
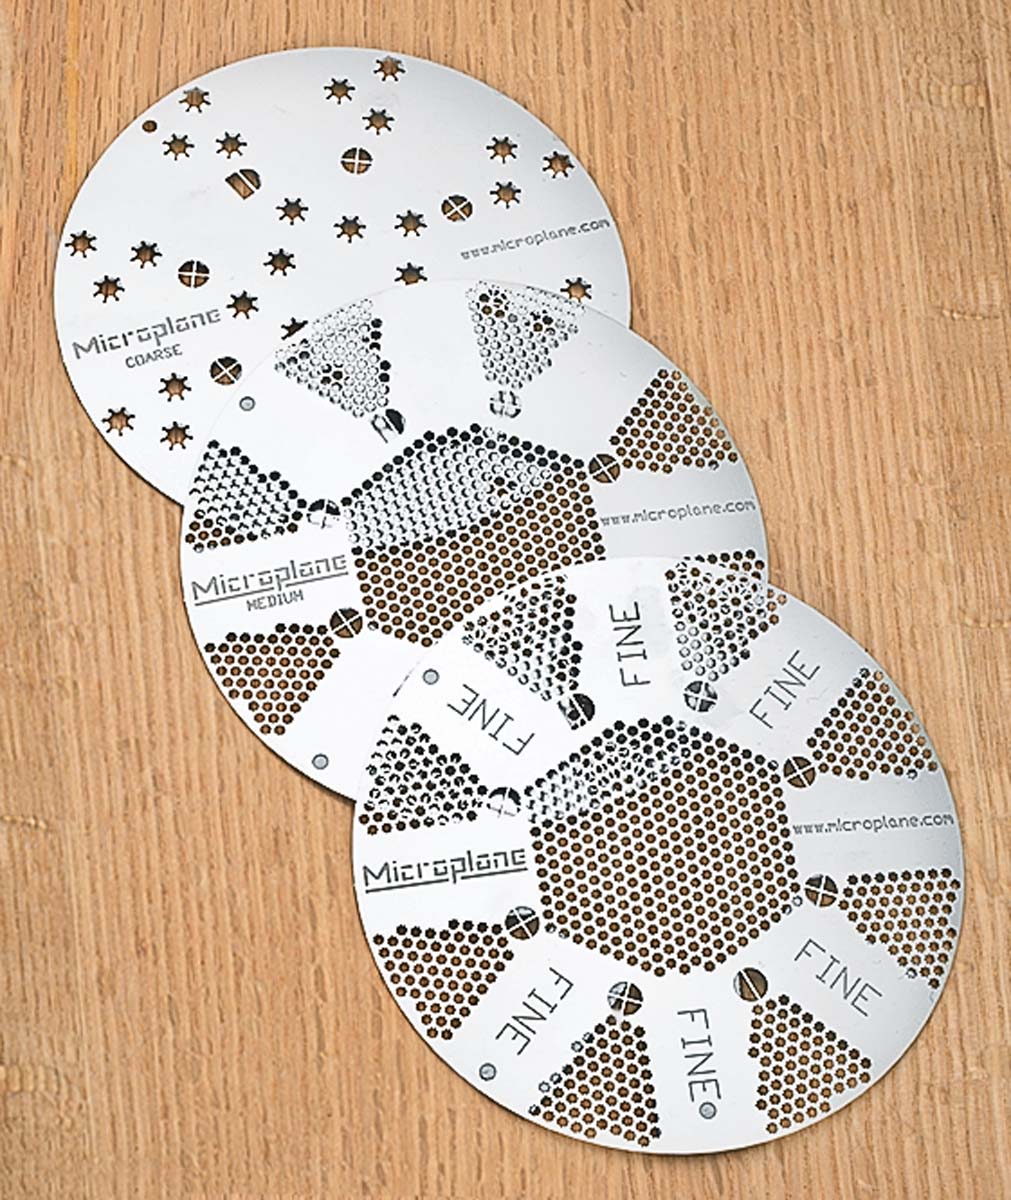
Microplane Discs
Microplane-style discs use stainless steel cutting edges rather than conventional abrasive grit. The article describes coarse, medium, and fine versions roughly corresponding to 40-, 80-, and 120-grit sandpaper and highlights their usefulness on rough-sawn wood.
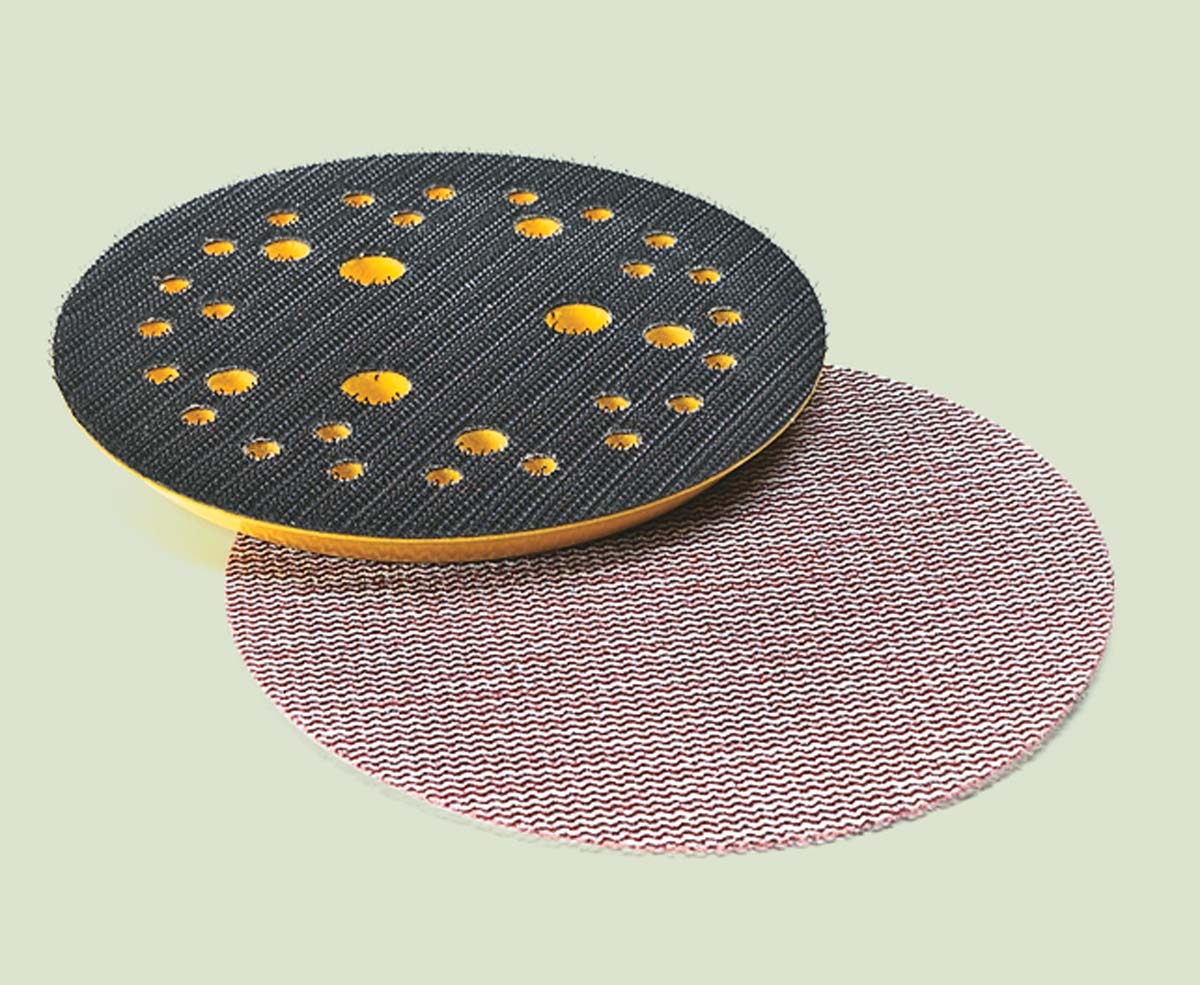
Abranet Mesh Abrasives
Abranet uses a woven abrasive structure that allows dust to pass through the disc, helping the sander's dust collection work effectively.
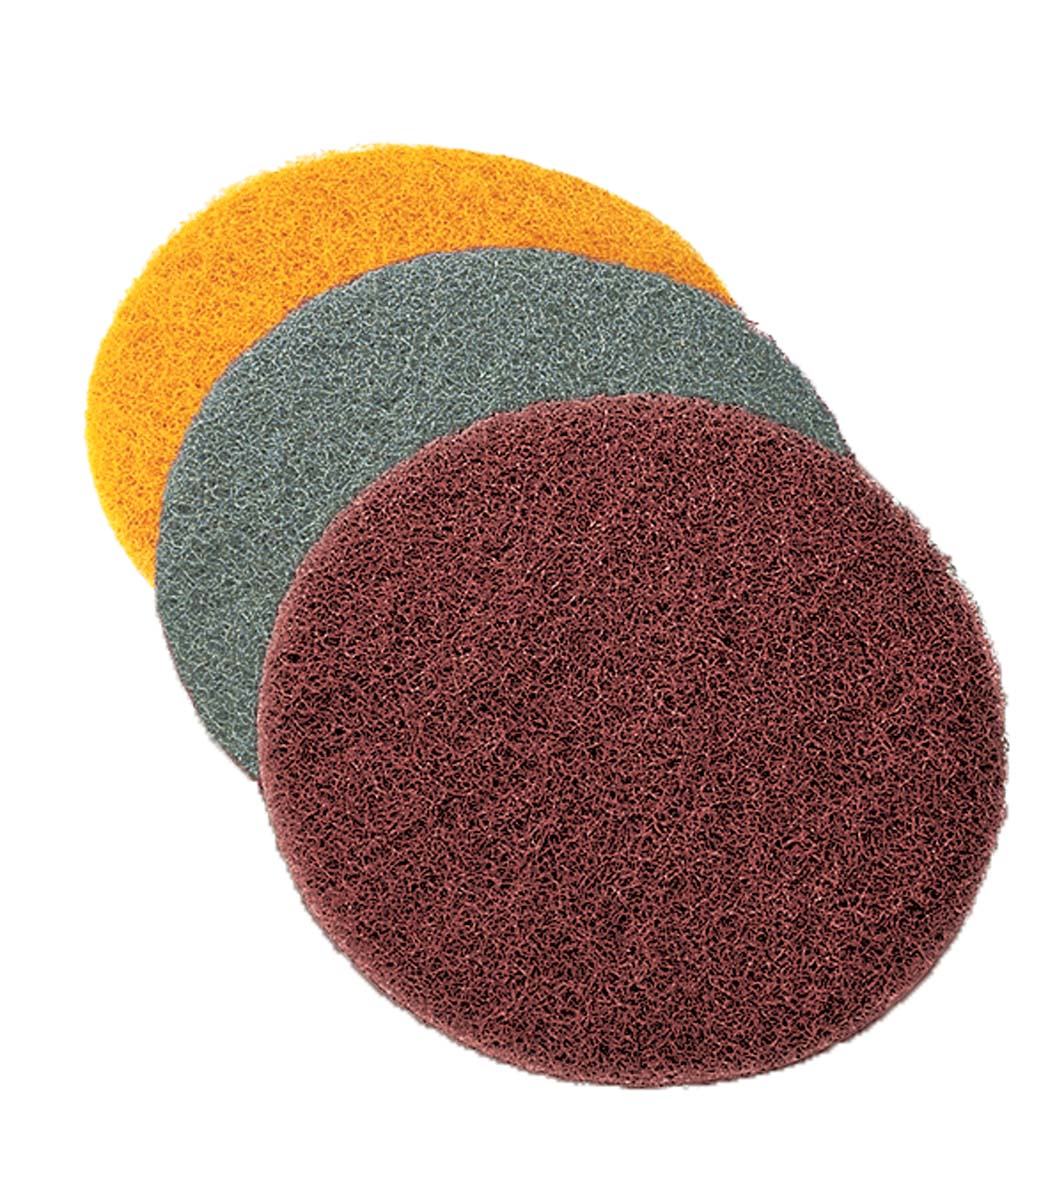
Non-Woven Pads
Non-woven abrasive pads aren't intended for aggressive sanding of raw lumber. Instead, they're useful for fine finishing tasks, including smoothing between coats of finish.
Which Woodworking Sander Should You Use?
You don't necessarily need every type of sander in the shop. For most woodworkers, a random-orbit sander handles the majority of everyday surface preparation.
The other sanders become valuable when the job gets more specialized. Reach for a belt sander when you need aggressive leveling, a finish sander for controlled fine sanding, and a detail sander when profiles or tight spaces prevent a larger tool from doing the job.
The important part isn't simply owning more sanders. It's matching the tool, abrasive, and technique to the surface you're trying to create.


