



How to Add Decorative Paint to Woodworking Projects
Sometimes a little paint is all it takes to transform a woodworking project. A splash of color, a decorative pattern, or a few carefully painted details can turn a simple wooden project into something special.
Decorative painting is especially effective on birdhouses, toys, carved figures, and other small woodworking projects. And you don't need to be an experienced artist to get good results.
With a few bottles of acrylic paint, a small selection of brushes, and some basic techniques, you can add colorful designs and details to almost any project.
The key is choosing the right supplies and learning how to control the paint. Here's what you need to get started.
Choosing the Best Paint for Decorative Woodworking
For most decorative painting projects, fluid acrylic paint is an excellent choice.
Fluid acrylics are easy to apply, available in a wide range of colors, and thin enough to flow smoothly from a brush without extensive mixing.
They also offer several practical advantages for woodworking:
- Easy cleanup. Water-based acrylic paints clean up with soap and water while they're still wet.
- Convenient packaging. Small squeeze bottles let you dispense just the amount of paint you need.
- Wide color selection. Acrylics are available in everything from subtle earth tones to bright decorative colors.
- Versatile application. They work well for broad areas of color, fine lines, patterns, and small details.
For most indoor decorative projects, a basic assortment of fluid acrylics provides everything you need.
Choosing Paint for Outdoor Wood Projects
If you're painting something that will be displayed outdoors, pay attention to the paint's lightfastness rating.
Lightfastness describes how well a pigment resists fading when exposed to light.
Many artist-grade acrylic paints use ASTM lightfastness classifications:
- ASTM I: Excellent lightfastness
- ASTM II: Very good lightfastness
- ASTM III: Fair lightfastness
For outdoor woodworking projects, choose colors with excellent lightfastness whenever possible.
Keep in mind that lightfastness isn't the same as weather resistance. A paint can resist fading but still need protection from moisture and changing weather conditions.
Choose a paint system rated for exterior use and follow the manufacturer's recommendations for priming and protective coatings.

Fluid acrylic paints are ideal for adding colorful details to woodworking projects. For outdoor use, choose pigments with excellent lightfastness and a suitable exterior paint system.
RELATED PROJECT: Build a Fish Whirligig
Essential Paint Brushes for Woodworking Projects
Walk into an art supply store and you'll find dozens of brush shapes and sizes. Fortunately, you don't need a large collection to get started.
A basic set of six brushes can handle most decorative woodworking projects:
- 3/0 round brush for fine details
-
3 round brush for small patterns and shapes
-
9 round brush for larger areas
- Liner brush for long, flowing lines
- 3/4" flat brush for controlled coverage
- 2" flat utility brush for broad surfaces
Synthetic-bristle brushes are a good choice for water-based acrylic paints. They're durable, easy to clean, and available in a wide range of sizes.
Each brush has a particular advantage depending on the type of painting you're doing.
Round Brushes for Fine Details and Patterns

Round brushes are among the most versatile brushes for decorative painting.
Their shape feels much like holding a pencil, making them easy to control when painting lines, dots, and small details.
Round brushes are available with rounded or pointed tips.
A rounded tip is useful for creating dots, filling small areas, and painting thicker lines.
A pointed round brush provides greater precision for details and narrow patterns.
The size of the brush determines how much paint it holds and the width of the marks it creates.

A small 3/0 round brush is ideal for painting eyes, delicate accents, and other fine details.
A #3 round brush works well for small shapes and decorative patterns.
A larger #9 round brush holds more paint, making it useful for filling larger, irregular shapes.

Round brushes provide excellent control for painting fine details, decorative dots, and small areas of color.
Flat Brushes for Smooth, Even Coverage

Flat brushes have a square profile with medium-length or long bristles.
Their broad face makes them useful for applying paint evenly over a surface.
A 3/4" flat brush is a versatile choice for most decorative woodworking projects.
Use the flat face to fill shapes or cover small panels with solid color.
You can also turn the brush on its edge to paint narrow lines or create textured effects.
Flat brushes work particularly well when you want smooth coverage without spending time making dozens of small brushstrokes.

A small flat brush makes it easy to apply paint smoothly and consistently while maintaining good control.
Liner Brushes for Long, Flowing Lines

Decorative painting often includes natural patterns such as vines, flowers, leaves, and grasses.
These designs require long, smooth lines, and that's where a liner brush comes in handy.
Liner brushes have long, flexible bristles that taper to a fine point.
The extra bristle length helps smooth out small movements of your hand, making it easier to paint graceful, flowing lines.
The bristles also hold a useful amount of paint, allowing you to create longer strokes without constantly reloading the brush.
Use a liner brush for decorative borders, stems, vines, and other curved details.

Liner brushes are ideal for painting smooth curves, flowing lines, and delicate decorative patterns.
Large Flat Brushes for Base Coats and Finishes

While smaller brushes handle most decorative details, it's useful to keep a larger utility brush nearby.
A 2" flat brush works well for applying base coats, sealers, and clear finishes over larger surfaces.
The wider bristles allow you to cover an area quickly with smooth, overlapping strokes.
A large flat brush is also useful for decorative techniques such as dry brushing, glazing, and adding texture.
You don't need an expensive artist's brush for this work. A good-quality synthetic utility brush is usually sufficient.

A large flat utility brush makes quick work of applying base coats and protective finishes to woodworking projects.
How to Prepare Wood for Decorative Painting
Just like staining or applying a clear finish, successful decorative painting begins with proper surface preparation.
Start by sanding the wood smooth.
Repair dents, scratches, or other imperfections that might show through the paint.
Then remove the sanding dust with a vacuum or clean cloth.
For many small indoor projects, acrylic paint can be applied directly to bare wood. However, a primer or sealer can help create a smoother, more consistent surface.
When to Use a Sealer or Primer
Water-based acrylic paints can raise the grain of unfinished wood.
Applying a suitable sealer first can help minimize this effect and provide a smoother surface for painting.
A compatible clear sealer may be useful when you want some of the natural wood grain to remain visible.
If you're painting the entire surface with an opaque color, primer provides a more uniform base.
For outdoor projects, use an exterior-rated primer that's compatible with your paint.
White primer works well beneath light colors, but gray primer can sometimes make it easier to cover the surface with darker colors.
Always allow the primer or sealer to dry according to the manufacturer's instructions before painting.
Tips for Adding Decorative Painted Details
Once the wood is prepared, the fun begins.
Decorative painting doesn't require complicated techniques, but a little practice can make a big difference in the finished appearance.
Practice Your Brushstrokes First
Before painting your project, spend a few minutes practicing on a piece of scrap wood.
Try making dots with a round brush, long curves with a liner brush, and broad strokes with a flat brush.
Experiment with how much paint to load onto the brush.
Too much paint can create blobs or uneven edges, while too little can leave streaks.
Practicing also gives you an opportunity to work out the order in which you'll apply different colors and patterns.
Paint Light Colors Before Dark Colors
When a design includes several colors, it's usually best to begin with the lighter shades.
Darker colors can then overlap the lighter areas, helping create clean separation lines.
For example, when painting a decorative birdhouse, you might apply the light-colored base first, then add darker trim, flowers, or other details.
This approach makes it easier to correct small irregularities and maintain crisp-looking patterns.
Applying lighter colors first and overlapping them with darker details helps create clean color separation.
Protect the Base Coat Before Adding Details
Here's a useful technique when painting more complicated designs.
After applying the base color, let it dry completely. Then apply a compatible clear protective coat before adding decorative patterns.
Once that clear coat has dried, you can begin painting the details.
The protective layer may make it easier to remove a small mistake without disturbing the base color underneath.
Test this technique on scrap first. Acrylic paint can dry quickly, and once it has cured, water alone may not remove it. The clear coat also needs to be compatible with both the base paint and the decorative layers.
Work from Large Areas to Small Details
A good painting sequence makes the process easier.
Begin by applying the base colors with a larger flat brush.
Next, add the main decorative shapes using medium-sized round or flat brushes.
Finish with the smallest details, such as eyes, dots, fine outlines, and flowing lines.
This keeps the process organized and reduces the chance of accidentally dragging your hand through freshly painted details.
Protecting Decorative Paint on Wood
After the decorative painting is complete, allow the paint to dry and cure according to the manufacturer's instructions.
For projects that will be handled frequently, a compatible clear protective finish can help resist wear.
Water-based clear finishes are often a convenient choice over acrylic paint, but always test the combination before applying it to the finished project.
For outdoor woodworking projects, use a coating system designed to withstand exterior exposure.
Remember that clear finishes can change the appearance of painted colors, so it's worth testing the final combination on a sample board.
Add Color and Personality to Your Next Woodworking Project
Decorative painting is an easy way to add a personal touch to your woodworking.
You don't need dozens of paints or a large collection of specialized brushes. A few fluid acrylic colors, several well-chosen brushes, and some practice are enough to get started.
Whether you're adding colorful details to a birdhouse, painting a wooden toy, or decorating a carved figure, the same basic techniques apply.
Start with a smooth surface, choose the right brush for the job, and work from broad areas of color to fine details.
The result can be a woodworking project that's as enjoyable to look at as it was to build.
Carved Birds Woodworking Plans
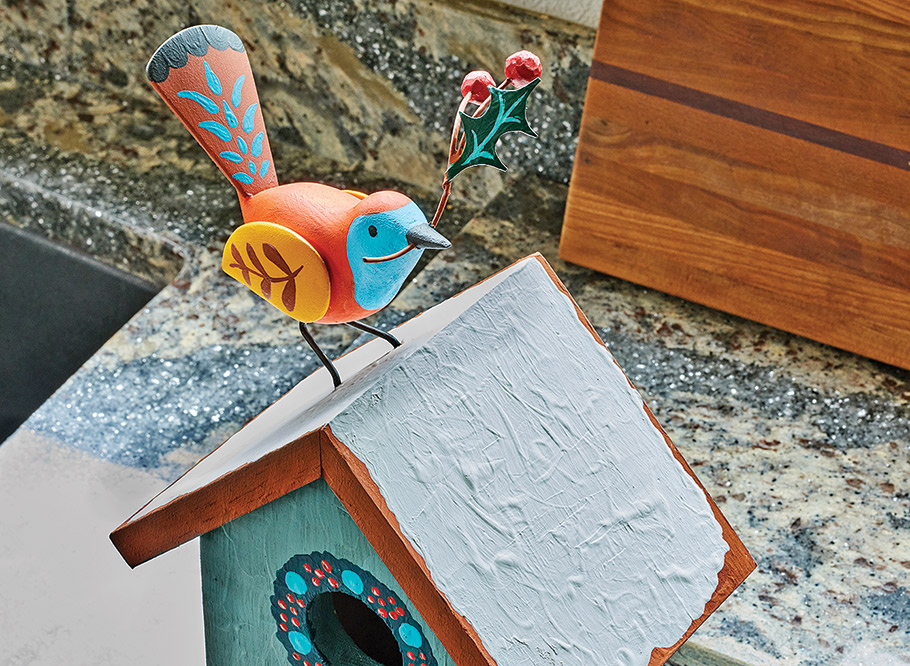
Put your decorative painting skills to work with this fun woodworking project. Learn to carve three charming birds from basswood using simple tools and beginner-friendly techniques. Then bring them to life with colorful painted details. These handcrafted birds make great gifts or cheerful accents for your home.
GET THE CARVED BIRDS PLANS → Carve, Paint & Display Your Own Colorful Birds


