


How to Clean & Restore a Cast Iron Table Saw Top
A smooth, clean table saw top does more than make your saw look good. It helps workpieces slide easily across the surface, reduces friction during cuts, and prevents rust, dried glue, and other buildup from leaving unwanted marks on your projects. If your cast iron tabletop has seen better days, a little maintenance can make a noticeable difference in how your saw performs.
My table saw gets a pretty good workout. But in a small shop, there are days when I use it without ever turning it on. The extra surface often doubles as an assembly area, sanding station, or even a place to set things down while finishing a project. Unfortunately, all that extra use eventually takes its toll.
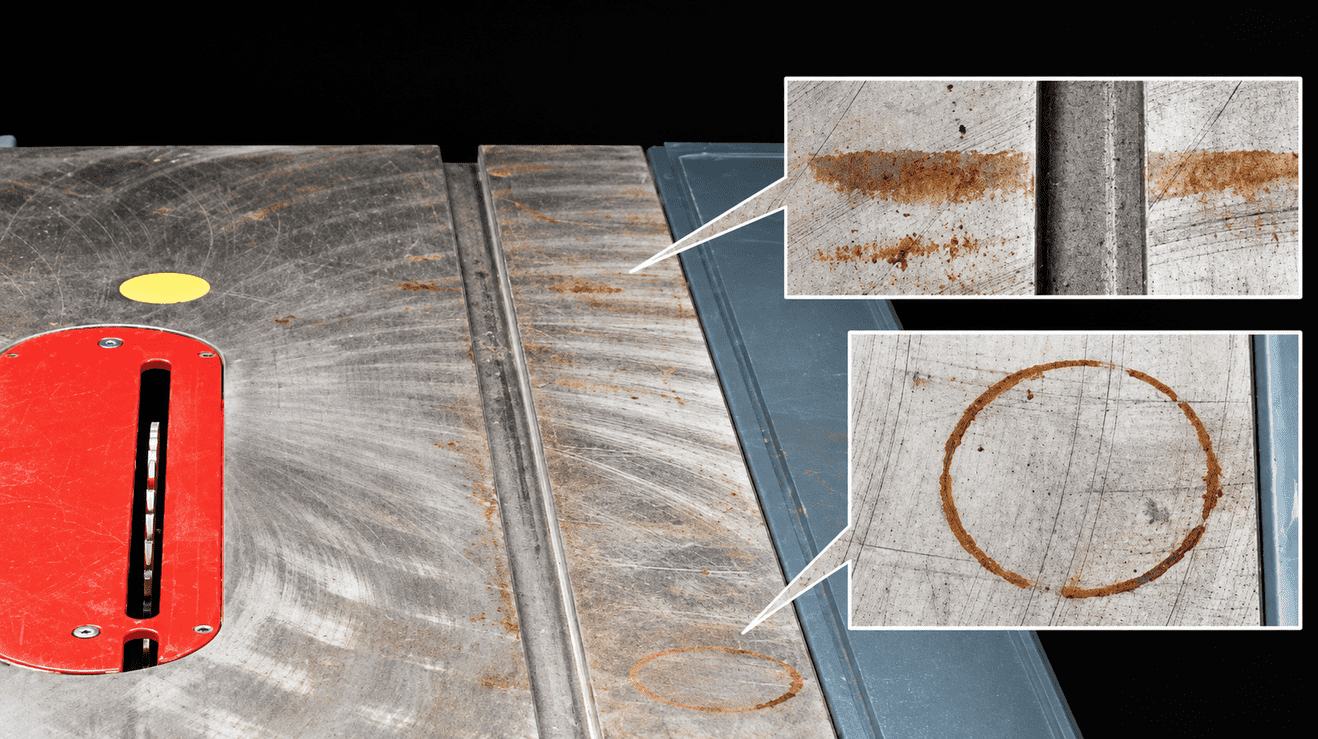
Over time, glue drips, finish residue, scratches, and rust can turn a once-smooth cast iron surface into a source of frustration. Rough spots can mark your workpieces, while grime increases friction and makes it harder to feed boards and jigs smoothly through a cut.
Fortunately, restoring a cast iron table saw top doesn't require expensive equipment or a complicated process. In this Woodsmith Shop video, I walk through the steps I use to clean, polish, and protect my saw's tabletop so it looks — and performs — like new again.
Why a Clean Table Saw Top Matters
A smooth tabletop is an important part of getting consistent results from your table saw. When a workpiece slides freely, it's easier to maintain a steady feed rate and keep the material firmly against the fence. Excess friction can make feeding less predictable, particularly when cutting large panels or using table saw jigs.
Rust, dried glue, and finish buildup can also transfer marks to the underside of your workpiece. Even small burrs around the blade opening or miter gauge slots can scratch the surface as material passes over them.
The goal of this restoration isn't to make the cast iron shiny for its own sake. It's to remove anything that interferes with smooth operation and leave behind a clean, low-friction surface that's protected against moisture.
Step 1: Remove Burrs, Dried Glue & Finish Buildup
Before working on the tabletop, unplug the saw or disconnect it from its power source. Remove loose dust and debris, and inspect the surface for raised imperfections.
I like to begin by checking the hard edges of the table with my fingers. Pay particular attention to the blade opening, miter gauge slots, and outer edges. A small ding or raised burr in any of these areas can scratch a workpiece as it moves across the saw.
If you find a burr, use a fine file to carefully knock down the raised metal. Work only on the damaged spot rather than filing the surrounding tabletop.
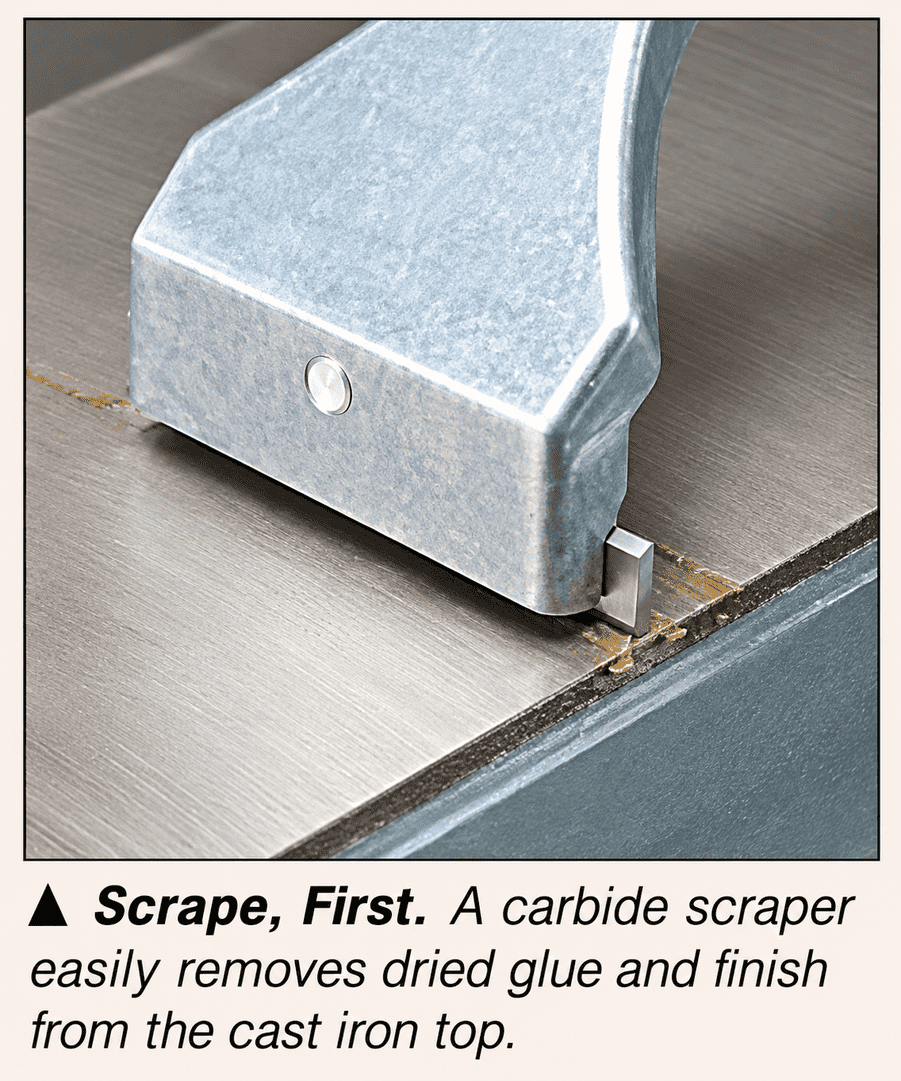
Next, remove any dried glue or finish that's stuck to the surface. A scraper held at a shallow angle can lift off the buildup without requiring aggressive sanding. A plastic scraper is a good starting point; for stubborn deposits, use a sharp metal scraper carefully to avoid gouging the cast iron.
Step 2: Remove Rust from the Cast Iron Table Saw Top
Rust is a common problem in unheated garages, damp basements, and workshops with fluctuating humidity. Even a small amount of moisture can leave spots on an unprotected cast iron tabletop.
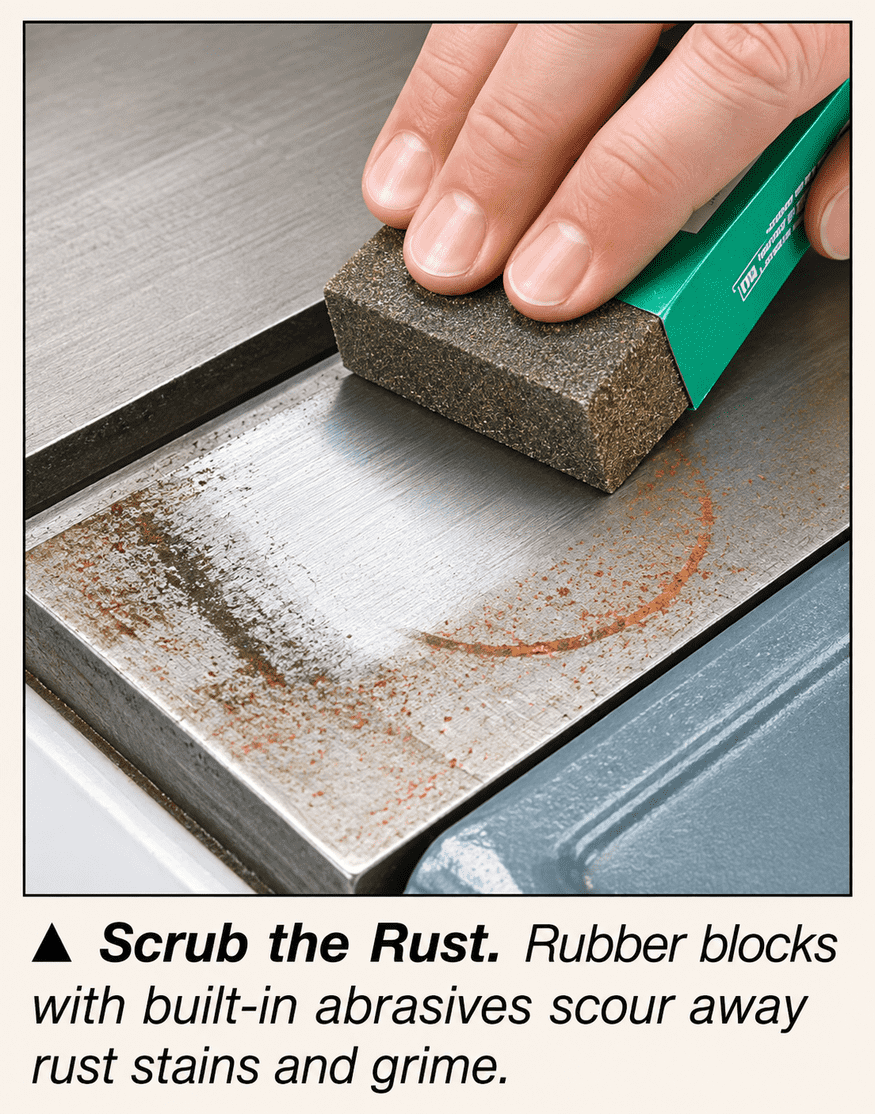
For light surface rust, I like to use an abrasive rust eraser. These blocks contain silicon carbide grit and gradually wear away as you work, exposing fresh abrasive. They're handy for targeting isolated rust spots without having to sand the entire tabletop.
Rub the affected area with light, even pressure until the rust is removed. For more widespread corrosion, a fine nonwoven abrasive pad or fine wet-or-dry sandpaper can also be effective.
What If the Table Saw Top Has Heavy Rust?
If your tabletop has extensive rust, you'll need to spend more time removing the corrosion before moving on to the polishing stage. Work gradually with an appropriate abrasive, starting with the least aggressive option that will remove the rust.
Avoid using a coarse grinding wheel or other aggressive method that could leave deep scratches or affect the flatness of the table. If corrosion has caused significant pitting, cleaning and polishing may improve the surface, but they won't restore the missing metal.
Once the rust is removed, wipe away the residue before proceeding.
Step 3: Clean the Tabletop and Miter Gauge Slots
With the dried glue, finish, and rust removed, it's time to give the entire tabletop a thorough cleaning.
Use a suitable degreasing cleaner to remove the remaining grime. Pay attention to the blade opening, miter gauge slots, and any other areas where dust and residue tend to collect.
A brass brush or old toothbrush can help loosen packed-in debris from the slots and corners. Follow up with a shop vacuum or carefully directed compressed air to remove the loosened material.
Make sure the cleaner is compatible with the saw's surfaces and keep liquids away from electrical components, bearings, and other areas where they could cause problems. Dry the tabletop thoroughly before moving on to polishing.
Step 4: Sand & Polish the Cast Iron Surface
By now, the tabletop should be clean, but it may still have scratches, stains, or an uneven appearance. The next step is to smooth and polish the cast iron to create a more uniform surface.
This is a two-stage process. First, use fine sandpaper to address the remaining surface imperfections. Then switch to a fine abrasive pad to blend the finish and produce a consistent, dull sheen.
Sand the Tabletop with 220-Grit Sandpaper
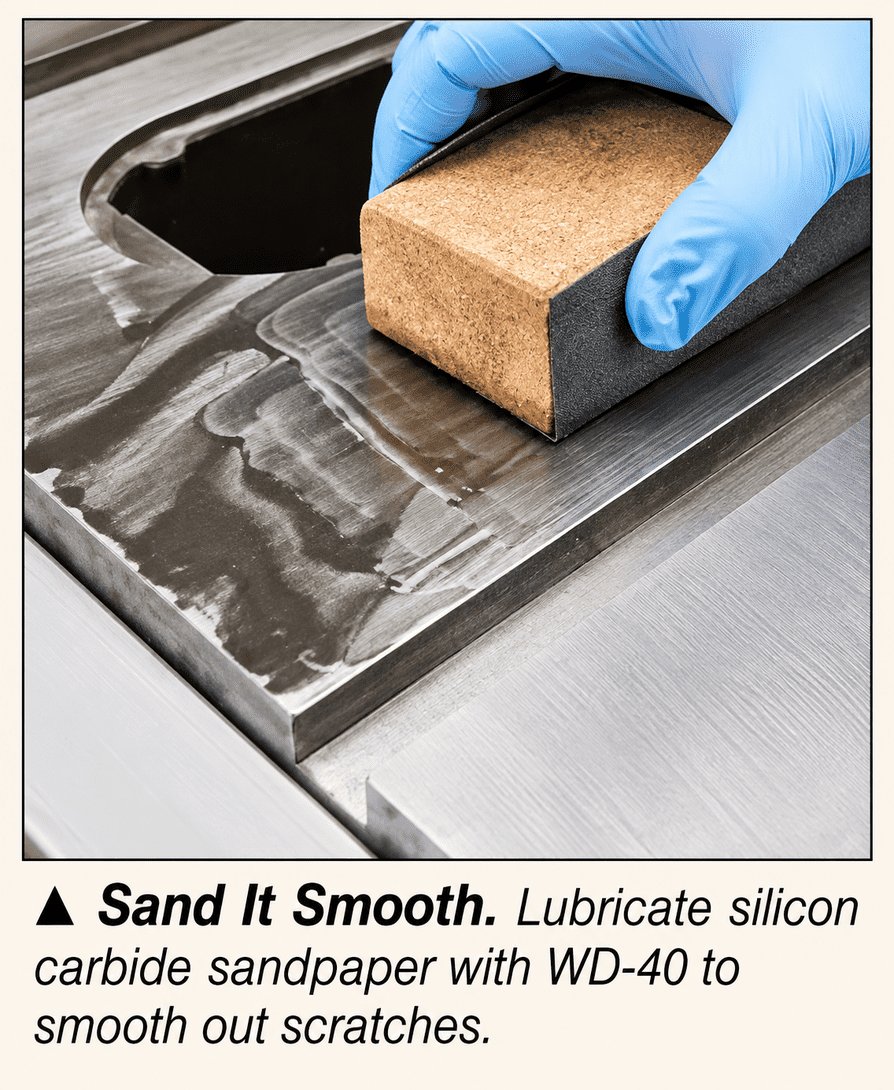
I start with 220-grit wet-or-dry sandpaper wrapped around a sanding block. Apply a little WD-40 to the abrasive as a lubricant, then work over the tabletop using even strokes from front to back.
The goal is to remove minor scratches and remaining surface discoloration without taking off more material than necessary. Keep the sanding block flat and avoid concentrating too much pressure in one area.
Cast iron is tough on sandpaper, so replace the abrasive as it wears. Periodically wipe away the slurry with a rag to check your progress.
Polish the Surface with a Fine Abrasive Pad
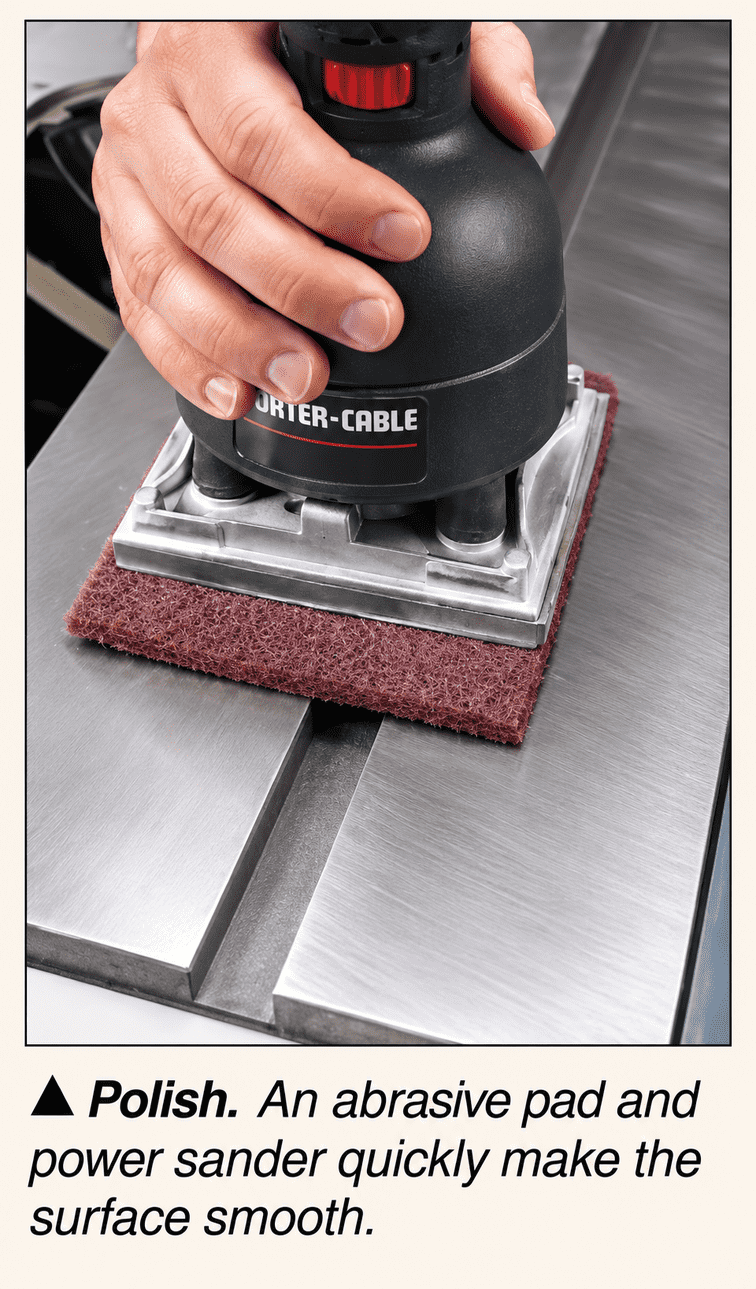
Once the surface is smooth, switch to a fine abrasive pad. I attach the pad to my finish sander and work over the tabletop again, blending the sanding marks into a uniform finish.
There's no need to create a mirror polish. What matters is achieving a clean, smooth surface that allows wood to slide easily.
Replace the abrasive pad as needed, and inspect the tabletop as you work. When you're satisfied with the results, remove all remaining abrasive residue and lubricant.
Remove the Remaining Sanding Residue
Before applying a protective coating, the tabletop needs to be completely clean.
Wipe away any remaining metal particles, abrasive dust, and WD-40 residue with a suitable cleaner. The original Woodsmith method uses lacquer thinner for this final wipe-down. If you use it, follow the product's ventilation, fire-safety, and handling instructions, and keep it away from painted surfaces and other materials it could damage.
Allow the surface to dry completely before applying the protectant.
Step 5: Protect the Table Saw Top Against Rust
Once the cast iron is clean and polished, the final step is protecting it from moisture and future buildup.
A spray-on protectant designed for woodworking machinery is a good choice. These products can help prevent rust, reduce friction, and make it easier to remove glue or finish that lands on the surface.
Apply the protectant according to the manufacturer's instructions, then buff the tabletop if required. Choose a product that's compatible with woodworking and won't leave contaminants that could interfere with finishing your projects.
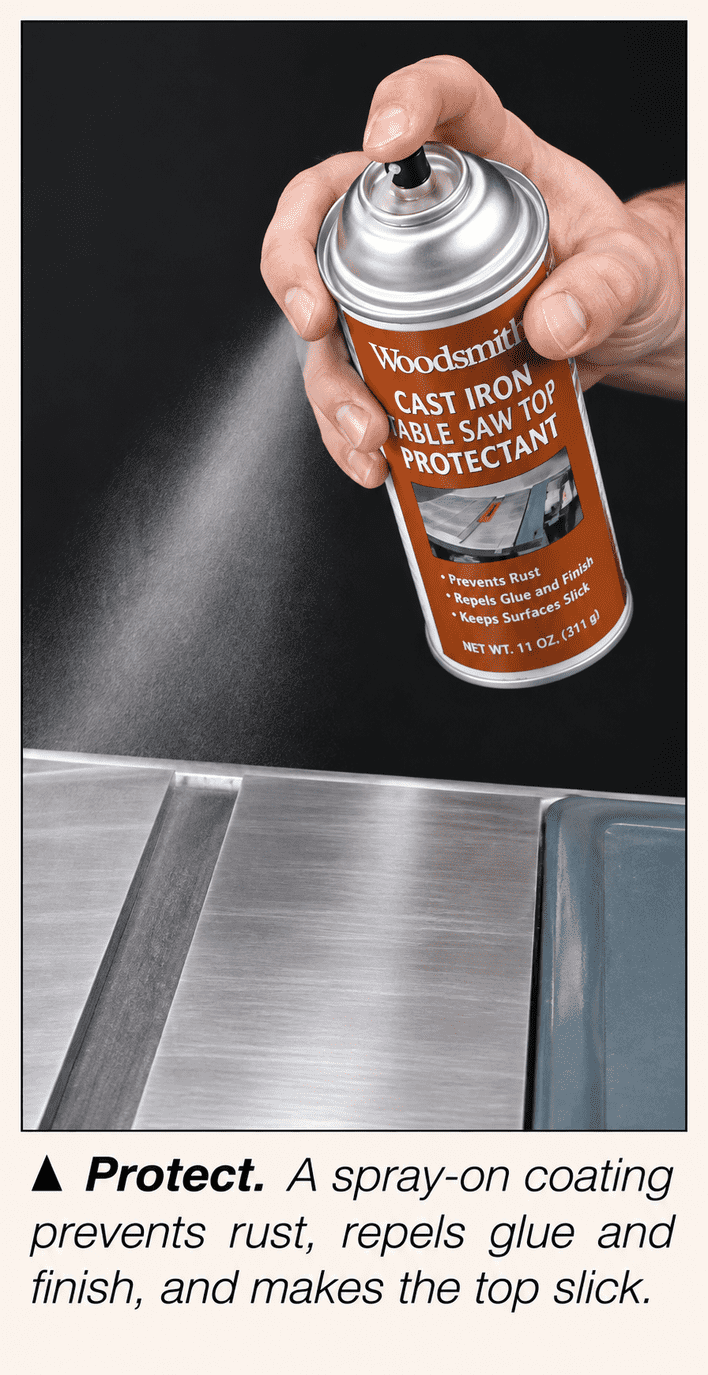
Paste wax is another option for protecting a cast iron table saw top. Whichever product you choose, reapply it periodically, especially if your shop experiences high humidity or you frequently use the saw as an assembly surface.
How to Keep Your Table Saw Top Clean & Rust-Free
Once you've restored the tabletop, a little routine maintenance will help keep it in good condition. Wipe away sawdust and spills after working, remove glue before it hardens, and inspect the surface periodically for rust.
If you use the table saw as an assembly or finishing station, consider covering it with a removable protective panel. This provides an additional work surface without exposing the cast iron to glue, finish, and accidental damage. Remove the cover before operating the saw.
Keeping the tabletop protected is much easier than repeating a full restoration after rust and grime have built up.
A Smoother Table Saw Makes Woodworking Easier
Restoring a cast iron table saw top is a straightforward shop maintenance project that can make a real difference in everyday use. Removing burrs, rust, and dried finish eliminates rough spots, while sanding and polishing create a surface that allows workpieces to move more freely.
Finish the job with a protective coating, and you'll have a cleaner, smoother tabletop that's easier to maintain.
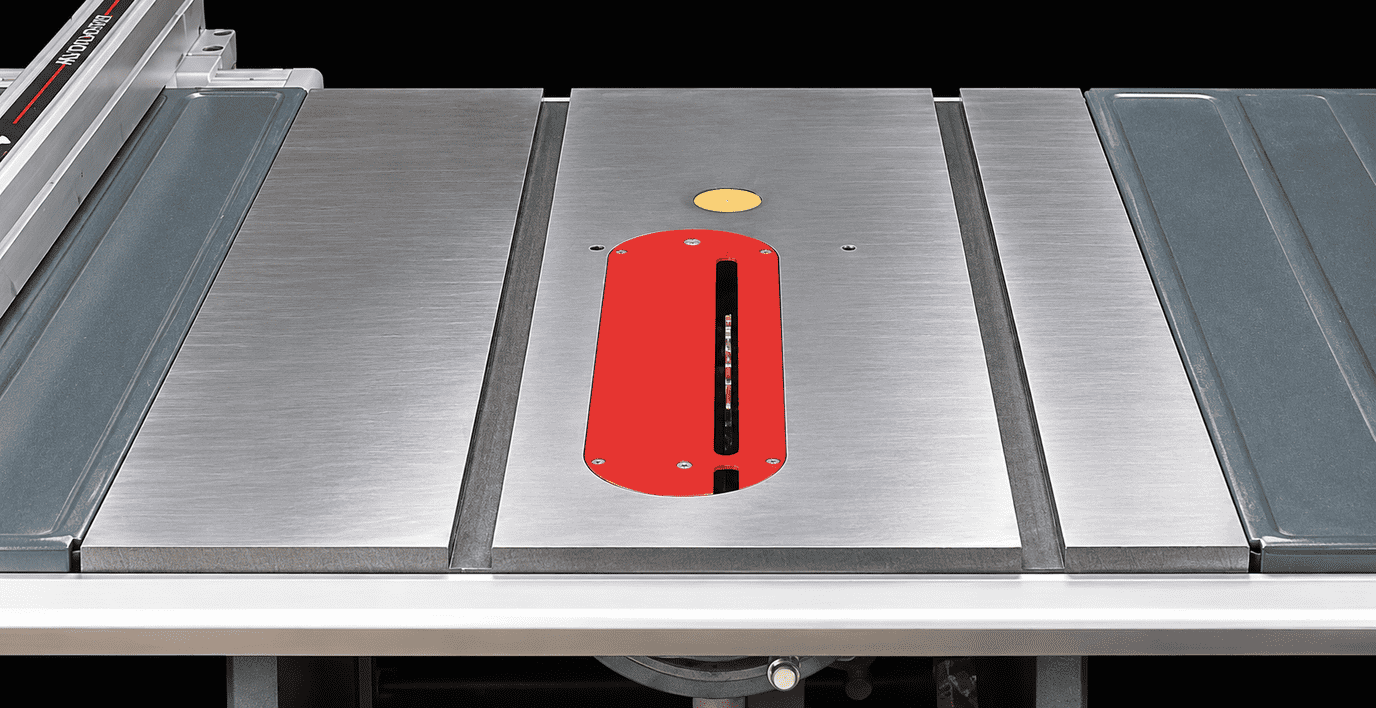
The result isn't just a better-looking table saw. It's a saw that's more pleasant to use, with less friction and fewer opportunities for surface blemishes to affect your work.
For additional maintenance tips beyond the tabletop, check out our free Table Saw Tune-Up article, which covers more ways to keep your saw operating smoothly.
You can also download the free Table Saw Makeover article for a handy reference to this restoration process.
For additional tips on avoiding rust in your workshop, check out the article on How to Prevent Rust on Woodworking Tools..


