


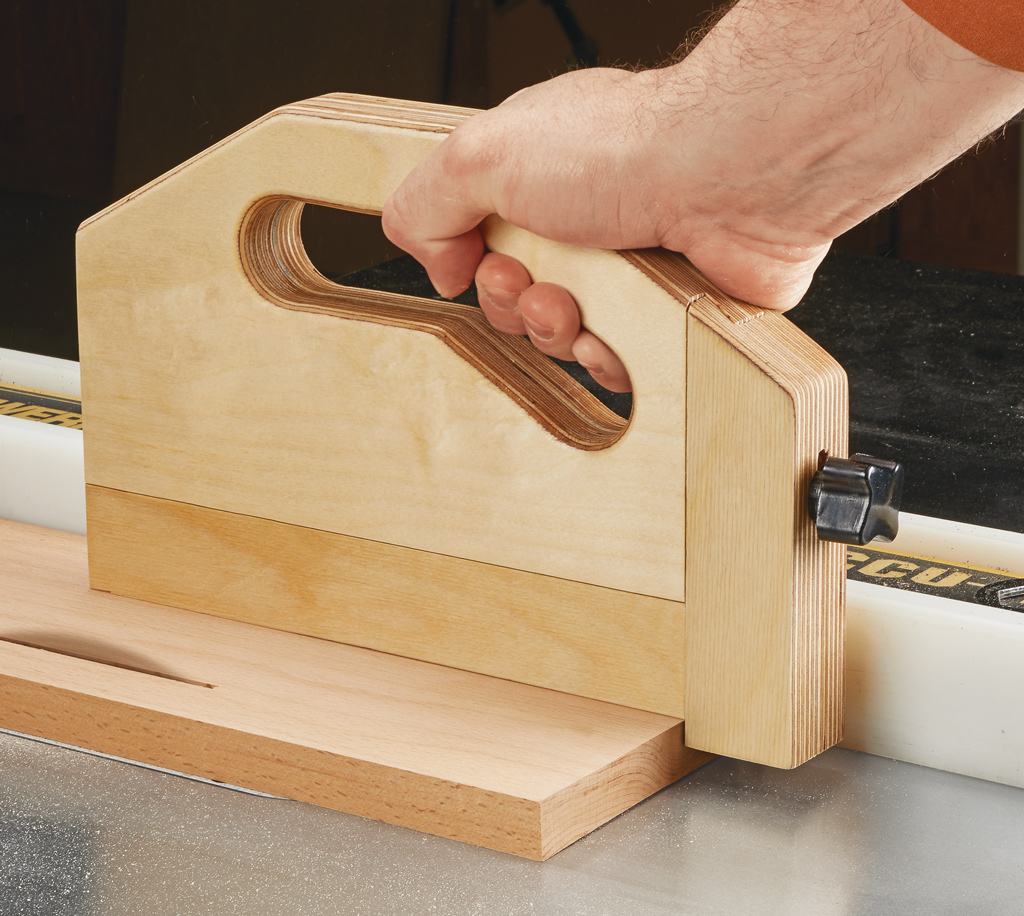
Build a Table Saw Push Block with a Replaceable Base
A good table saw push block is one of those shop accessories you'll reach for again and again. It helps maintain control of a workpiece while keeping your hands farther from the spinning blade.
But there's one drawback to many shop-made push blocks: Eventually, the bottom and heel become worn or damaged from repeated use.
After years of making disposable push blocks, I decided it was time to build one that would last.
The solution is this renewable table saw push block, featuring a sturdy handle, a replaceable base, and an adjustable heel.
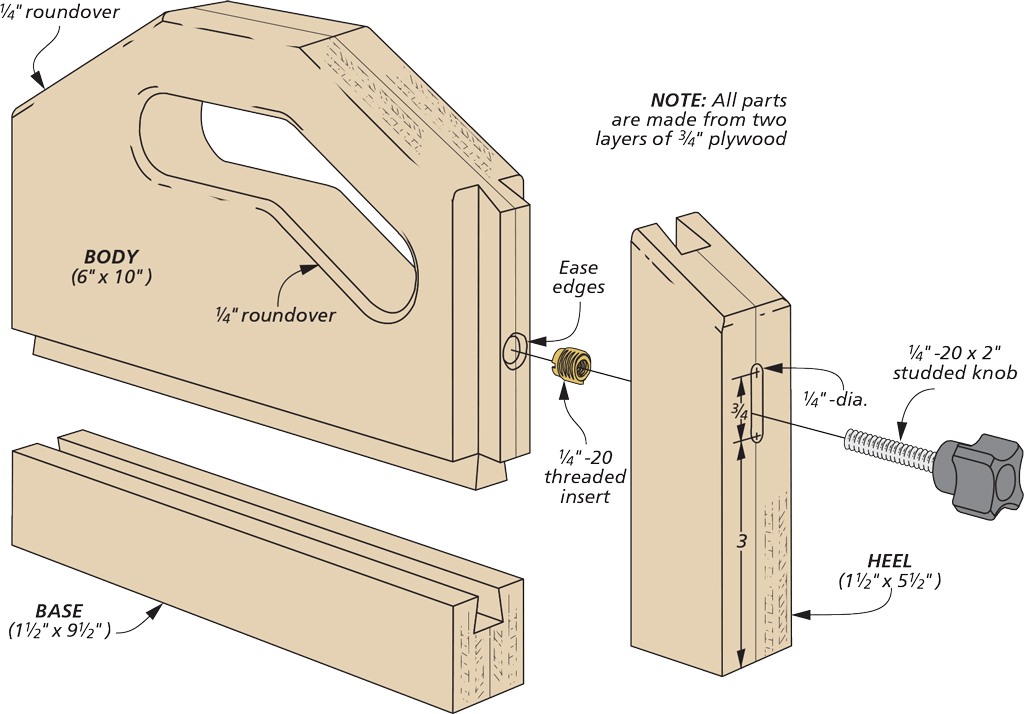
Both wear parts attach to the handle with sliding dovetails, making them easy to remove and replace when necessary.
It's a simple idea that gives this push block a much longer useful life.
RELATED ARTICLE: 5 DIY Push Blocks for Safer Woodworking
What Makes This Push Block Different?
Most shop-made table saw push blocks are cut from a single piece of wood or assembled with permanently attached components.
That works well until the bottom or heel becomes worn.
This design takes a different approach by separating the push block into three main components:
- Handle: The permanent portion of the push block that provides a comfortable grip.
- Replaceable base: A sacrificial bottom piece that can be changed when it becomes damaged.
- Adjustable heel: A replaceable rear stop that pushes the workpiece through the cut.
The base and heel are attached with sliding dovetails rather than being permanently glued in place.
This allows the worn parts to slide off the handle so new ones can be installed.
Sliding Dovetails Make the Parts Replaceable
The key to this design is the sliding dovetail joinery.
Both the base and heel fit into matching dovetail slots in the handle.
The joints keep the components aligned while allowing them to be removed when replacement is necessary.
A Sacrificial Base
The bottom of a push block can become worn from repeated contact with the saw blade.
Rather than allowing that wear to damage the main body, this design uses a separate sacrificial base.
When the base becomes worn, simply slide it off and replace it with a new one.
The handle remains intact and ready for continued use.
An Adjustable, Replaceable Heel
The heel is another part of a push block that takes a lot of abuse.
Its job is to catch the trailing edge of the workpiece and push the stock forward through the cut.
On this design, the heel includes a slot for a studded knob.
Loosening the knob allows you to raise or lower the heel to accommodate different stock thicknesses.
Once the heel is positioned, tighten the knob to hold it securely in place.
When the heel becomes worn or damaged, it can be replaced without rebuilding the entire push block.
Making Replacement Parts
One of the best features of this push block is how easy it is to keep replacement parts on hand.
Rather than making a new base or heel every time one wears out, I make several extra pieces whenever I'm cutting the dovetail profiles.
In fact, I usually make a couple of feet of replacement stock at a time.
That way, when a base or heel becomes damaged, I can simply cut a new piece to length and slide it into position.
Keep the Dovetail Fit Consistent
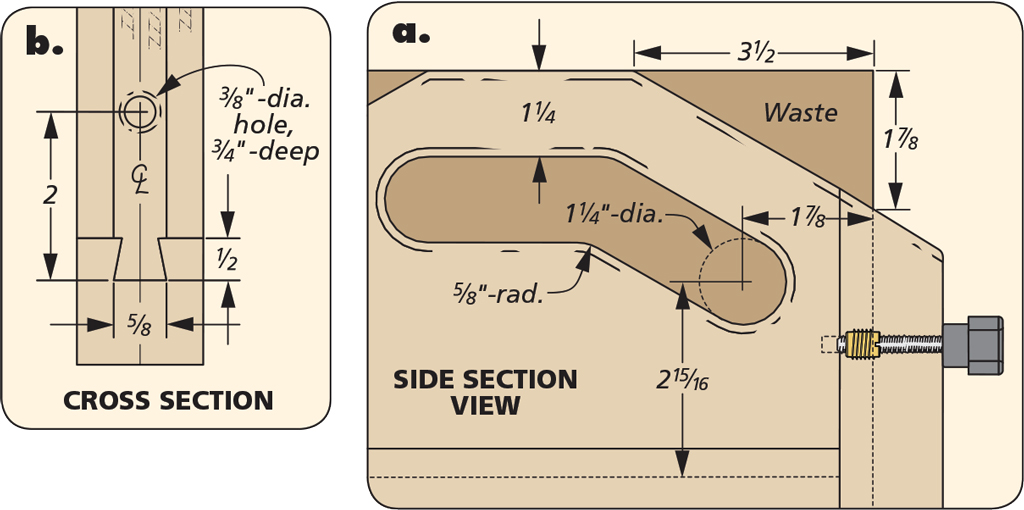
For the replacement system to work, the dovetail profiles need to be consistent.
Using the same setup when machining the replacement stock helps ensure the new parts fit the handle.
The fit should allow the pieces to slide into position without excessive looseness.
Before using the push block, make sure the base and heel are fully seated and securely retained.
Adjusting the Push Block for Different Stock Thicknesses
The adjustable heel adds versatility to the design.
For thinner stock, lower the heel so it catches the trailing edge of the workpiece.
For thicker material, raise the heel to suit the stock.
The studded knob locks the heel at the desired position.
Before making a cut, check that the heel engages the workpiece securely and that the base provides stable support.
Shop Safety: Inspect the push block before each use. Make sure the replaceable components cannot slide loose during operation, and verify that the adjustable heel is securely locked. Replace worn or damaged parts before continuing. Use the push block only for cuts where it provides proper control and clearance, along with the saw's appropriate guards and riving knife.
A Table Saw Push Block Built to Last
A push block doesn't need to be complicated to be useful, but a few thoughtful details can make it much more durable.
By using sliding dovetails to attach the base and heel, this design allows the parts that wear out to be replaced without sacrificing the handle.
The adjustable heel also makes it easy to use the push block with different stock thicknesses.
Keep a few extra replacement pieces on hand, and you'll have a reliable shop-made accessory that's ready whenever you need it.
Build a Table Saw Push Block with an Adjustable Heel

Looking for a simpler way to make a long-lasting table saw push block? This shop-made version features a laminated plywood body and an adjustable hardboard heel that can be replaced when it wears out. It's an easy project that helps you maintain control during table saw cuts.
BUILD THE PUSH BLOCK → Another Smart Push Block Design


