Cutting miters on small strips of molding or glass stop can be awkward on a power miter saw. Besides being difficult to hold securely, a small workpiece can splinter or be thrown by the blade.
For pieces like these, sometimes the simplest solution is also the best one.
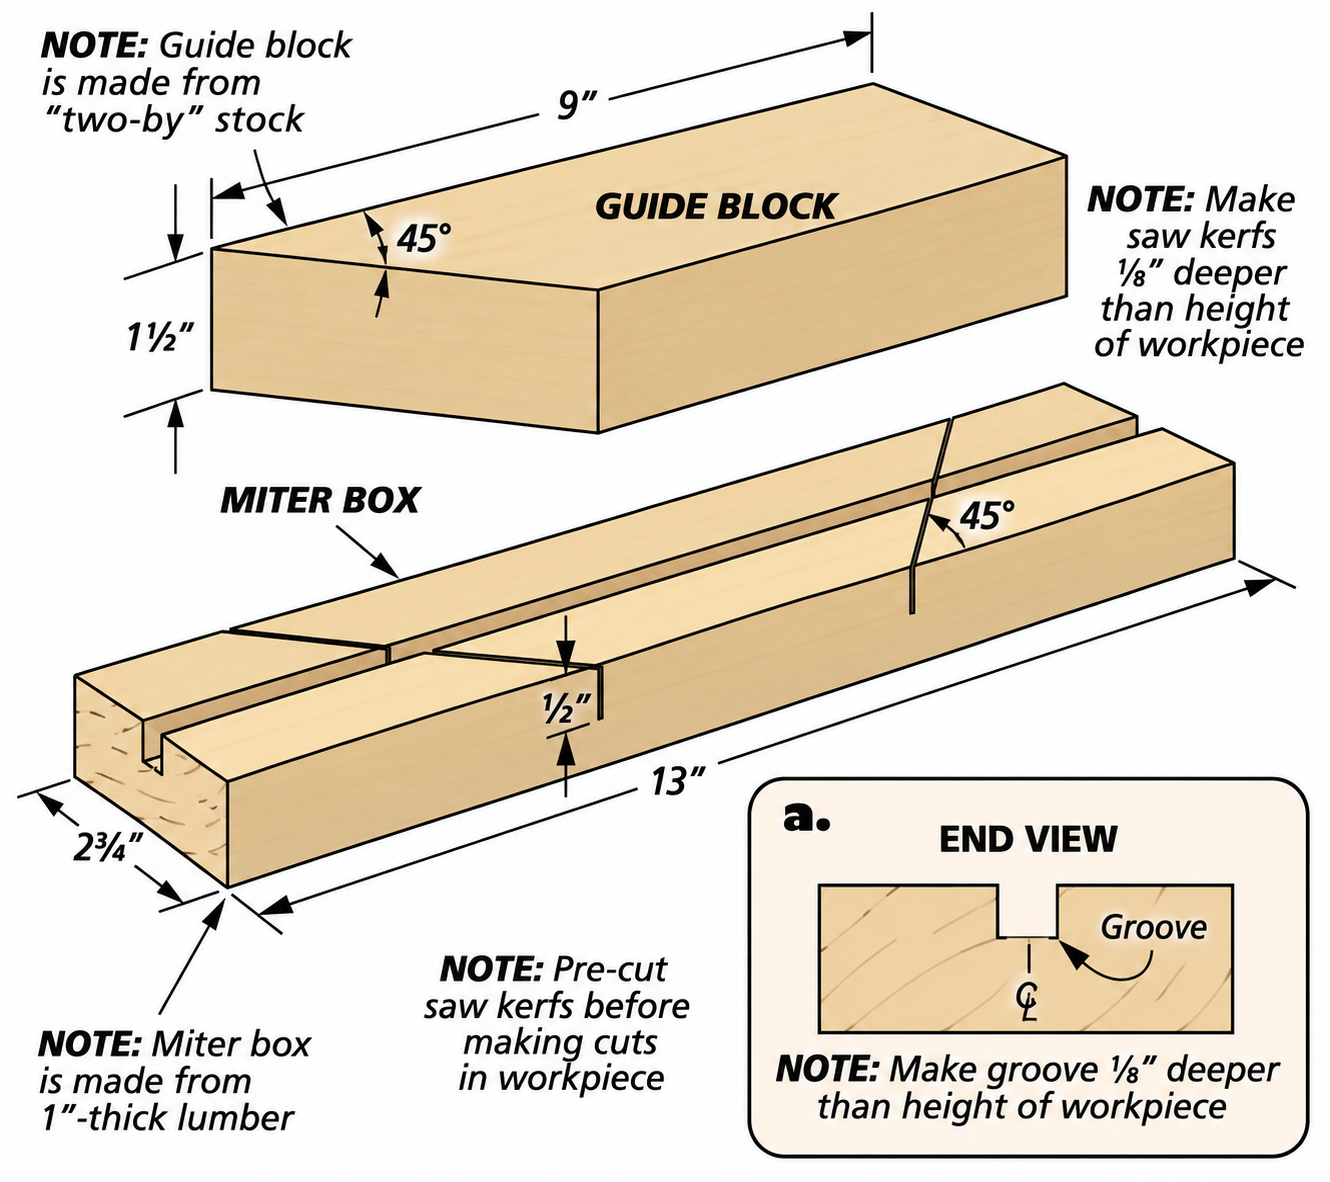
This five-minute miter box is made from a scrap of lumber and used with a hand saw. A groove holds the workpiece securely below the surface while a pair of 45° kerfs guides the saw for accurate cuts.

Start with a Scrap of Lumber
There's not much to this miter box. The body is simply a piece of 1"-thick scrap lumber with a groove cut down the center.
Size the groove to fit the molding or glass stop you plan to cut. The groove should be slightly deeper than the thickness of the workpiece. This allows the molding to sit below the top surface of the miter box.
Recessing the workpiece serves two purposes. It helps keep the narrow strip contained during the cut, and the sides of the box help guide the saw as you begin the cut.
Cut Two 45° Saw Kerfs
The miter box needs two opposing 45° kerfs so you can cut miters in either direction.
Start by laying out the kerfs with a combination square.
Accuracy matters here because these kerfs will guide every miter you make with the box. A simple way to establish the cut is to make a 45° guide block from another piece of scrap.
Position the guide block on your layout line and secure it temporarily with double-sided tape.
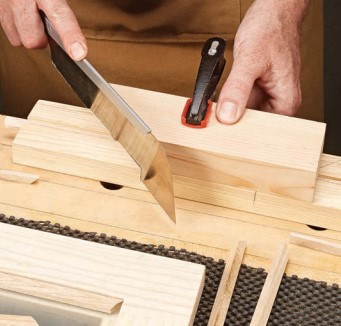
With the guide block in place, use a pull saw to establish the kerf. Keep the blade against the guide as you begin the cut, then continue the kerf into the body of the miter box.
Repeat the process in the opposite direction to create the second 45° kerf.
Cut Small Molding with a Hand Saw
To use the miter box, place the molding or glass stop in the center groove and align the desired cut with the appropriate kerf.
The groove supports and contains the small workpiece while the kerf guides the hand saw at 45°.
This gives you much more control over a tiny workpiece than trying to hold it near the blade of a power miter saw.
Woodsmith Tip: Leave the Miter Slightly Long. Don't try to hit the finished length exactly with the saw. Instead, cut the molding about 1⁄32" longer than needed. Then use a block plane or sanding block to carefully fine-tune the miter to its finished length.That little bit of extra material gives you room to adjust both the length and fit of the miter.
Make a Miter Box for Each Size of Molding
One advantage of this design is how inexpensive and quick it is to build.
Instead of trying to make one miter box accommodate every small workpiece in the shop, you can make several dedicated boxes with grooves sized for different molding profiles or glass stops.
A close-fitting groove provides better support and makes those tiny pieces easier to control.
For a jig made from a few pieces of scrap, that's a useful upgrade whenever a project calls for small, precisely mitered parts.
RELATED VIDEO: Check out the Miter Box in Action