A sharp hand plane is one of the most useful tools in any woodworking shop. Whether you're smoothing a board, trimming a joint, or cleaning up an edge, a properly sharpened plane iron makes the work easier and produces better results.
But sharpening a hand plane blade doesn't have to involve expensive equipment, complicated jigs, or a lengthy process.
In this Woodsmith Shop woodworking tutorial, Chris Fitch demonstrates how to sharpen a plane iron using a pair of oil stones, a little honing oil, and a simple leather strop. With a few basic techniques, you can put a razor-sharp edge on your blade in just a few minutes and get right back to woodworking.
The hand plane featured in this video is a classic shop-made design from Woodsmith Magazine, Issue 236. If you'd like to build one for your own workshop, you can get the step-by-step Hand Plane woodworking plans from WoodsmithPlans.com.
What You Need to Sharpen a Hand Plane Blade
One of the advantages of Chris's sharpening method is its simplicity. You don't need a powered sharpening system or an elaborate collection of accessories.
For routine sharpening, a few basic supplies will do the job.
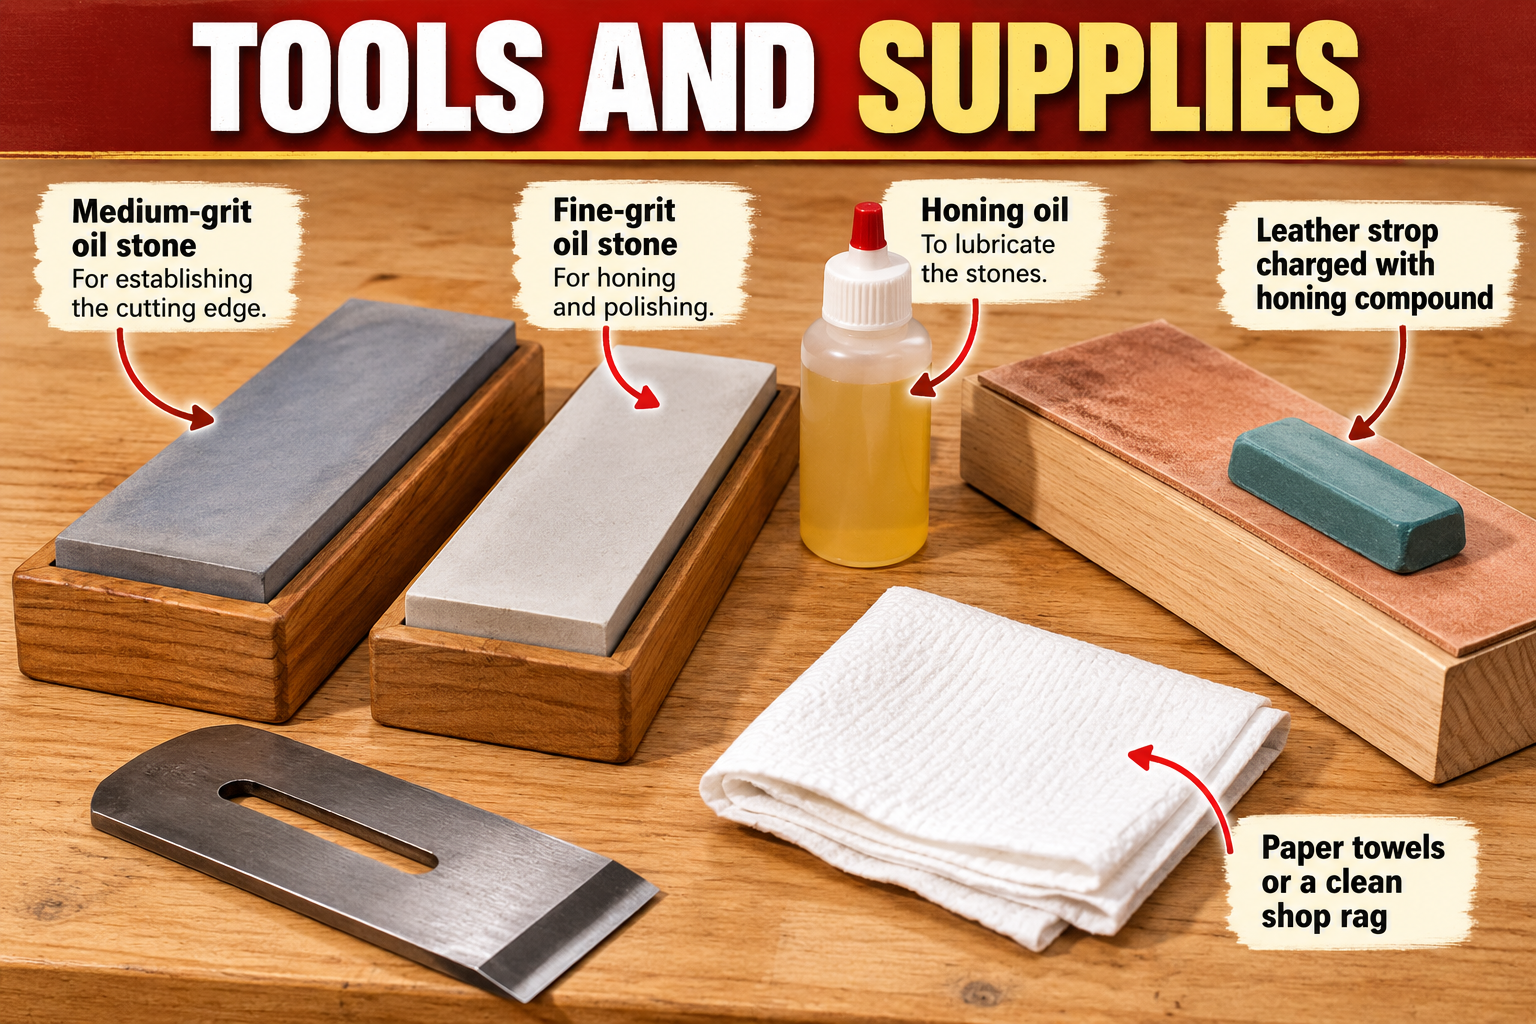
Chris prefers oil stones because they're versatile. In addition to sharpening plane irons, they work well for knives, carving tools, chisels, and other woodworking tools.
Honing oil lubricates the blade as it moves across the stone. It also helps carry away the fine steel particles produced during sharpening, preventing them from clogging the stone's surface.
This method is intended for routine sharpening. If your plane iron has deep nicks or a badly damaged cutting edge, you'll need to repair the edge before moving on to the finer sharpening steps.
Understanding the Primary Bevel and Secondary Bevel
Before you start sharpening, it's helpful to understand the geometry of a hand plane blade.
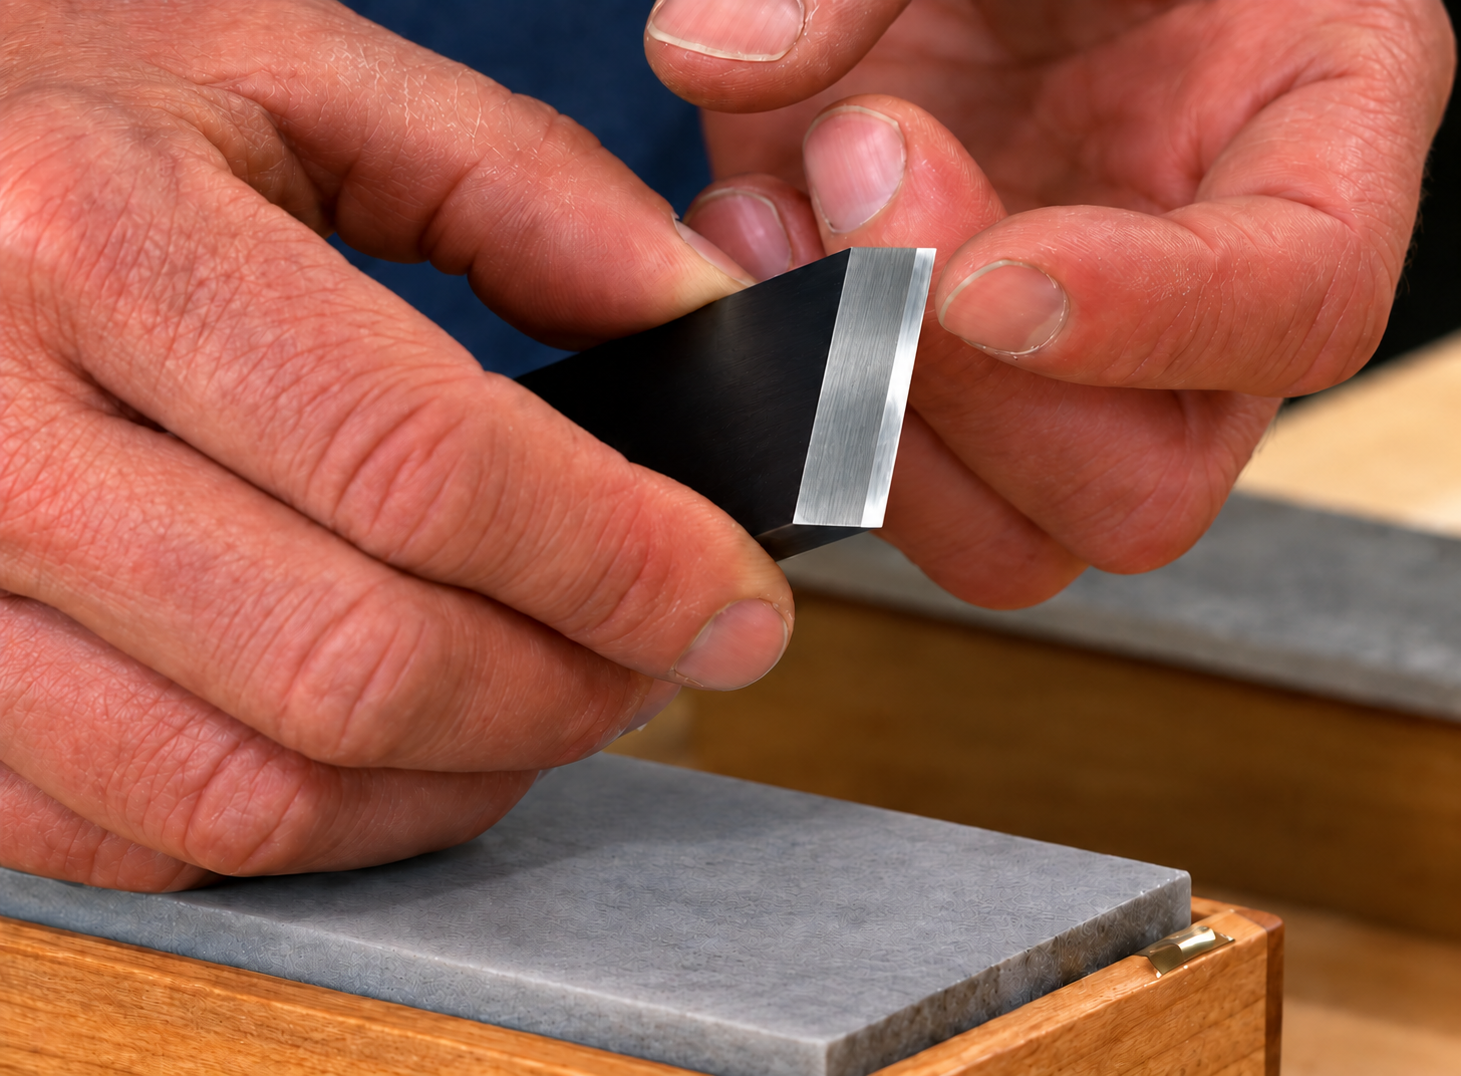
Most plane irons have two bevels: a primary bevel and a secondary bevel, sometimes called a micro-bevel.
The primary bevel is the larger angled surface ground into the blade. The secondary bevel is a narrow, slightly steeper bevel at the very cutting edge.
Rather than grinding away the entire primary bevel every time the blade needs sharpening, Chris focuses on honing this smaller secondary bevel.
This removes less metal, making the sharpening process faster and easier.
Step 1: Prepare the Medium-Grit Oil Stone
Start with your medium-grit sharpening stone.
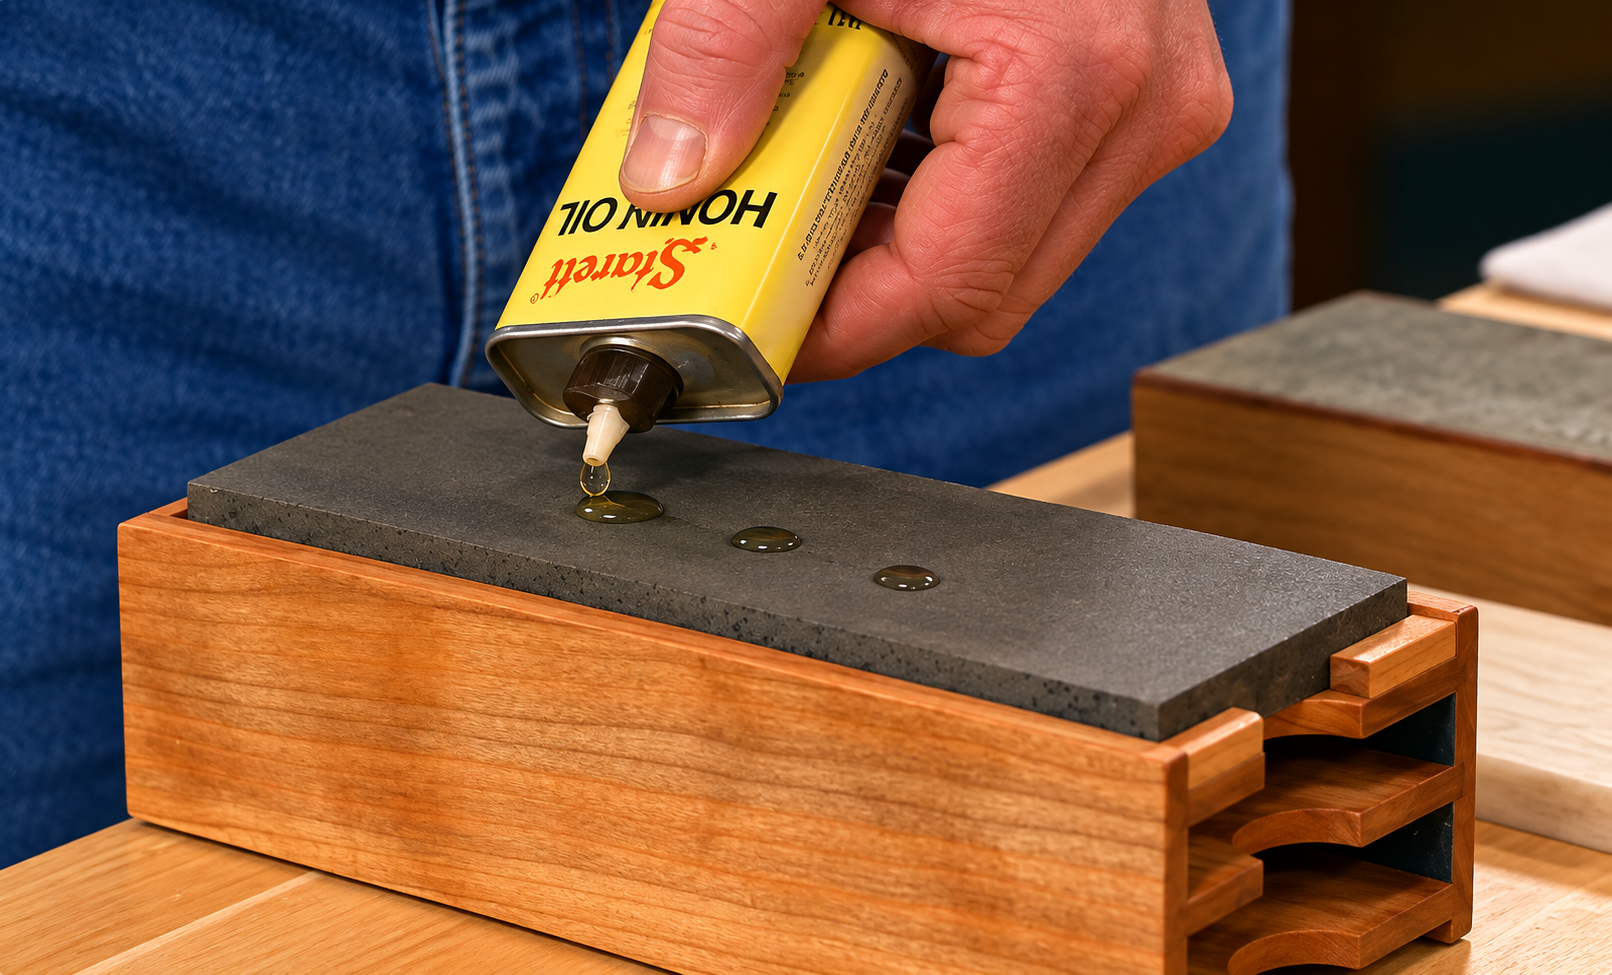
Apply a small amount of honing oil to its surface and spread it evenly. You only need enough oil to lubricate the blade and help carry away the steel particles.
Place the stone on a stable work surface. Chris uses a wooden holder that keeps the stone securely positioned while sharpening.
With the stone prepared, you're ready to begin honing the blade.
Step 2: Sharpen the Plane Iron's Secondary Bevel
Place the plane iron on the end of the medium-grit stone, with the primary bevel resting against its surface.
Rock the blade forward until you feel the primary bevel make full contact with the stone. Then lift the back of the blade just slightly to establish the secondary bevel.
Maintaining this angle, push the iron forward in a long, smooth stroke.
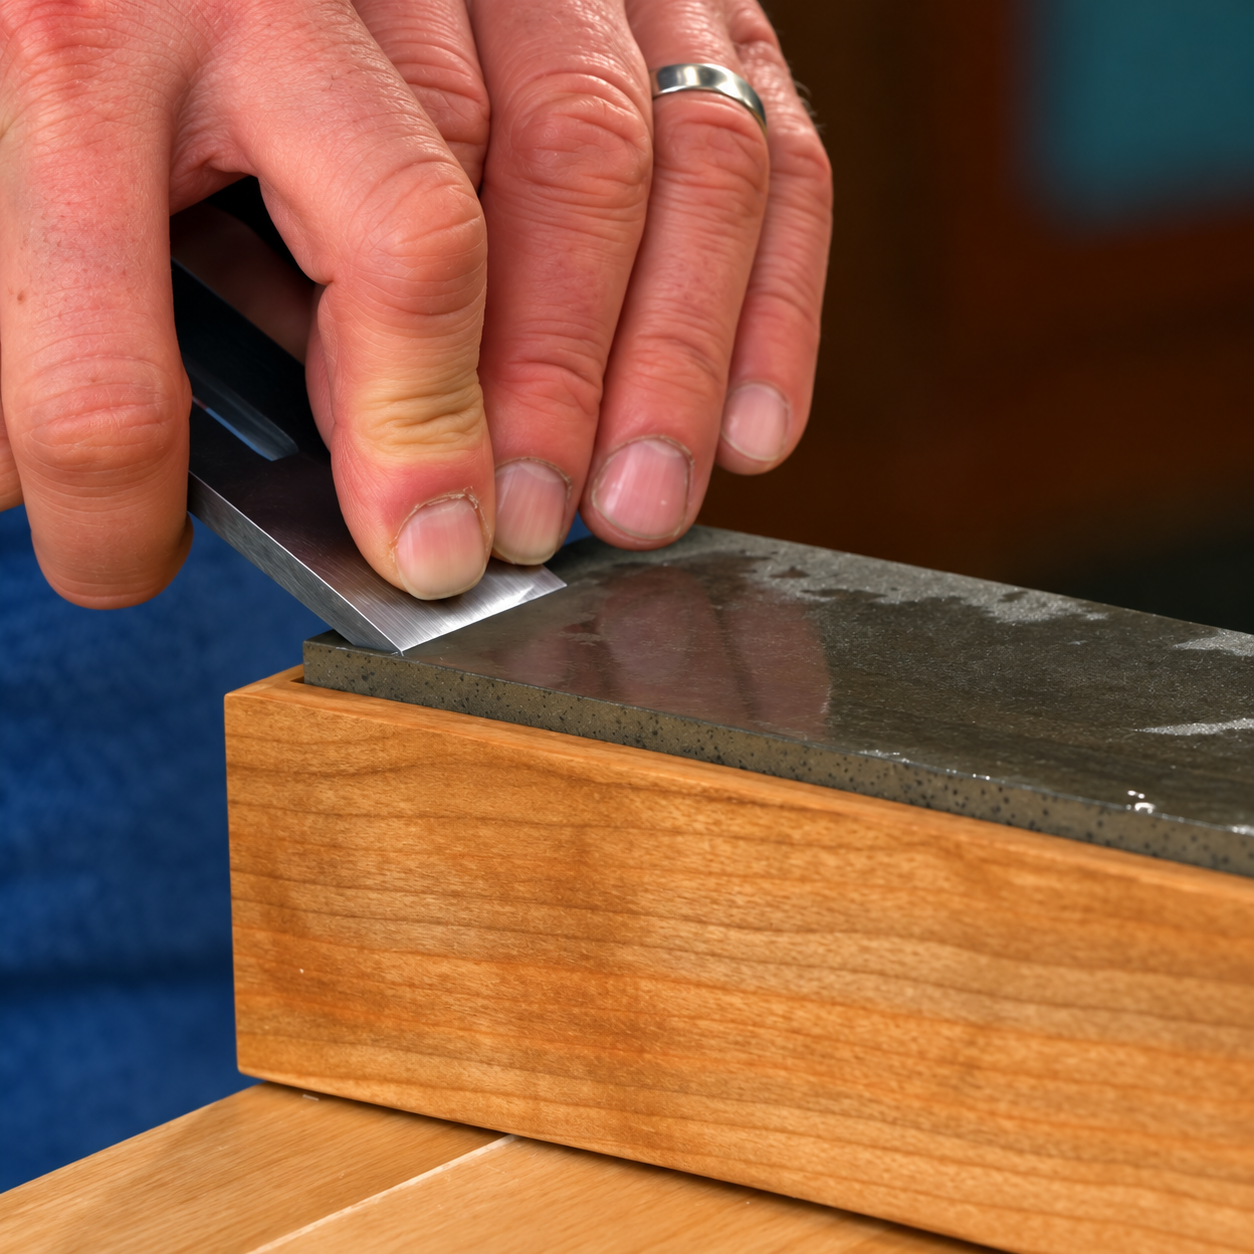
The key is to maintain a consistent angle and use light, even pressure.
There's no need to bear down on the blade. Instead, Chris recommends rocking your body forward as you sharpen. This helps maintain a steady motion and consistent contact with the stone.
As you make additional strokes, gradually move the blade across the width of the stone. This distributes wear evenly rather than concentrating it in one area.
For a blade that isn't badly nicked, Chris typically makes about 15 to 20 strokes on the medium-grit stone.
Keep Your Sharpening Stone Wearing Evenly
About halfway through the sharpening process, Chris turns the stone end for end.
This simple habit helps distribute wear over the entire sharpening surface.
Combined with moving the blade across the stone, it helps prevent uneven wear that can eventually affect sharpening accuracy.
Step 3: Hone the Blade on a Fine Oil Stone
After sharpening on the medium-grit stone, wipe the plane iron clean with a paper towel or shop rag.
This is an important step. You don't want to transfer coarse abrasive particles or steel residue to your finer sharpening stone.
Apply a little honing oil to the fine stone and repeat the same sharpening process.
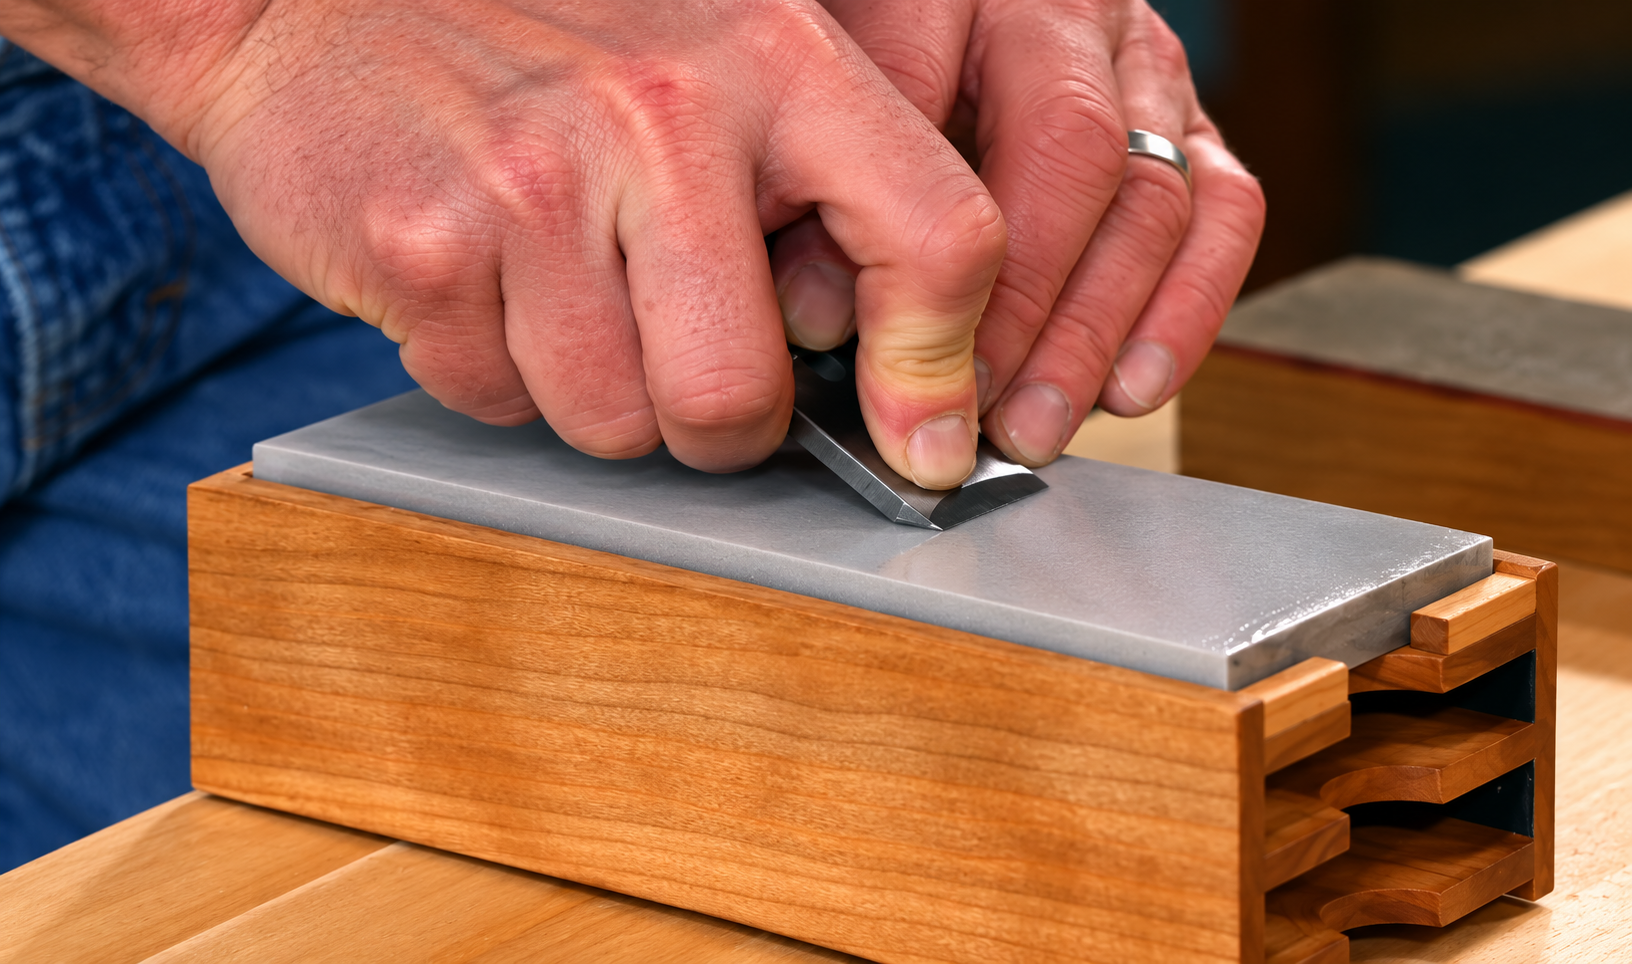
Set the primary bevel against the stone, rock the blade forward until you feel full contact, and then lift the back of the iron slightly to engage the secondary bevel.
Using light, even pressure, make smooth strokes while gradually moving across the stone.
Turn the stone end for end halfway through to maintain even wear.
The fine stone removes the scratches left by the medium-grit stone and refines the cutting edge.
Once you've finished honing, wipe the blade clean again.
Step 4: Polish the Back of the Plane Iron
Sharpening the bevel is only part of the process. For a plane iron to cut cleanly, the back of the blade also needs to be smooth and flat immediately behind the cutting edge.
Fortunately, you don't need to polish the entire back of the iron during routine sharpening.
Chris focuses on the small area directly behind the cutting edge.
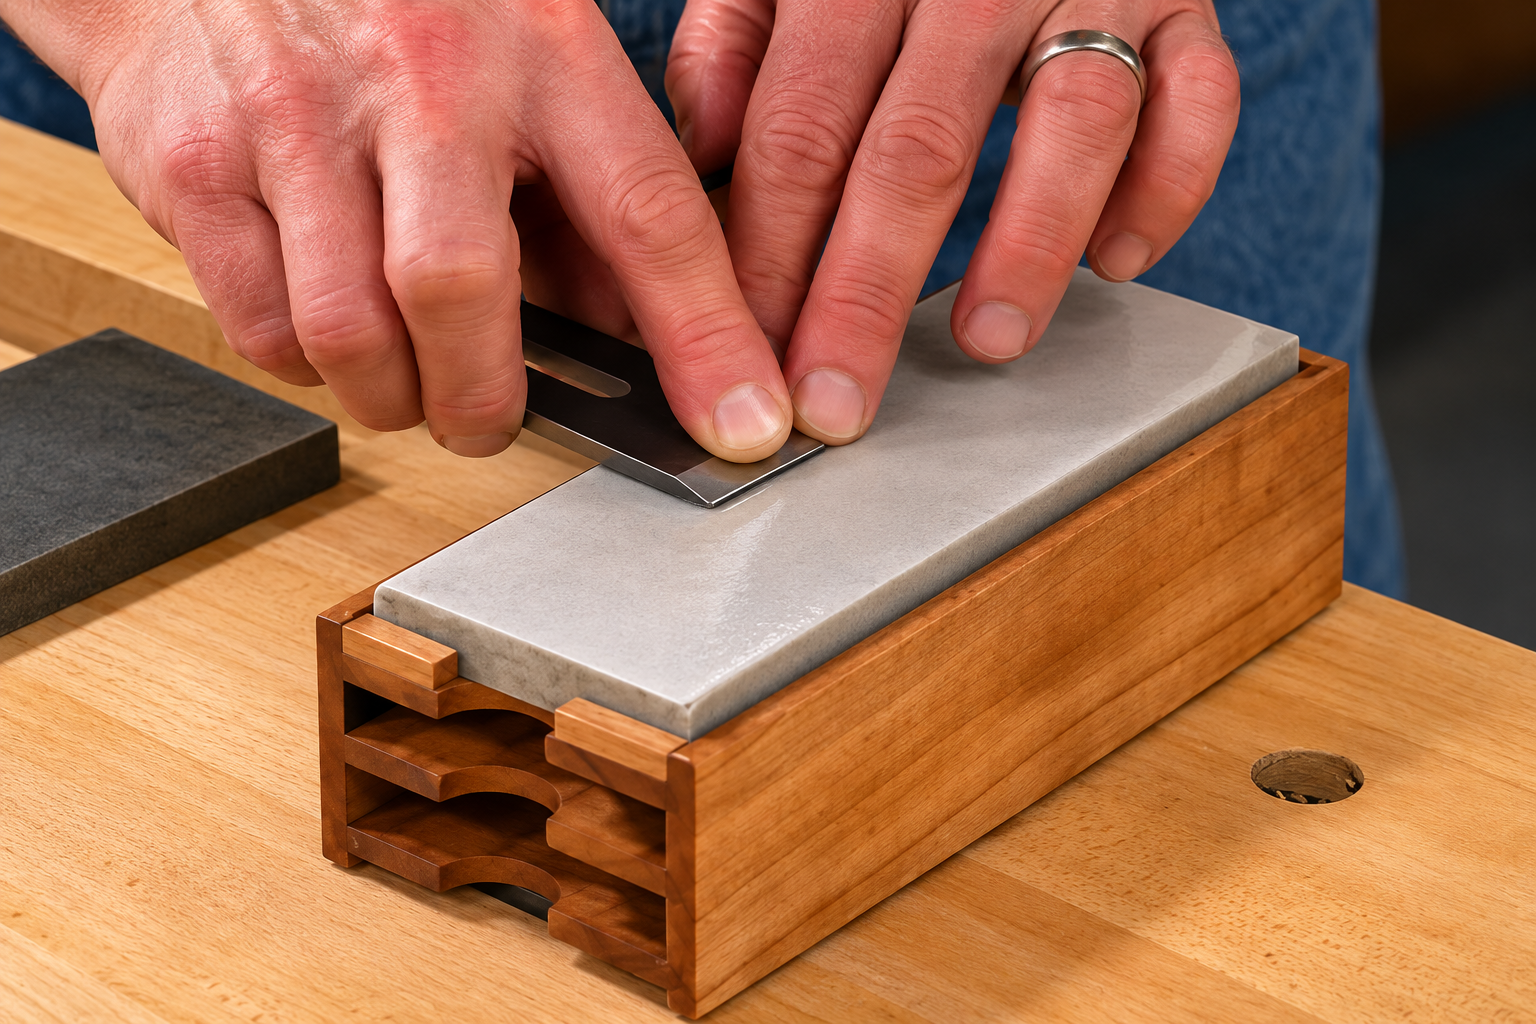
Place the back of the blade flat against the fine-grit stone. Using light pressure, move the blade in a circular motion, working from one end of the stone to the other.
Be sure to keep the back flat against the stone. You don't want to accidentally round over the cutting edge.
This step refines the back of the blade and helps prepare it for the final stropping process.
Once you're finished, wipe away the remaining oil and sharpening residue.
Step 5: Remove the Wire Edge with a Leather Strop
As you sharpen the plane iron, a very thin burr, or wire edge, forms along the cutting edge.
Although the blade may feel sharp, this delicate feather of steel can break off when you begin using the plane.
Removing it is the final step in achieving a clean, durable cutting edge.
Chris uses a simple shop-made strop consisting of a piece of leather glued to a wooden block. The leather is charged with honing compound.
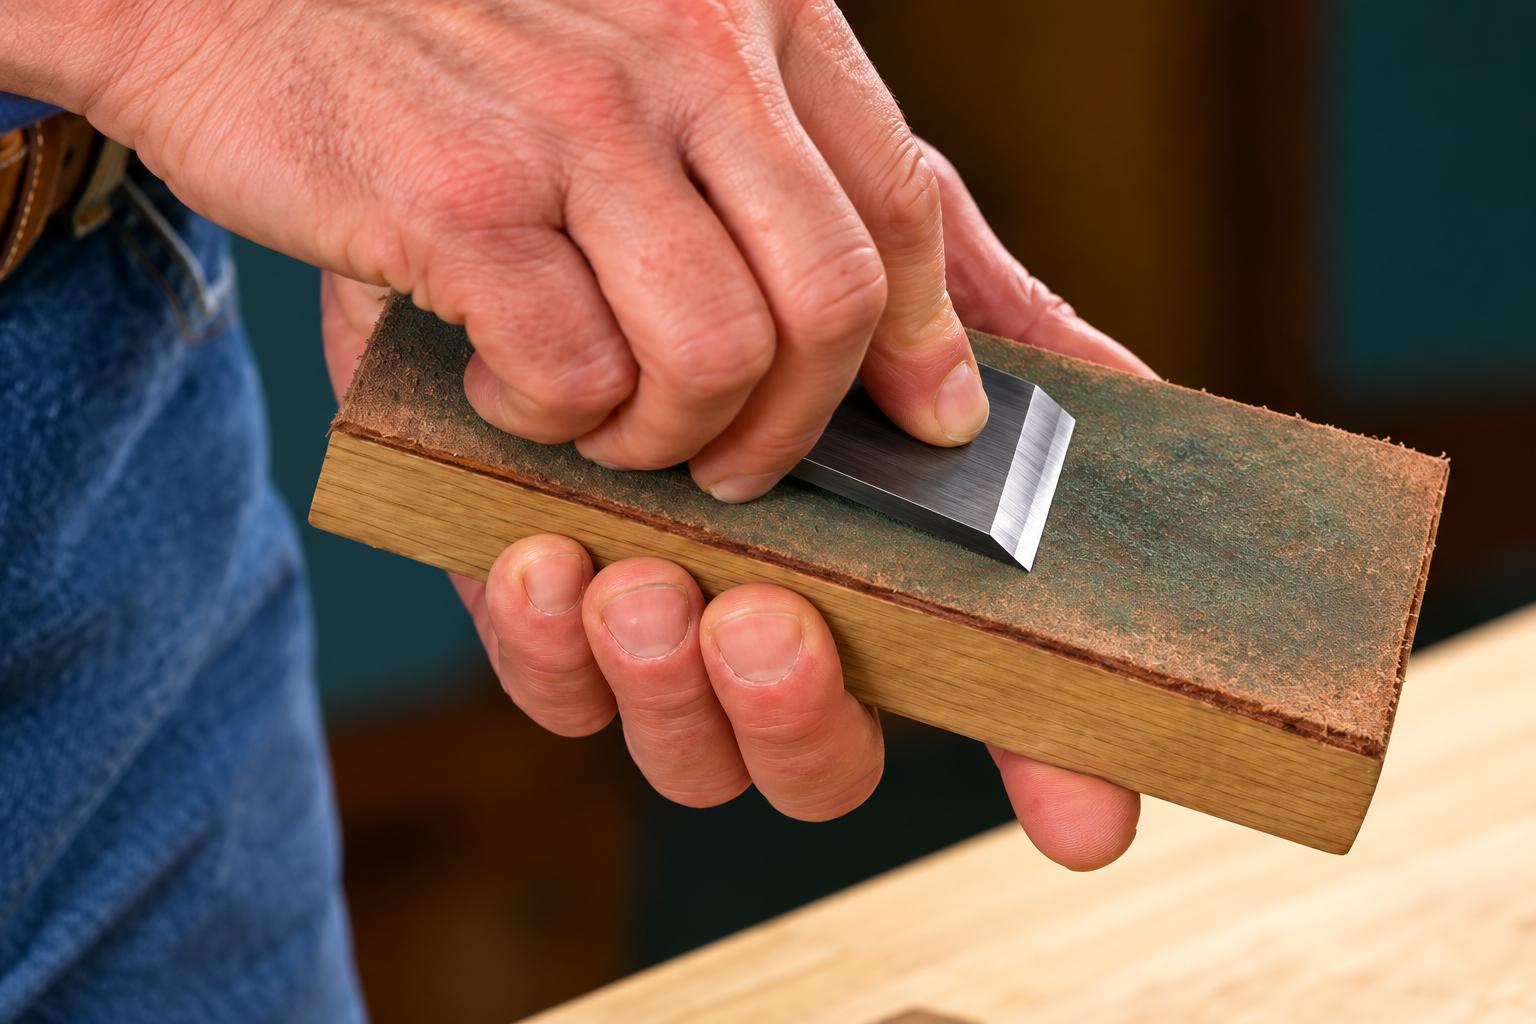
Place the beveled side of the plane iron against the strop and make two or three light strokes, pulling the blade away from its cutting edge.
Flip the iron over and repeat on the flat back.
These final strokes help remove the wire edge and polish the cutting edge.
With that done, your plane iron is sharp and ready to go back into the hand plane.
Tips for Sharpening a Hand Plane Blade Quickly
Once you've practiced this method a few times, sharpening a plane iron becomes a straightforward part of regular tool maintenance.
Here are a few important points to keep in mind:
Sharpen before the blade gets too dull. Regular touch-ups require less work than restoring a severely worn edge.
Maintain a consistent bevel angle. Light pressure and smooth, controlled strokes are more important than speed.
Use the entire sharpening stone. Moving across the surface and turning the stone helps distribute wear.
Clean the blade between grits. This prevents coarse particles from contaminating your fine stone.
Don't skip the strop. Removing the wire edge is essential for a clean, sharp cutting edge.
You don't need to master a complicated sharpening technique to get excellent results. A little practice and a consistent routine are all it takes.
Build Your Own Woodsmith Hand Plane
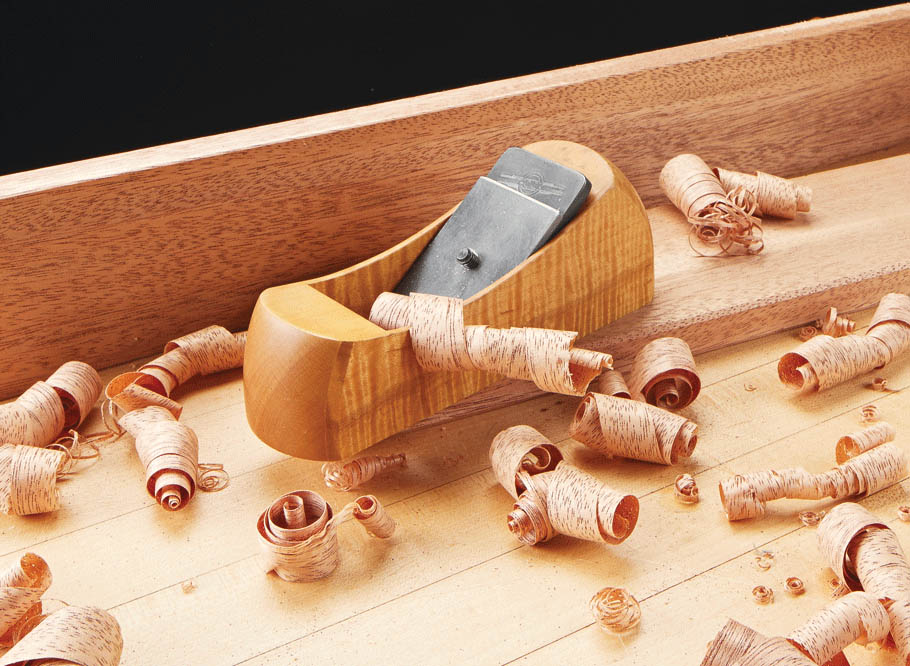
Every workshop can benefit from a small hand plane. It's the perfect tool for trimming joinery, easing sharp edges, and making those final adjustments that help a project come together.
The compact hand plane Chris uses in this video is a Woodsmith classic featured in Issue 236. Its shop-made design makes it a rewarding project for woodworkers who enjoy building and using their own hand tools.
Ready to build one for your shop?
GET THE PLANS: Woodsmith Hand Plane
With a sharp blade and a dependable hand plane, you'll be ready to tackle your next woodworking project.