


It’s tough to think of a hand tool that gets more use in my shop than a good set of chisels. I reach for them to clean up joinery, square routed corners, trim plugs, remove dried glue, and handle dozens of other small jobs.
But simply having a sharp chisel isn’t enough. How you hold and position the chisel — particularly whether you work bevel-up or bevel-down — can make a big difference in the amount of control you have.
Here are four everyday woodworking tasks that demonstrate some of the most useful chisel techniques to know.
1. Square a Routed Corner With a Chisel
A router is an easy way to create a rabbet for a cabinet back. But because you're cutting with a round router bit, the inside corners of the rabbet will be rounded as well.
A chisel makes quick work of squaring them up.
I tackle the job in two steps.
Start With Vertical Chopping Cuts

First, make a series of vertical chopping cuts to define the square corner.
I like to use a relatively wide chisel for this operation. The extra width provides a stable bearing surface against the routed edge and helps keep the cut aligned with the rabbet.
Rather than gripping only the handle, I hold the chisel down near the blade. This puts my hand closer to the cutting edge and gives me greater control over its position.
Work carefully to establish the corner without cutting beyond the edges of the rabbet.
Pare Away the Waste

Once the corner is defined, the second step is a horizontal paring cut that removes the remaining waste.
For this cut, I position the chisel bevel-up.
This puts the wide, flat back of the chisel against the bottom of the rabbet, where it acts as a reference surface and helps keep the cut even with the routed surface.
I use my left hand near the blade to steer the chisel while my right hand provides the pushing force.
The combination of chopping and paring leaves a clean, square corner without requiring any additional routing.
2. Trim Wood Plugs Flush With a Chisel
Wood plugs are a traditional way to conceal screw heads, but installing the plug is only half the job. You still need to trim it flush without damaging the surrounding surface.
I use a simple process that starts with a hand saw.
First, cut away most of the projecting plug, leaving it slightly proud of the surrounding surface. Then switch to a sharp chisel for the final trimming.
How you approach that final cut depends on the type of plug you're using.

Trimming End-Grain Plugs
A short section of dowel makes an easy plug, but it leaves end grain facing upward.
That end grain can be difficult to slice cleanly with a chisel.
Rather than trying to remove the entire plug in one pass, I start by making scoring cuts around its perimeter. Then I gradually deepen the cuts until the plug is almost flush with the surface.
A final light bevel-up paring cut trims the remaining material smooth.
Trimming Face-Grain Plugs
Face-grain plugs require a slightly different approach.
The danger here is splitting the plug below the surface of the workpiece. Instead of taking a heavy cut in the direction of the grain, take thin cuts across the grain, gradually working the plug down to the surrounding surface.
The key with either type of plug is patience. Several light, controlled cuts are much safer than trying to remove all the waste at once.
3. Remove Dried Glue From Inside Corners

Dried glue squeeze-out is another job where chisel orientation makes a big difference.
For glue that's dried in an inside corner, such as the corner of a drawer, I hold the chisel bevel-down and use it to pop away the dried glue.
With the chisel positioned this way, the bevel helps keep the cutting edge from digging into and gouging the workpiece.
Use controlled pressure and work along the glue line rather than trying to aggressively dig underneath it.
4. Scrape Glue From an Edge Joint
Dried squeeze-out along a flat edge joint calls for another technique.
Instead of using the chisel like a conventional cutting tool, hold it nearly vertical and pull it along the glue line.
This turns the cutting edge into a scraper. The scraping action quickly shears away the dried glue without requiring you to pare deeply into the surrounding wood.
There's one additional shop lesson I've learned from doing this job: Don't use your best chisel for scraping glue.
Dried adhesive can be tough on a cutting edge. Rather than spending extra time resharpening one of my good chisels, I keep an inexpensive chisel in the shop specifically for removing glue.
Bevel-Up vs. Bevel-Down: Which Way Should You Hold a Chisel?
One of the useful lessons from these techniques is that there's no single correct orientation for every chisel operation.
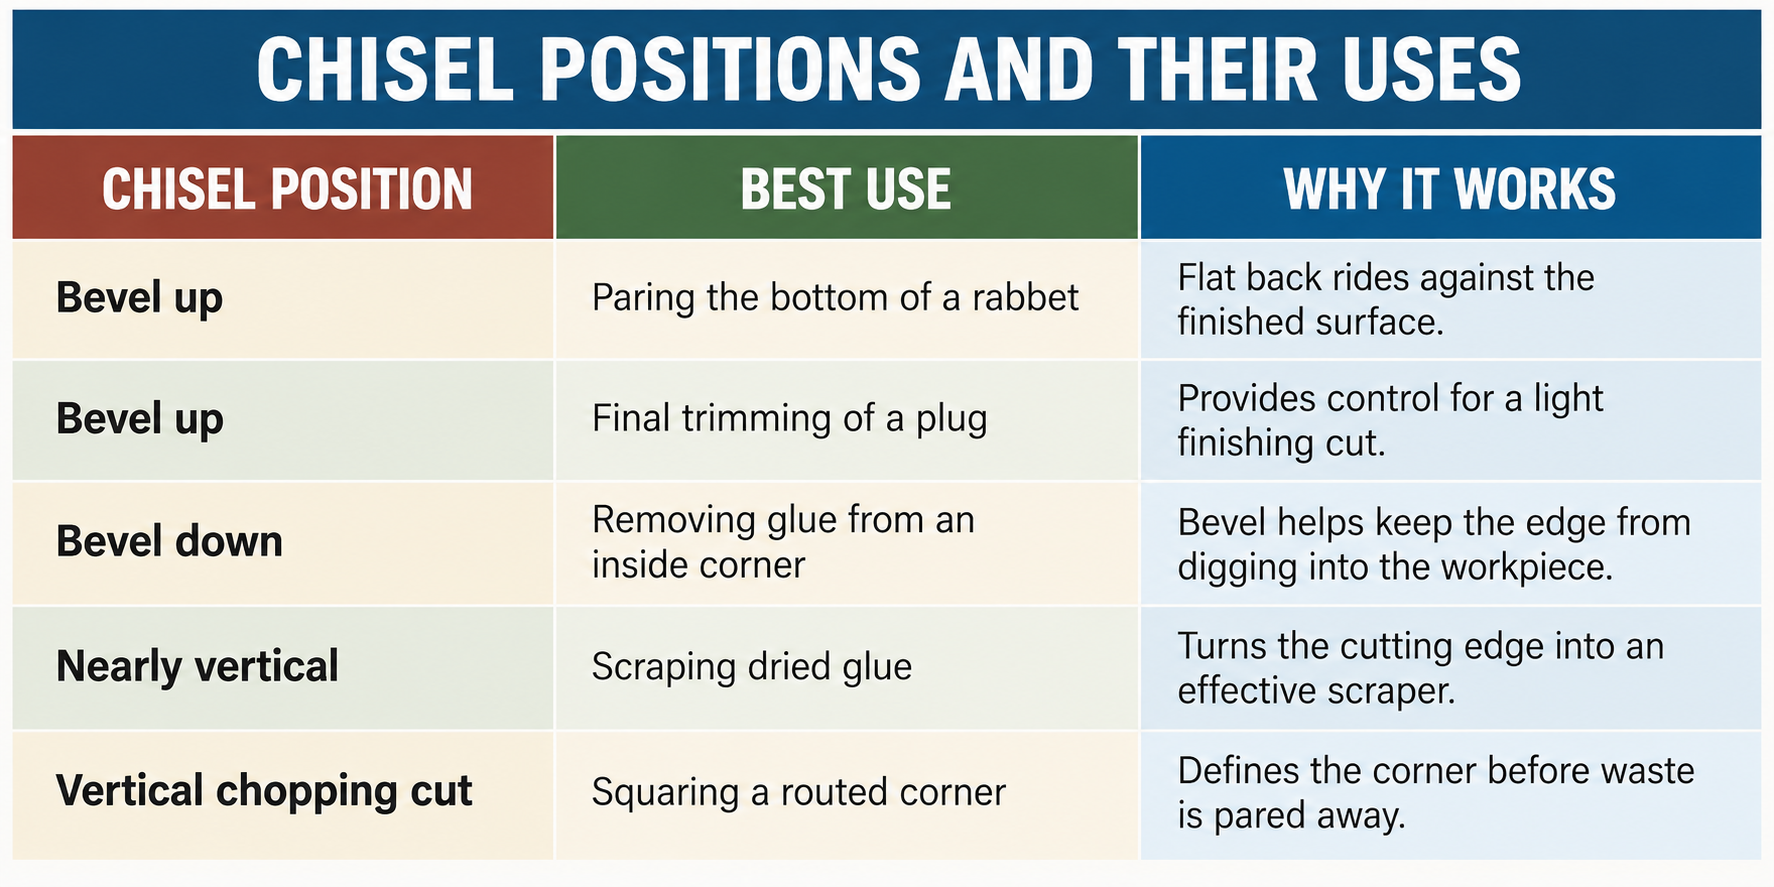
Better Chisel Control Starts With the Right Technique
A sharp woodworking chisel is an incredibly versatile tool, but getting good results depends on more than simply pushing the cutting edge through the wood.
Pay attention to where you grip the chisel, which side of the blade is against the workpiece, and whether you're chopping, paring, or scraping.
Use the flat back as a reference when you need a controlled paring cut. Turn the bevel down when it helps prevent the edge from digging into a surface. And when you're dealing with something hard on a cutting edge, like dried glue, save your best chisels and reach for a dedicated utility chisel.
Once these basic techniques become second nature, you'll find yourself reaching for a chisel for far more than traditional joinery.


