One of the best ways to get the biggest bang from a plunge router is to put it to work routing mortises. The technique is easy to master and the results are top-notch. And the clincher is that, from setup to completion, the whole process takes only a few minutes. The key is this simple-to-build and easy-to-use mortising jig.
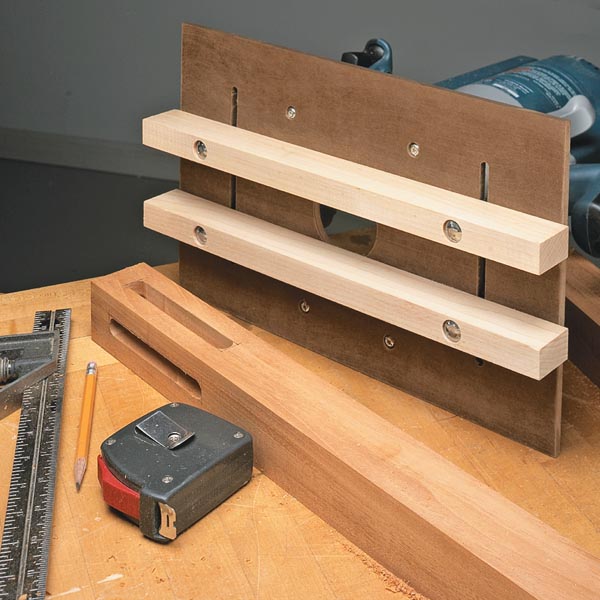
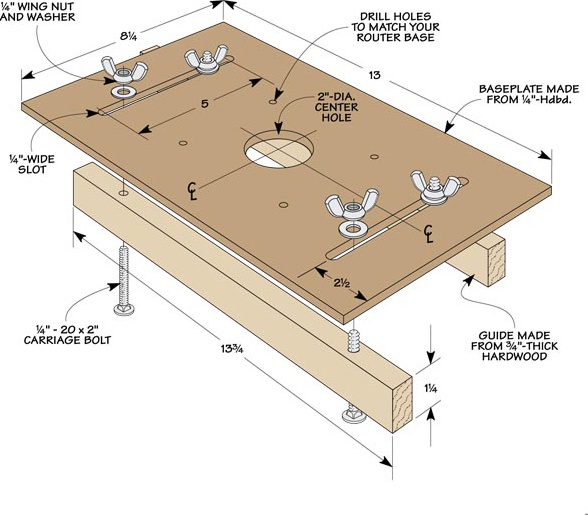
My emphasis here was on keeping things very simple, so this won’t keep you away from the work for long. Take a look at the drawing below and you’ll see that the working parts of the jig consist of an auxiliary baseplate and two adjustable guides. The baseplate is simply a “slotted” piece of hardboard that rides along the workpiece. The guides are the heart of the jig and serve two purposes. First, they’re used to easily and accurately position the mortise in the workpiece by allowing you to reference the cut off one edge. Second, the two guides sandwich the workpiece snugly to give you steady control of the router as the mortise is being cut. This makes it possible to cut accurate mortises in even very narrow stock.
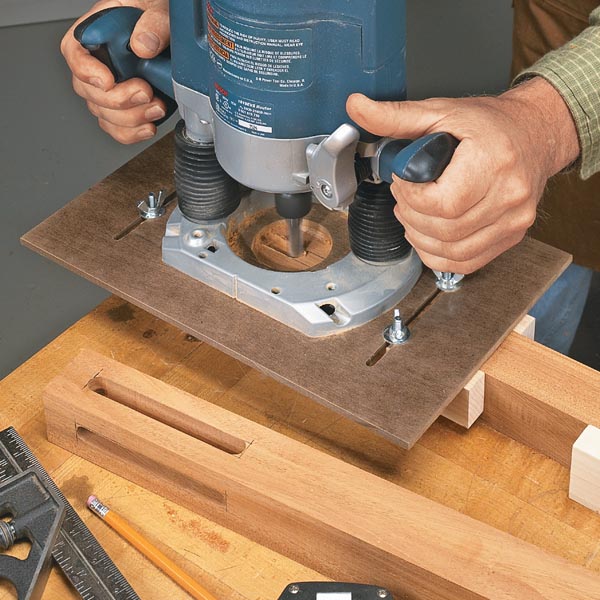
To get started, you’ll need the jig in place and the bit installed in the router. (I prefer a spiral upcut bit for mortising.) With the mortise laid out, I clamp the workpiece down so that the jig will slide along it without obstruction. With the jig positioned on the workpiece, lower the bit to the surface and then reposition the jig to center it on the layout. Snug the guides up to the workpiece and tighten them down. The jig should slide easily along the workpiece but without any slop or wobble.
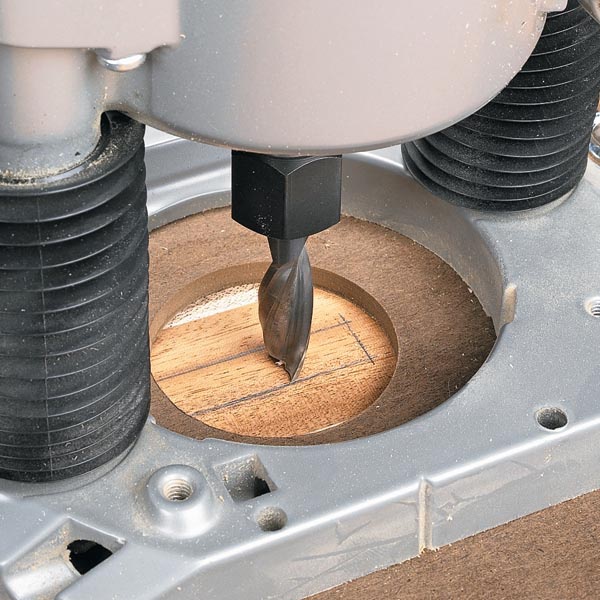
Routing the mortise is really no different from the basic procedure described earlier. I always use multiple passes to “step” the mortise down at about 1/4" per cut. Plus, I like to start the cut by plunging just to the inside of the end line. Then I rout back to the layout line before routing forward. This is easier than trying to plunge several times at the exact same spot. To end the cut right on the mark, you can clamp a stop block to the workpiece. Since the workpiece is trapped firmly between the two guides, all you need to concentrate on are the “plunge mechanics.” And when you lift the jig off the workpiece, I think you’ll be surprised that a technique this easy can give such top-notch results.