Clamping squares are handy for keeping cabinet cases and other assemblies at 90°. But there's another clever way to put one to work: use its 45° edge as the fence for a simple table saw miter sled.
All you need is a clamping square, a scrap of plywood, and a runner sized to fit your table saw's miter slot. The result is an inexpensive jig that makes accurate, repeatable 45° cuts without a complicated setup.

Make the Plywood Sled
Start with a piece of plywood roughly 12" wide by 21" long for the sled base.
Fit a runner to your table saw's miter slot and attach it to the underside of the plywood.
Position the runner so the base extends slightly past the saw blade.
With the runner installed, make a pass through the saw to trim the edge of the plywood. This creates a reference edge that shows the exact cutting line of the blade.
Position the Clamping Square
Now the clamping square can become the sled's miter fence.

Use a 45° drafting triangle registered against the saw blade to position the clamping square accurately on the plywood base. Once you're satisfied with the alignment, fasten the square securely to the sled.
The workpiece can now register against the clamping square while the runner guides the entire assembly past the blade.
WOODSMITH TIP: Make a Test Cut. Before using the sled on project parts, cut two scraps and bring the miters together. If there's a gap, fine-tune the fence alignment before making your final cuts.
Simple Jig, Repeatable Miters
That's really all there is to it. Instead of building a dedicated wooden 45° fence, the clamping square does the alignment work for you.
It's a great example of getting more from an accessory you may already have in the shop — and turning a couple scraps into a useful table saw miter jig in very little time.
Build a Precision Table Saw Miter Sled
Ready to upgrade from this quick shop-made jig? Build a precision table saw miter sled designed for accurate, repeatable 45° cuts. Dual runners provide smooth, stable travel, while adjustable stop blocks make it easy to cut matching parts to the same length.
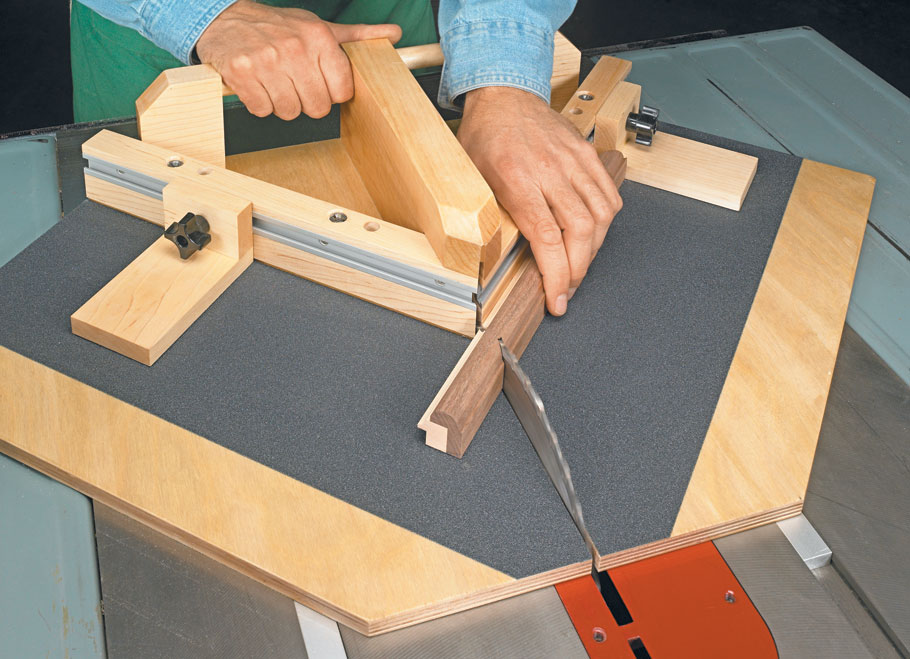
Once the fences are calibrated, you'll have a dependable setup for cutting tight-fitting miters for frames, boxes, furniture, and other projects.
GET THE STEP-BY-STEP PLANS: Build a Table Saw Miter Sled