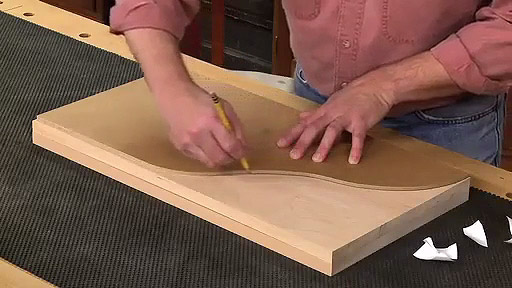
How to Add Seamless Hardwood Edging to Plywood Cases
Plywood is one of my favorite materials for building cabinets, bookcases, and other casework. It's stable, easy to work with, and makes it possible to build great-looking projects without spending days milling solid lumber.
But there's one drawback: exposed plywood edges.
Even high-quality hardwood plywood reveals its layers along the edges. And on a finished piece of furniture, those exposed plies can take away from an otherwise clean appearance.
My favorite solution is to cover the edges with thin strips of solid hardwood. When the edging is properly sized, glued, and sanded flush, it blends into the plywood and gives the case the appearance of solid-wood construction.
The process isn't difficult, but a few details make all the difference.
Apply Hardwood Edging After Assembling the Case
One of the first decisions is when to attach the hardwood edging.
For most casework, I prefer to assemble the plywood case first and then apply the edging.
This approach has a couple of advantages.
First, the edging covers the exposed plywood plies along the front of the case.
Second, it can conceal the ends of dadoes, rabbets, and other case joinery that might otherwise be visible.
The result is a cleaner, more finished appearance.
Applying the edging after assembly also allows you to use continuous strips across the front edges of the case, rather than interrupting the edging at every joint.
Choose Hardwood That Matches the Plywood
For the most seamless appearance, start by selecting hardwood with grain and color that closely match the face veneer of your plywood.
For example, if you're building a cherry plywood cabinet, choose solid cherry edging with a similar color and grain pattern.
Take a little time to arrange the edging strips so the grain looks natural alongside the plywood veneer.
This small detail can make the difference between edging that stands out and edging that almost disappears.
Cut the Hardwood Edging Slightly Oversized
Once you've selected your hardwood, the next step is preparing the edging strips.
I like to make the strips approximately 1/4" thick. This provides enough material for a strong glue joint while keeping the edging thin enough to blend into the plywood.
The other important dimension is the width.
Rather than trying to make the edging exactly match the plywood thickness, I plane the blanks so they're about 1/32" wider than the plywood is thick.

Why Oversized Edging Works Better
Making the edging slightly wider provides a little room for adjustment during glue-up.
When the strip is centered on the plywood edge, it overhangs the face veneer slightly on both sides.
This is much easier than trying to align the edging perfectly flush during clamping.
After the glue dries, you can remove the small amount of excess material with a sanding block.
The result is a smooth transition between the plywood and hardwood edging.
Plan the Order Before Gluing the Edging
Before reaching for the glue bottle, take a moment to decide how the edging strips will be installed.
On a simple cabinet case, I generally start with the outside vertical edges and then add the horizontal pieces.
For more complicated cases with shelves, dividers, or multiple openings, the installation order becomes more important.
The goal is to arrange the pieces so the joints look clean and the exposed ends of the edging are minimized.

Dry-fitting the strips before gluing also gives you a chance to check their lengths and make any necessary adjustments.
Glue and Clamp the Edging in Place
Once everything is cut and fitted, you're ready to attach the hardwood edging.
Apply an even coat of wood glue to the plywood edge and position the hardwood strip.
I like to start at one end, align the edging, and secure it with a clamp.
Then I work my way along the case, adding clamps as I go.
Center the Edging on the Plywood
As you clamp the strip, make sure the edging overhangs the plywood slightly on both faces.
Because the strip is only about 1/32" wider than the plywood, the overhang is small.
You can usually feel the slight projection with your fingertips, making it easy to center the edging as you work.
Apply enough clamps to close any gaps and maintain consistent contact along the entire edge.
Use Masking Tape Where Clamps Won't Reach
Sometimes the case design makes clamping difficult.
For example, if the cabinet back is already installed, there may not be enough room to position clamps along certain edges.
In these situations, strips of masking tape can help hold the edging in place while the glue dries.

The tape works best when the edging fits tightly against the plywood and doesn't require much pressure to close the glue joint.
Sand the Hardwood Edging Flush
Once the glue has dried, the final step is to bring the edging flush with the plywood faces.
Because the edging only overhangs by a small amount, this doesn't require much work.
A sanding block and a few careful strokes are usually all it takes.
Keep the block flat against the plywood face and work gradually until the hardwood edging blends smoothly into the surface.
Protect the Plywood Veneer
One thing to watch for is sanding through the thin face veneer of the plywood.
It's easy to remove too much material if you're aggressive with the sanding block.
Use light pressure and check your progress frequently.
The goal is to remove the excess hardwood edging without noticeably sanding the surrounding plywood.
Once the edging is flush, the transition should be smooth to the touch and nearly invisible after finishing.
A Simple Detail That Makes Plywood Cases Look Better
Adding hardwood edging is one of those small woodworking details that can dramatically improve the appearance of a finished project.
By choosing matching hardwood, cutting the strips slightly oversized, and applying the edging after assembly, you can hide exposed plywood edges and case joinery without adding much complexity to the build.
And with a little care during clamping and sanding, the finished edging will blend seamlessly into the plywood.
It's a straightforward technique that works just as well on a simple shop cabinet as it does on a fine furniture project.
More Tips for Working with Plywood
Good-looking casework starts with choosing the right sheet goods. From veneer-core plywood to Baltic birch and MDF-core panels, different materials offer different advantages for furniture, cabinets, and workshop projects.

Learn how to select the best material for your next build in our guide to Choosing Plywood for Woodworking Projects.
LEARN MORE ABOUT PLYWOOD → Choosing the Right Plywood for Your Projects