


Stopped mortises are a great way to add traditional Craftsman-style details to a woodworking project. Whether you're building a chest, cabinet, or piece of Mission-style furniture, these shallow recesses provide a clean, consistent location for decorative tenon plugs.

On the Craftsman Chest featured in Woodsmith, the sides and top are assembled with screws driven through shallow mortises. Decorative end-grain tenon plugs conceal the screws, creating the appearance of traditional mortise-and-tenon joinery.
The challenge is making every mortise the same size while positioning them at different distances from the edges of the workpieces.
Rather than laying out and routing each mortise individually, I used a simple shop-made router jig. Its guide slot controls the mortise dimensions, while removable shims allow the same jig to be used on the chest's top and sides.
Here's how to set up the jig, rout the stopped mortises, and make the matching decorative plugs.
How to Make a Router Jig for Consistent Stopped Mortises

The key to routing accurate stopped mortises is controlling both the length of the cut and its distance from the edge of the workpiece.
This shop-made mortising jig uses a router equipped with a guide bushing and straight bit. The jig consists of a base, two fillers that define the ends of the guide slot, and a cleat that registers against the workpiece.
The base parts and fillers form an opening that guides the router bushing. The slot should be just wide enough for the bushing to slide smoothly without noticeable side-to-side movement.
The distance between the fillers determines the overall length of the routed mortise, accounting for the relationship between the guide bushing and router bit.
Once the base is assembled, screw the cleat to its underside. The cleat provides a reference against the edge of the workpiece, making it easy to position the jig consistently.
Adjusting the Jig with Removable Shims
The mortises on the Craftsman Chest are all the same size, but their locations vary depending on whether they're cut in the top or sides of the case.
Instead of building separate jigs, I designed this one to use removable shims.
Adding a shim between the cleat and the workpiece changes the distance from the edge to the mortise. This allows you to maintain the same mortise dimensions while adjusting its position.
A little double-sided tape holds the shims in place during routing.
Before working on the finished project parts, make a test cut in scrap material to confirm the mortise dimensions, location, and cutting depth.
Routing Stopped Mortises in the Chest Top

With the jig assembled, you're ready to rout the shallow mortises in the chest top.
The front and rear mortises are identical in size, but they're located at different distances from their respective edges.
The removable shims make it easy to switch between the two setups without changing the guide slot.
Routing the Front Mortises
Start with the jig in its original configuration, without any shims installed.
Position the cleat against the front edge of the chest top and align the jig with the mortise location.
Secure the jig and workpiece, then rout the shallow mortise using the guide bushing to control the router's movement.
Keep the bushing in contact with the guide slot and avoid forcing the router into the cut.
Repeat the process for the remaining front mortises.
Routing the Rear Mortises
To rout the mortises along the rear edge of the top, add the first shim next to the cleat.
Secure it with double-sided tape, then position the jig against the rear edge of the workpiece.
The shim changes the mortise's setback while the guide slot maintains the same dimensions.
Rout the rear mortises using the same technique as before.
The drawing above illustrates both configurations and shows how the shim changes the position of the cut.
Routing the Stopped Mortises in the Chest Sides

The stopped mortises in the chest sides are routed using the same jig, but they require a different setback from the edge.
For this setup, add the second shim to the underside of the jig, as shown in the drawing.
Once the shim is installed, position the jig against the edge of the side panel and align it with the mortise location.
Since all the side mortises are located the same distance from their respective edges, no further jig adjustments are necessary.
Rout each mortise to the specified depth, keeping the router firmly supported on the jig.
Using the same guide slot for all the mortises ensures that the decorative tenon plugs will have consistent dimensions throughout the project.
How to Make Decorative End-Grain Tenon Plugs
Making decorative end-grain tenon plugs
Once the stopped mortises are complete and the chest is assembled, the final step is making the decorative tenon plugs.
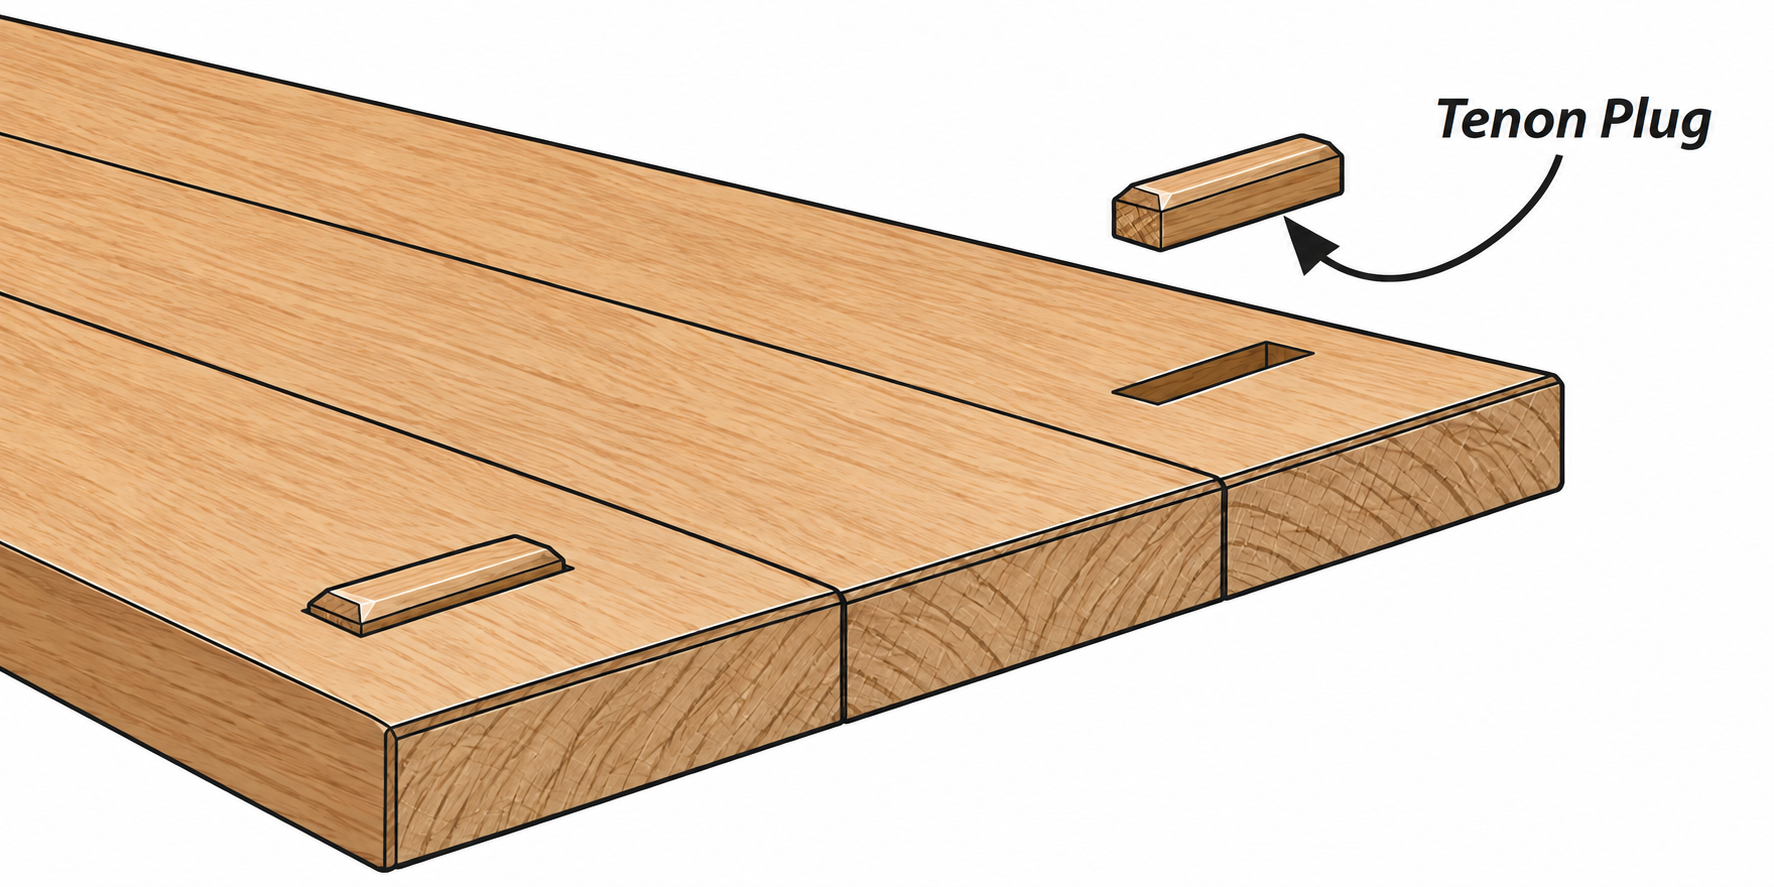
These small wooden plugs fit into the shallow mortises and conceal the assembly screws. Each plug stands slightly proud of the surrounding surface and features a small chamfer around its exposed face.
The result is a traditional Craftsman-style detail that gives the chest the appearance of exposed mortise-and-tenon joinery.
Start with an Oversize Blank
Because the plugs are small, trying to shape them individually would be difficult and potentially unsafe.
Instead, start with an oversize workpiece that's easy to control at the router table.
Prepare the blank so its cross section matches the required plug dimensions, allowing for a snug fit in the routed mortises.
Using an oversize blank also makes it easier to keep your hands safely away from the router bit while forming the chamfer.

Rout the Chamfer and Cut the Plugs
Set up the router table with a chamfer bit and adjust it to produce the small bevel around the exposed end of the plug.
Rout the chamfer on the end of the oversize blank, as shown in the drawing above.
Once the chamfer is complete, move to the table saw and cut the finished plug free from the blank. Use a suitable small-parts cutting setup to keep the offcut controlled and your hands clear of the blade.
Then return to the router table and repeat the process to make the remaining plugs.
Working from a larger blank makes it easier to produce a set of matching plugs with consistent chamfers.
Installing the Tenon Plugs
Before gluing the plugs in place, test-fit each one in its mortise.
The plugs should fit snugly without requiring excessive force. Make any necessary adjustments before installation.
Apply a small amount of glue, then seat each plug in its mortise, leaving the chamfered face slightly proud of the surrounding surface.
The finished plugs conceal the screws and add a distinctive decorative detail to the Craftsman Chest.
A Simple Router Jig for Accurate Craftsman-Style Details
The advantage of this stopped-mortise jig is its versatility. With a single guide slot and a couple of removable shims, you can rout consistent mortises at several different setbacks without rebuilding or readjusting the entire jig.
The same approach can be adapted for other woodworking projects that use shallow decorative mortises or faux through-tenon details.
Combined with matching end-grain tenon plugs, it's an effective way to add traditional Craftsman-style character to a cabinet or chest while keeping the construction straightforward.
The Craftsman Chest and its stopped-mortise details are featured in Woodsmith.


