

One of the best parts about being a woodworker is that whatever you make is a unique item — even if you followed a plan. The wood choice, the work, and finish all bear your fingerprints, so to speak.
Even so, friends and family have asked me to sign the projects I make for them (usually with a marker). So I’ve considered getting a branding iron made or a hardened stamp to leave my mark. The nice versions of these feel pretty pricey to me.
In addition, they lock me into a single design. Then, the other day, I noticed a strange flickering light coming from Chris Fitch’s CNC Basecamp room. Dance party? Nope. Instead it was coming from the LaserPecker 2. It seemed to be the answer to my project signing concerns.
SO MUCH MORE.
After a little chat with Chris, it turns out that I was wrong. The LaserPecker is far more than a branding iron. It uses a laser (hence the name) to engrave text or images onto a workpiece. The basic equipment is shown in the below.
 There isn’t much to the LaserPecker. The small scale makes it a versatile tool for all kinds of applications. You can use it handheld or with the included stand.
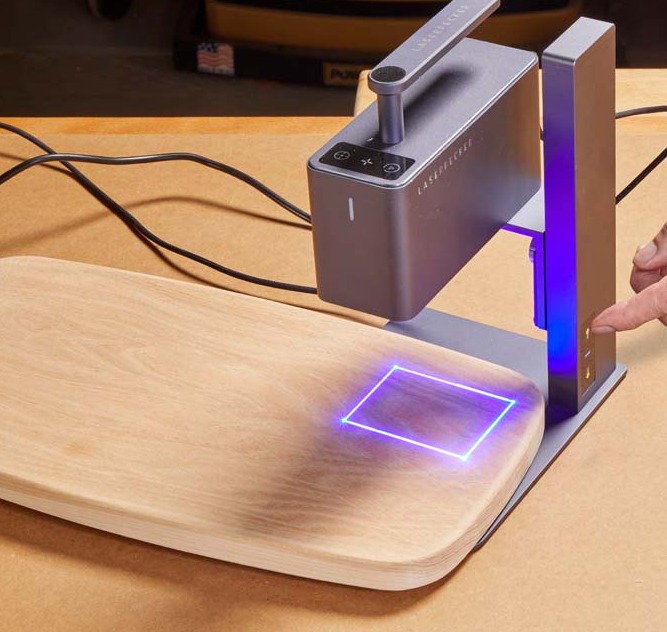
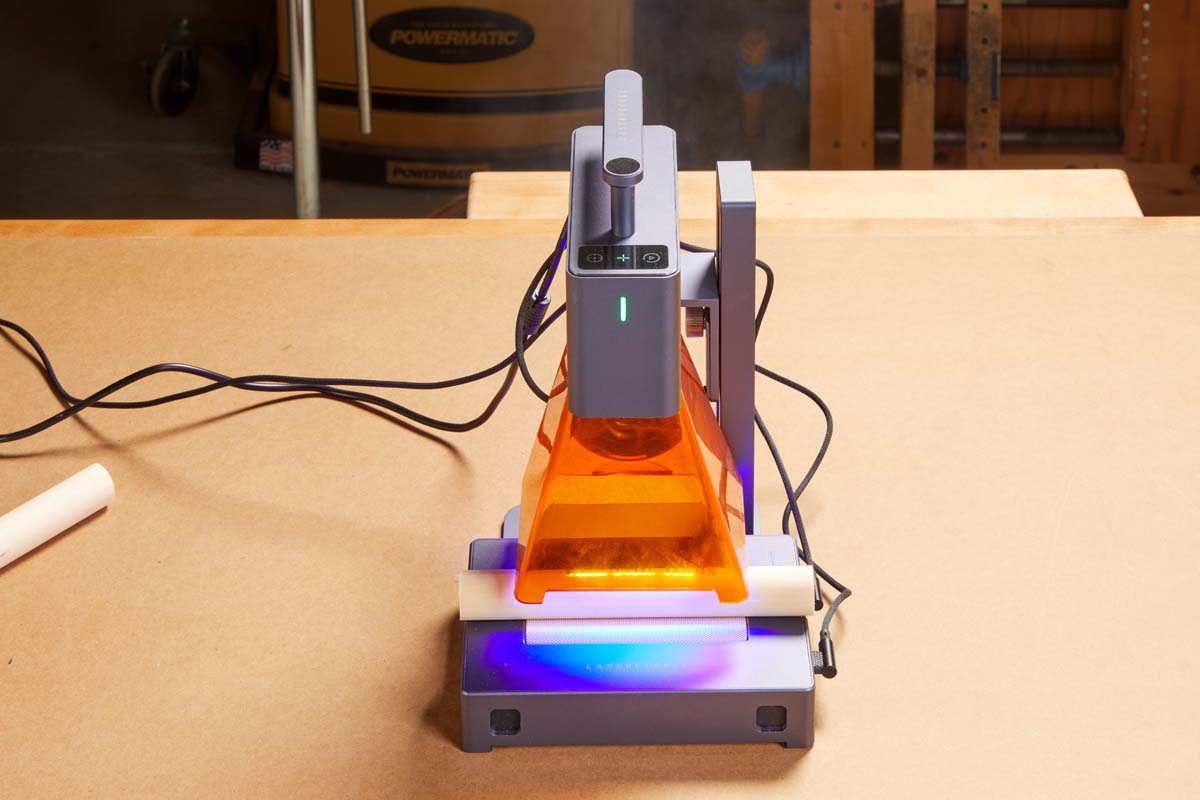
You might be familiar with lasers that are essentially stationary tools. You bring the workpiece to the machine. In fact, you place it inside the machine. The LaserPecker flips this around. It’s a portable tool you take to the work. The unit consists of a laser emitter, a stand, a shield with a fan to vent smoke, a power supply, and a set of protective glasses.
There are several ways to use it. Mounting the emitter on the stand creates a compact workstation, as shown in the main photo on the previous page. With this arrangement, you can easily swap in small pieces for batch work.
 |
 |
 |
| The emitter illuminates a preview window to let you know the size (100mm x 100mm) and location of the work area for positioning. | On the stand, adjust the height of the laser emitter to match its focal length above the workpiece. | The shield supports the laser for portable work, protects your eyes from the laser, and includes a fan to clear smoke. |
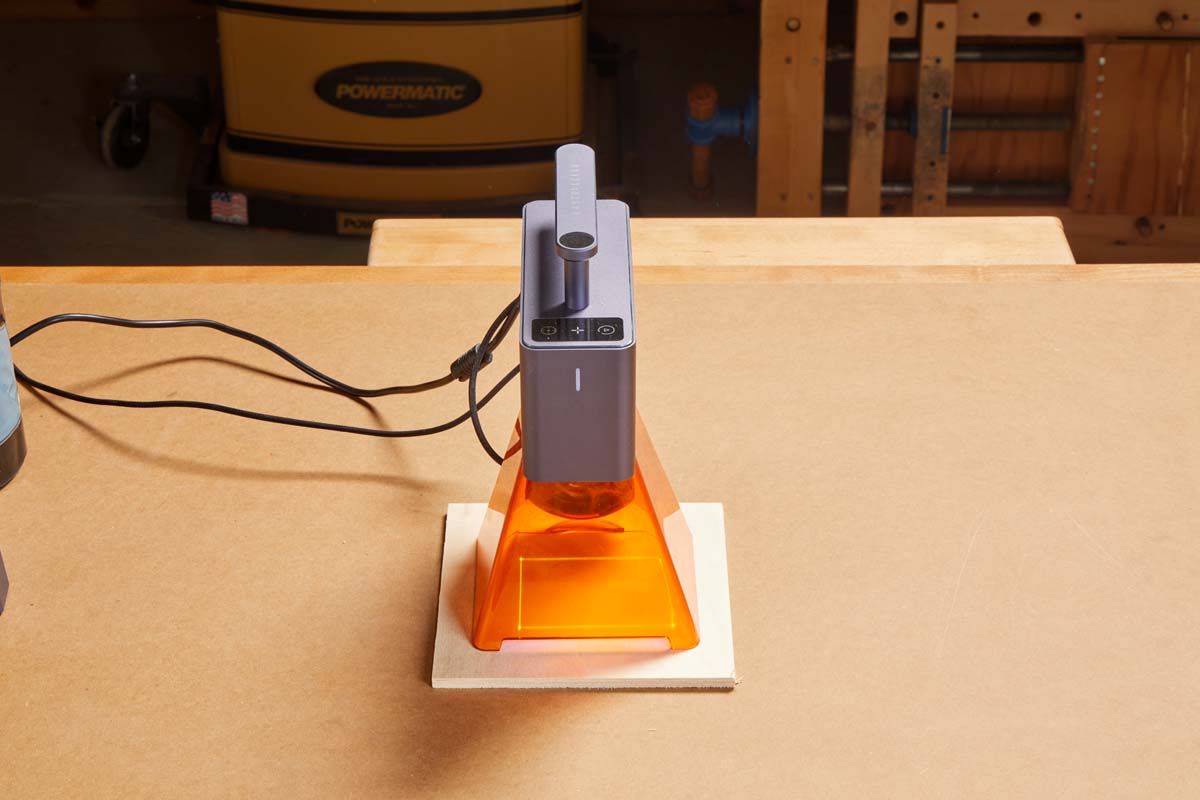
You can place the laser emitter and shield directly on a workpiece, as you can see in the photos. This is best for working with larger project parts and assemblies.
DON’T FORGET SOFTWARE.
  |
| The software includes easy-to-adjust settings for importing and editing the image as well as the laser settings. |
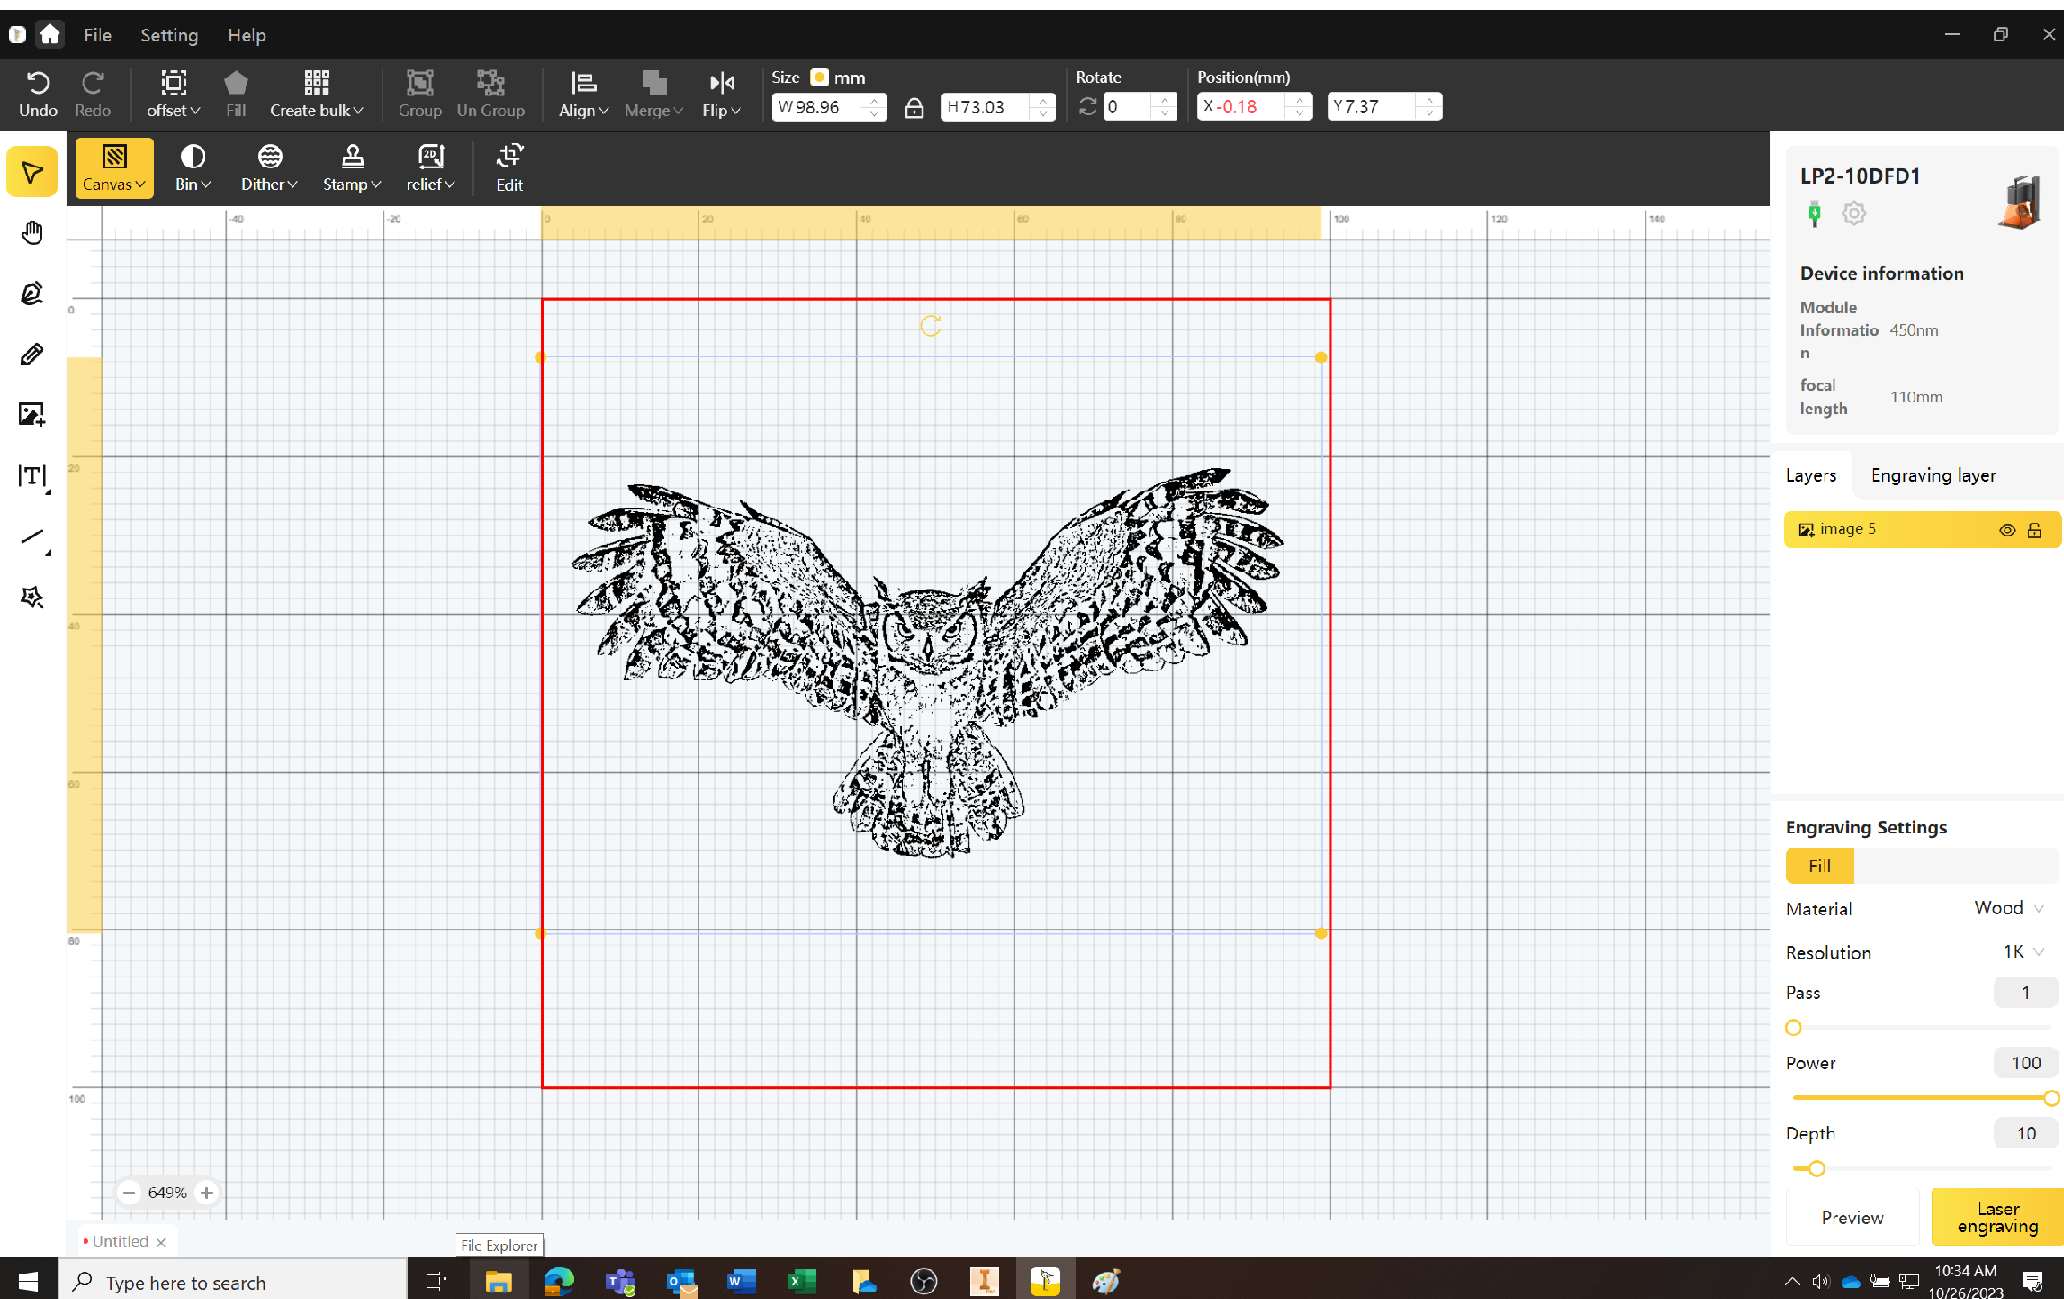
Laser tools are essentially endlessly customizable engravers. The trick is translating the idea in your head onto the workpiece, especially for those who don’t feel super nerdy.
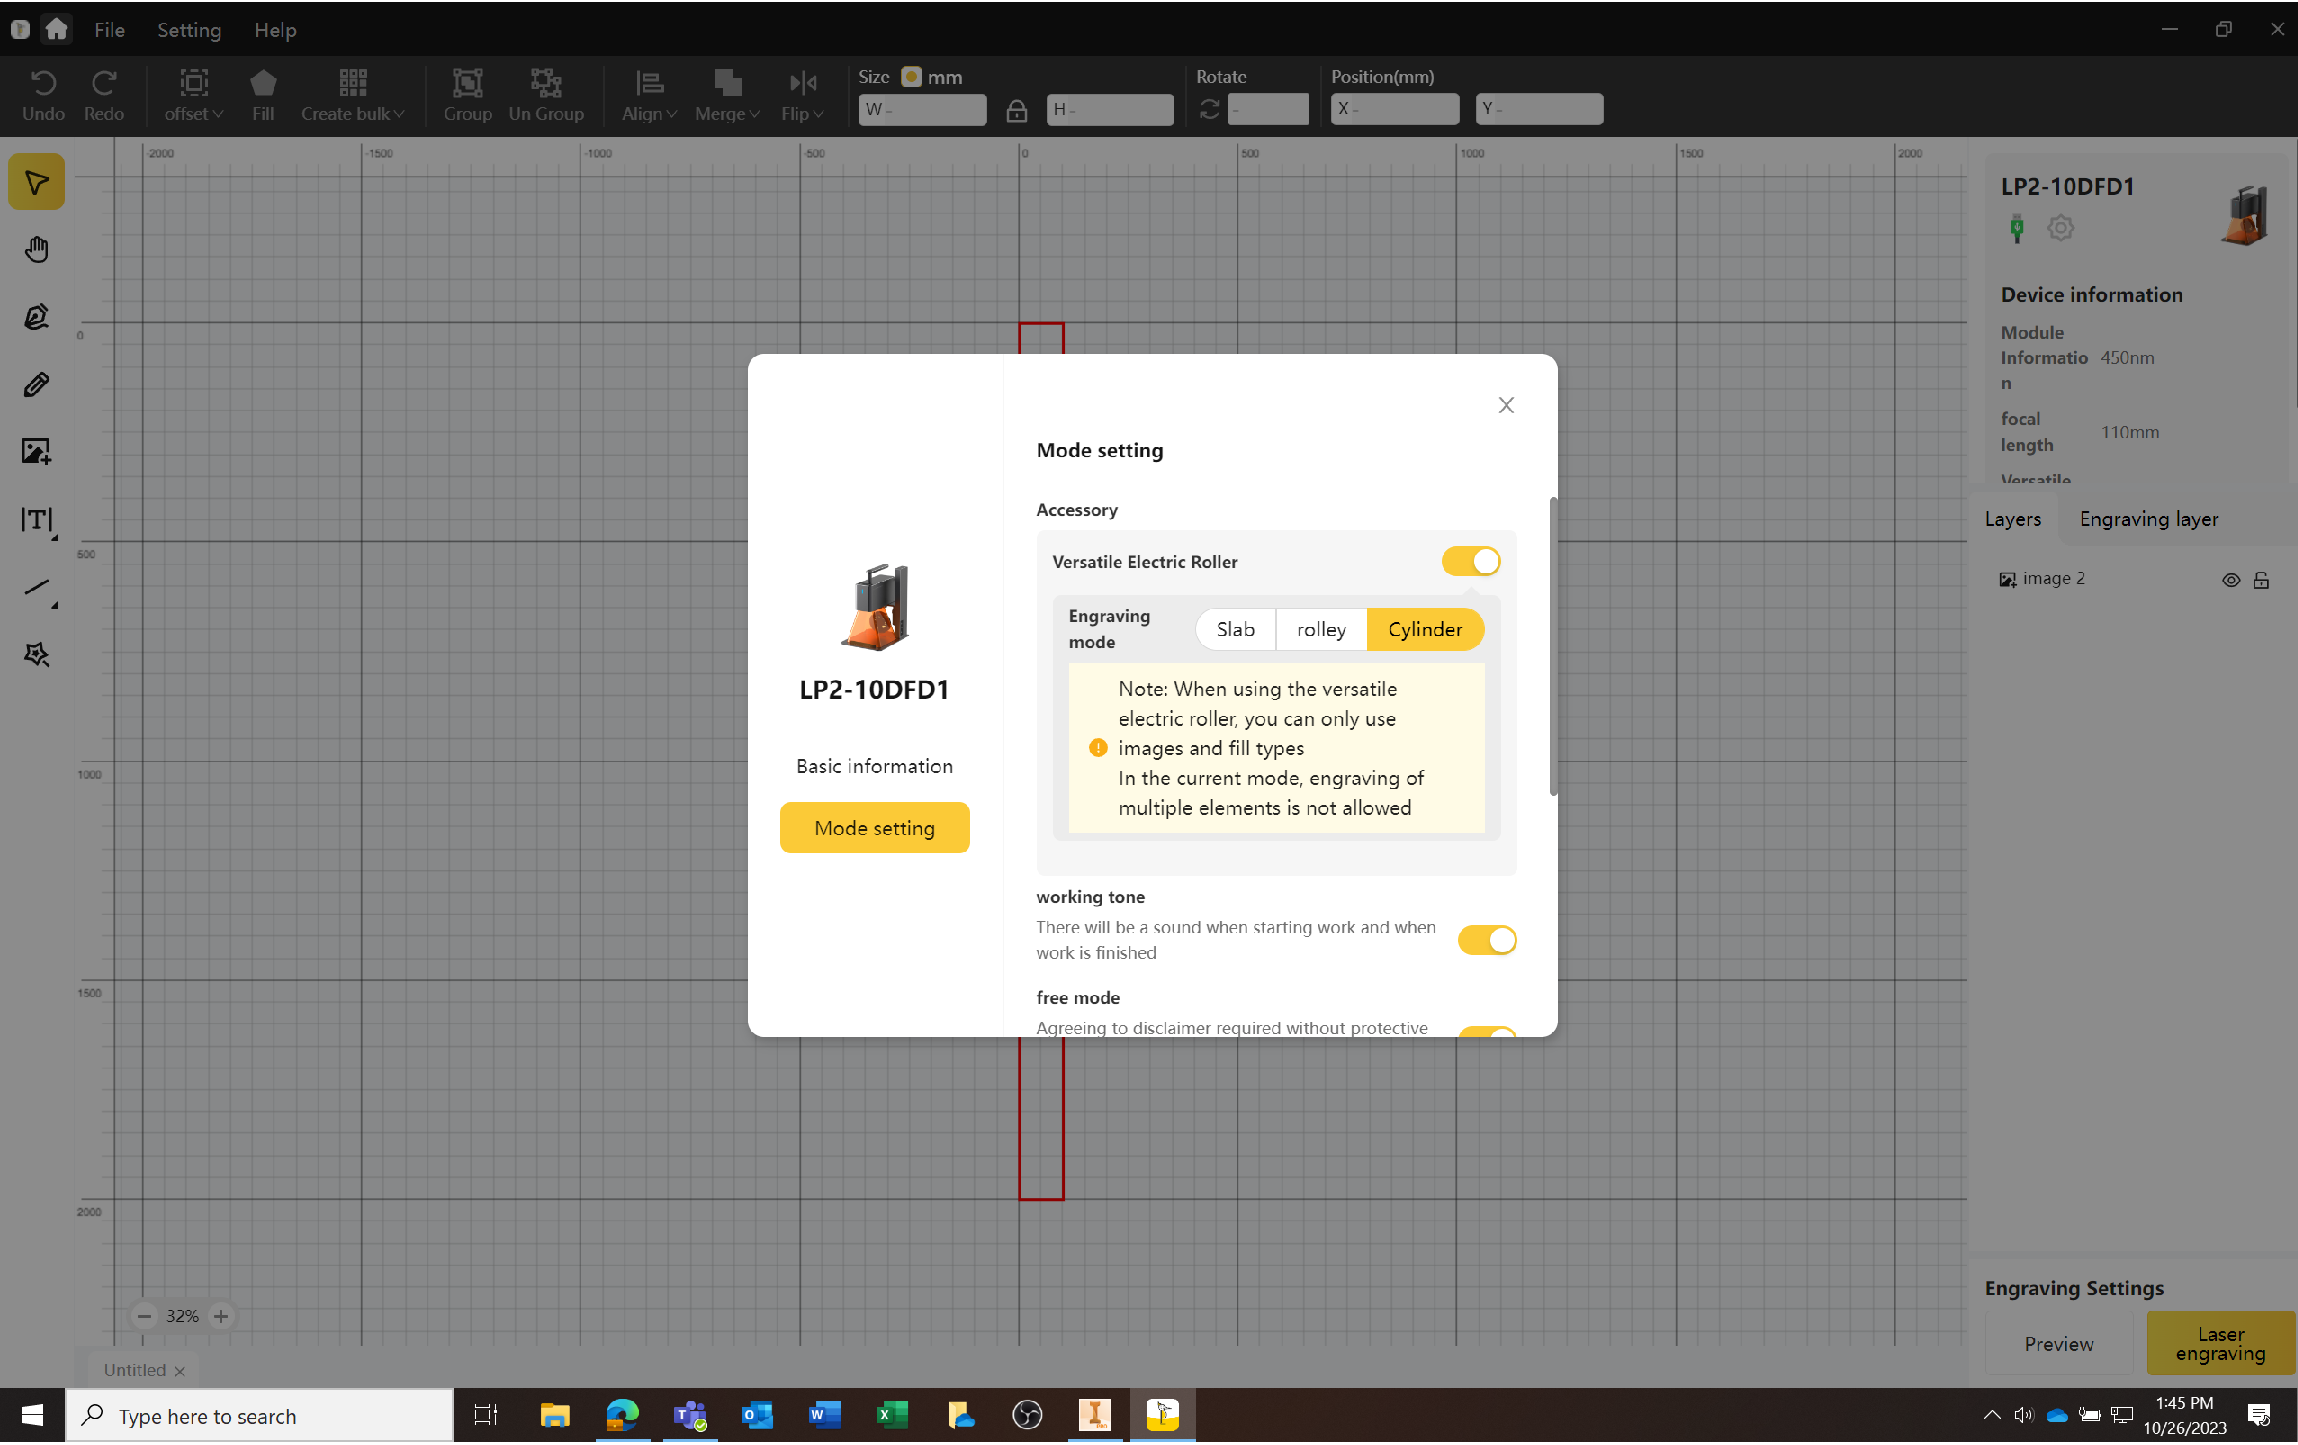
This is where the software comes in. The program that runs the machine is accessed through your web browser — or smartphone app. If you have any experience with a drawing program or have edited photos on your phone, you’ll find the controls familiar.
The upper image is a screen capture of the controls. The red box on the screen shows the size of the work area. Drawing tools along the left side of the screen allow you to create images and text. You can import photos and artwork from other sources.
Think of the laser as a black and white printer. Drawings and text are the easiest to get right. Photos work, but you’ll need to adjust the contrast and details in order to get a clear image. Thankfully, you’ll find good help for success in the menu selections.
LASER CONTROLS.
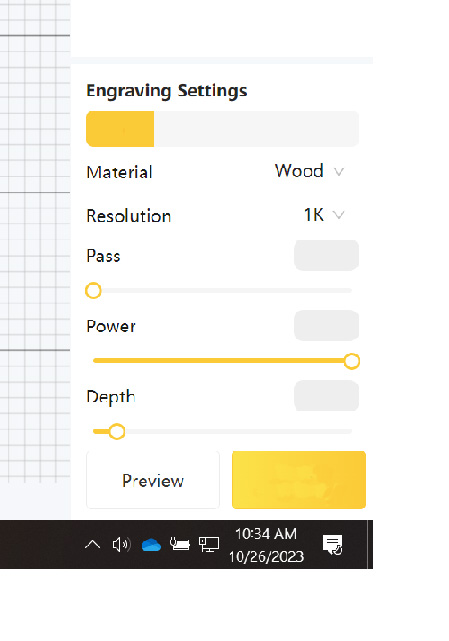
In addition to the image settings, there are a few other controls and options for controlling the laser in use. You need to tell the machine what material you’re cutting. You also control the laser power, depth of cut, and the number of passes to take.
I found the various menus easy to move through and the selections are clear. The machine rewards experimentation and playing around. So try out test engravings on some scrap pieces. As you gain experience, be sure save profiles to suit the kinds of work and materials you use most.
FOCAL LENGTH.
One of the important aspects of using any laser is positioning the laser emitter correctly above the workpiece. This is the focal length of the tool. For the LaserPecker, that distance is 110mm above the surface you will be engraving. This gives you the crispest details on the piece.
Cleverly, the orange shield sets the laser at the correct height automatically when used in the portable/handheld way. This is shown in the right photo on the previous page. When the laser is mounted on the stand, you have to manually adjust the height with buttons on the back of the column, as in the middle photo on the previous page.
MATERIAL MATTERS.
Wood and sheet stock (plywood, MDF) aren’t the only materials that you can work with. Paper and cardboard are obvious choices. However, you can also engrave acrylic and other plastic. The photos show some side-by-side examples.


 Engraving in wood results in darkened cuts from the laser burning into the surface of the wood.|The pigment in colored acrylic provides enough resistance for the laser to cut away the surface, creating an image.|For clear acrylic, you need to mask the surface with marker in order for the laser to have something to engage with.
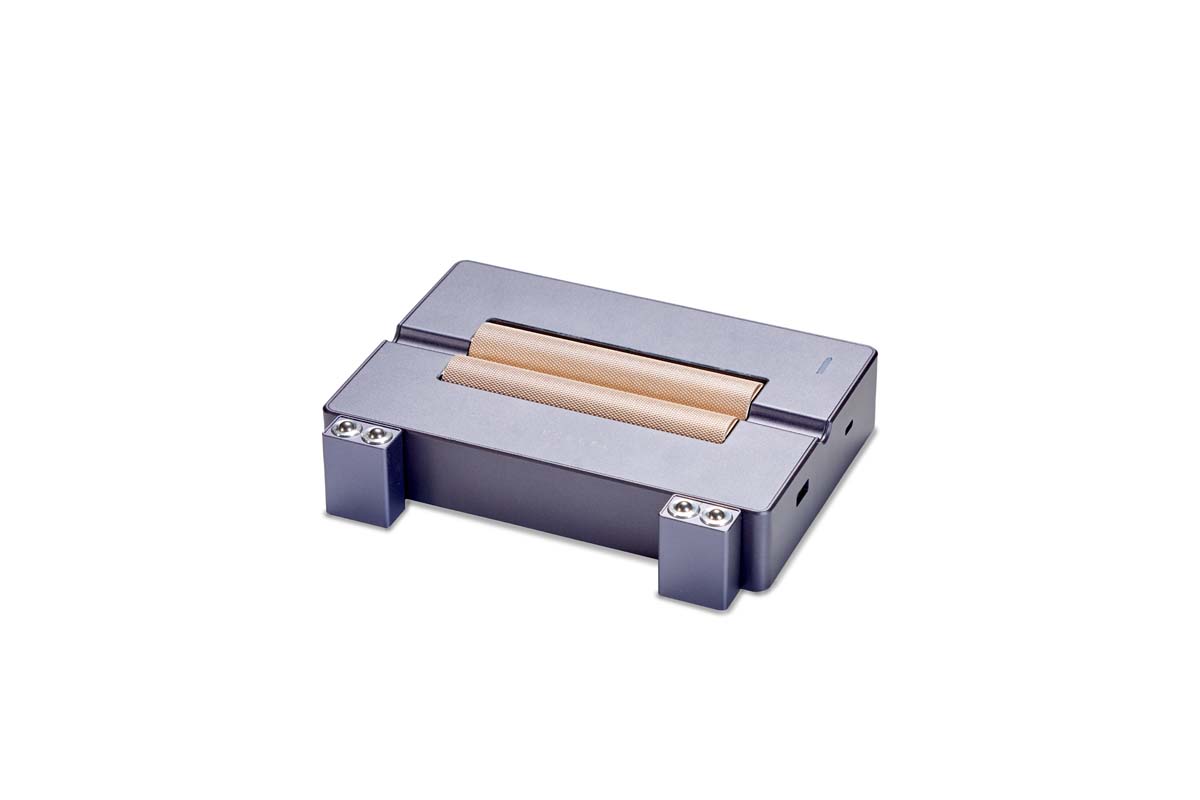
ELECTRIC ROLLER
 |
| Optional electric roller with powdered rollers and roller blocks. |
The small scale of the LaserPecker makes it a good candidate for learning about the possibilities of a laser engraver in your shop. The downside is the small working area. One solution to that is the accessory roller shown above.
The roller consists of a pair of powered cylinders that look as though they could cook hotdogs along with a set of support bearings. The rollers interact with the laser for a variety of applications.
ROUND PARTS.
 |
| The powered roller accessory communicates with the laser, allowing you to engrave words or images around the circumference of workpieces without distortion. |
 |
One way to use the roller is to engrave a round workpiece, like a rolling pin. The roller spins the workpiece while the laser engraves a pattern on the surface. The roller works to keep the laser perpendicular to the surface for a crisp image that isn’t stretched out due to the curvature of the part.
LONG ARTWORK & PIECES.
 |
| For flat workpieces, the roller can extend the image by shifting the piece along. While the roller does a solid job of propulsion, you need to balance the workpiece from below and set up guides to make sure the engraving is parallel to the edges. |
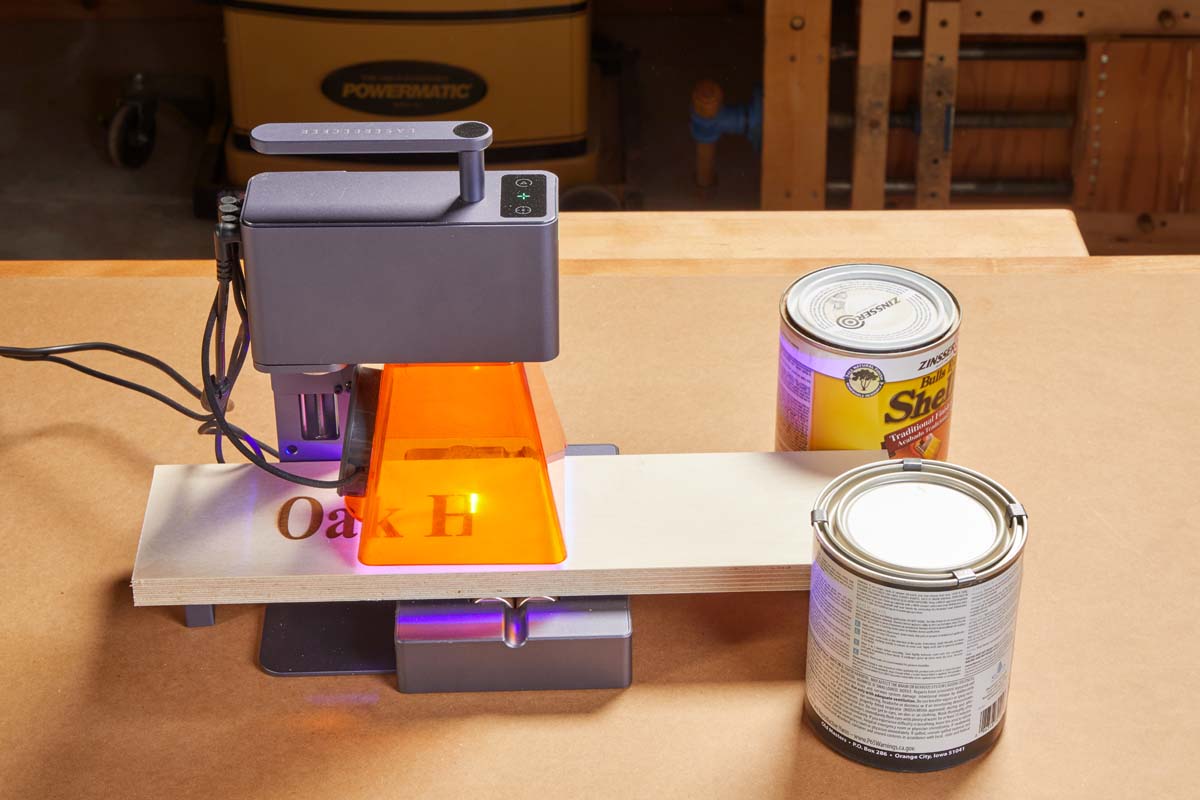
Another way the roller expands your options is by driving a flat workpiece along past the laser image area. You can create signs or flowing images. The key to consistency is providing workpiece support and guidance. Due to the small surface area of the rollers, you’ll need to set up support so the workpiece doesn’t tip at the beginning and ends of engraving.
Another consideration is making sure the workpiece tracks a straight path. Chris came up with a quick solution. A pair of full finish cans on either side of the laser stand stabilize the sign and keep it moving in a straight line.
ROLLING LASER.
 |
| To engrave a large workpiece, you can attach the stand to the roller unit. This creates a self-propelled engraver. To ensure that it tracks a straight line, you can attach plywood strips to guide the unit as it works if necessary. |
If the location of the image is more than a few inches from the edge, or if the workpiece is large, moving the the workpiece won’t work. For these scenarios, you can flip the roller over (wheels down) and attach the laser stand. Now it’s the laser that moves along rather than the workpiece.
EXPANDING OPTIONS.
Getting a new tool has a way of not only satisfying the need you got it for. It also has a way of opening up new, unexpected opportunities to put it to use. Whenever someone new saw the LaserPecker in the shop, a new set of options opened up. Customizing gift projects to commemorate special occasions is good example.
The engravings can be filled with tinted epoxy for making inlaid patterns. For the shop, you can label cases and jigs with important information. You could engrave your benchtop with a scale or common slope angles for setting a bevel gauge.
For woodworkers that run a business or side hustle, the laser can engrave QR codes and bar codes on items to link people to business websites through the camera in smartphones. Creating something special is a big part of why people get into woodworking. The craft is also fun. Working with tools like the LaserPecker 2 ($799) that check both of those boxes inspires even more creativity and joy in the shop.


